Welcome to 2CarPros.
The mass air flow sensor may cause it to run poorly, but what you described doesn't sound like it. Does the vehicle start right back up after it stalls only to do the same thing?
If that is what is happening and there is no check engine light, my first suspect is the crankshaft position sensor. If the vehicle won't start after it stalls, then you can take your scanner and check if there is an RPM signal when it won't start. If there is none, then the sensor is my first suspect.
Take a look through these links:
https://www.2carpros.com/articles/how-a-crank-shaft-angle-sensor-works
https://www.2carpros.com/articles/symptoms-of-a-bad-crankshaft-sensor
https://www.2carpros.com/articles/crankshaft-angle-sensor-replacement
Another way to test the sensor is by checking for ignition spark. If when the engine shuts off you note that spark stopped, the sensor is a suspect.
_______________________
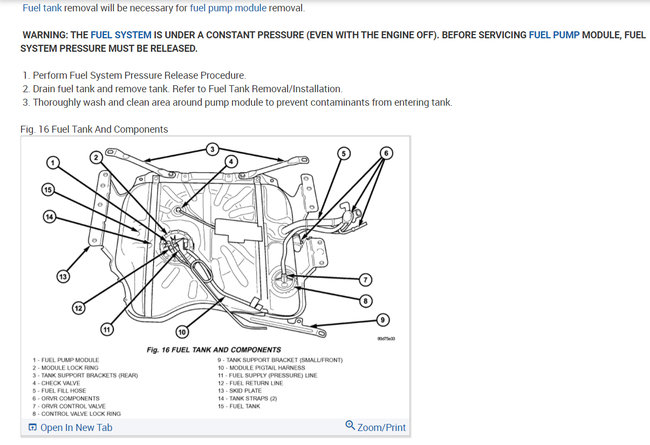
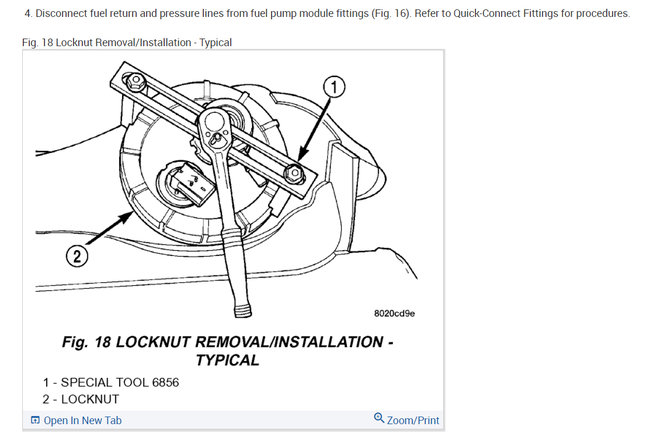
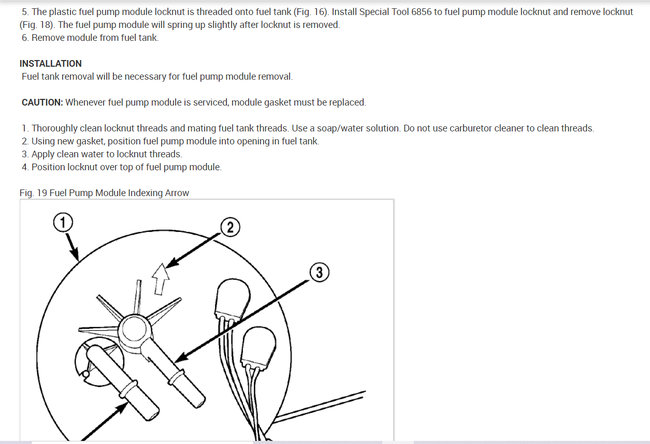
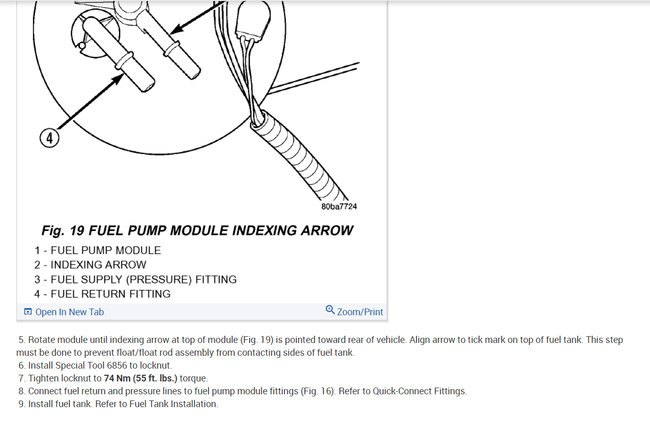
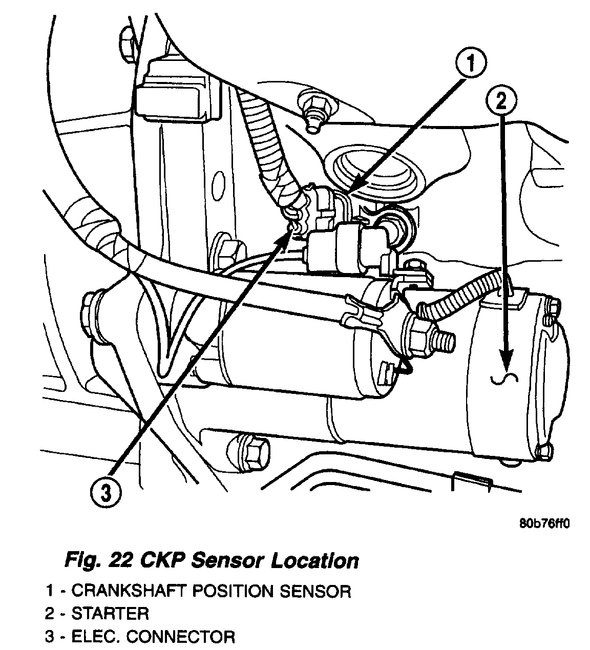
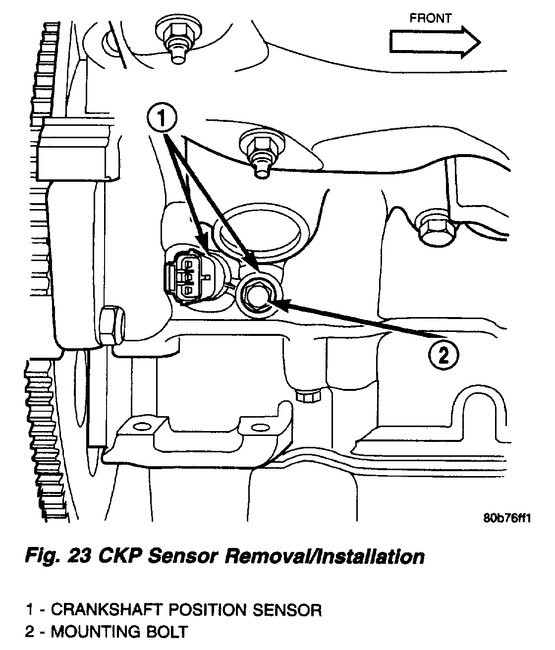
Here are the directions specific to your vehicle for replacing the sensor. It is located right above the starter. However to access the retaining bolt, the starter needs removed. Make sure to disconnect the battery before you work on or around the starter. The attached pictures correlate with the directions.
_____________________
2001 Jeep Truck Grand Cherokee 4WD V8-4.7L VIN N
Procedures
Vehicle Powertrain Management Sensors and Switches - Powertrain Management Sensors and Switches - Computers and Control Systems Crankshaft Position Sensor Service and Repair Procedures
PROCEDURES
REMOVAL
Fig.22 CKP Sensor Location
Pic 1
The Crankshaft Position (CKP) sensor is bolted to the side of the engine cylinder block above the starter motor; It is positioned into a machined hole at the side of the engine block.
1. Remove starter motor. Refer to Starter Removal/Installation.
2. Disconnect CKP electrical connector at sensor.
Fig.23 CKP Sensor Removal/Installation
Pic 2
3. Remove CKP mounting bolt.
4. Carefully pry sensor from cylinder block in a rocking action with two small screwdrivers.
5. Remove sensor from vehicle.
6. Check condition of sensor O-ring.
INSTALLATION
1. Clean out machined hole in engine block.
2. Apply a small amount of engine oil to sensor O-ring.
3. Install sensor into engine block with a slight rocking action. Do not twist sensor into position as damage to O-ring may result.
CAUTION: Before tightening sensor mounting bolt, be sure sensor is completely flush to cylinder block. if sensor is not flush, damage to sensor mounting tang may result.
4. Install mounting bolt and tighten to 28 Nm (21 ft. Lbs.) torque.
5. Connect electrical connector to sensor.
6. Install starter motor. Refer to Starter Removal/Installation.
___________________
Let me know if this helps or if you have other questions.
Take care,
Joe
Images (Click to make bigger)
Tuesday, June 22nd, 2021 AT 5:04 PM
(Merged)
