Good morning,
I attached the procedure below for you for the repair. It requires the removal of the dashboard to access the actuator itself. The book pays almost 6 hours in a shop. I would at least double it if you are doing the repair.
https://www.2carpros.com/articles/replace-blend-door-motor
Roy
AIR TEMPERATURE ACTUATOR REPLACEMENT - RIGHT
REMOVAL PROCEDURE
1. Remove the I/P carrier.
imageOpen In New TabZoom/Print
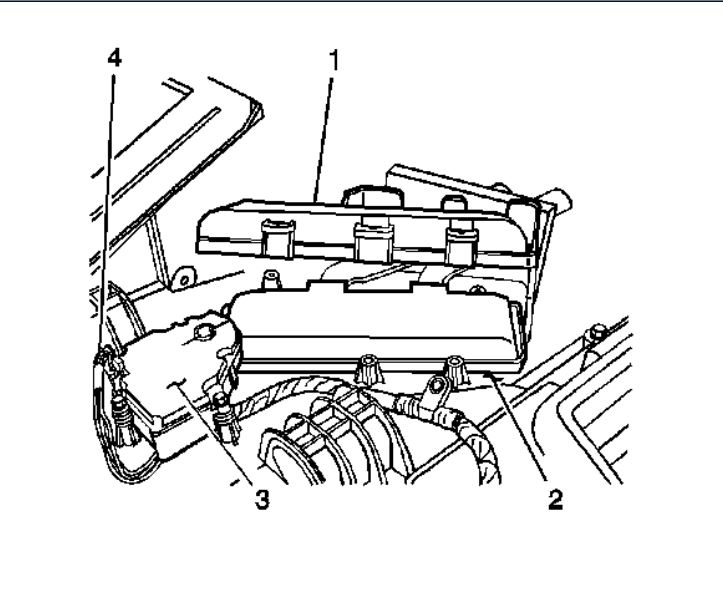
2. Disconnect the electrical connector (4) from the right air temperature actuator (3).
3. Remove the screws from the right air temperature actuator (3).
4. Remove the right air temperature actuator (3) from the HVAC module assembly (2).
Instrument Panel (I/P) Assembly Replacement
Removal Procedure
Caution: Refer to Battery Disconnect Caution in Service Precautions.
Caution: Refer to Restraint System Service Precautions in Service Precautions.
1. Remove the instrument panel (I/P) trim panel.
2. Remove the center console, if equipped.
3. Disconnect the negative battery cable.
4. Remove the driver side knee bolster.
5. Remove the lower I/P trim panel.
6. Remove the passenger side airbag module.
7. Remove the radio.
8. Remove the HVAC control.
9. Remove the accessory switch housing.
10. Remove the left air louver housing.
11. Remove the steering column.
12. Remove the communication interface module (CIM), if equipped.
13. Remove the remote control door lock receiver module, if equipped.
14. Remove the data link connector from the I/P.
15. Remove the park brake release lever from the I/P.
16. Remove the instrument panel cluster (IPC).
17. Remove both front window air ducts from the I/P assembly.
18. Remove the harness from the I/P.
imageOpen In New TabZoom/Print
19. Remove the I/P assembly retaining bolts (3) and nuts (4).
20. Remove all harness hold down retainers from the I/P assembly.
21. Remove the I/P assembly from the vehicle.
Feb 25, 2021 at 9:49 PM