Hello,
I have attached the info you requested.
EXTERIOR MIRROR
NOTE: Do not remove the exterior mirror assembly when repairing an individual part. Individual components can be installed, without removing the exterior mirror.
NOTE: LH side is shown. RH side is similar.
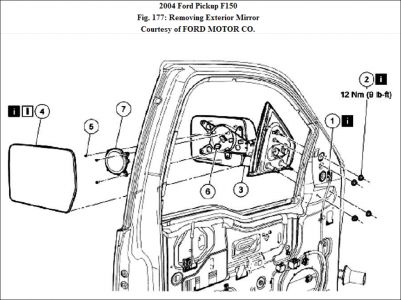
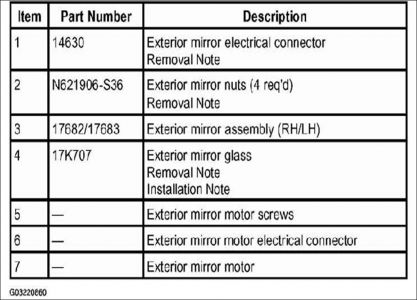
1. Remove the parts in the order indicated in the following illustration and table.
To remove individual parts, only carry out the listed steps:
PARTS REMOVAL STEPS
Part Steps
Exterior mirror glass 4
Exterior mirror motor 4-7
Exterior mirror assembly 1-3
Fig. 177: Removing Exterior Mirror
Courtesy of FORD MOTOR CO.
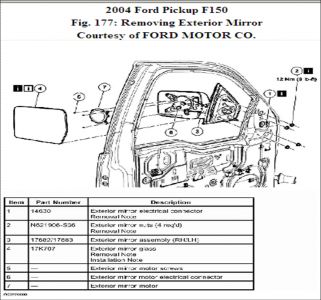
2. To install, reverse the removal procedure.
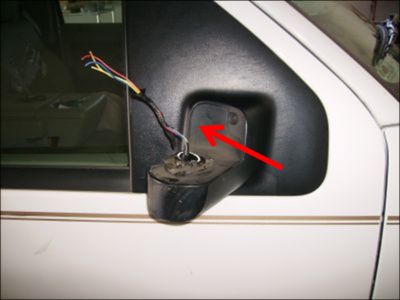
Item 1: Exterior Mirror Electrical Connector Removal Note
1. Remove the front door trim panel. Refer to BODY SYSTEM - INTERIOR .
FRONT DOOR TRIM PANEL
Removal and Installation
NOTE: LH side is shown. RH side is similar.
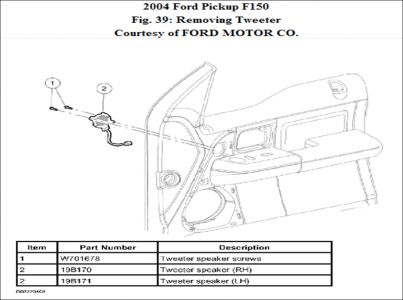
1. Remove the front door speaker. Refer to ENTERTAINMENT SYSTEM - F150 PICKUP .
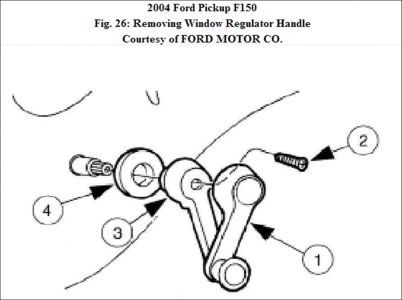
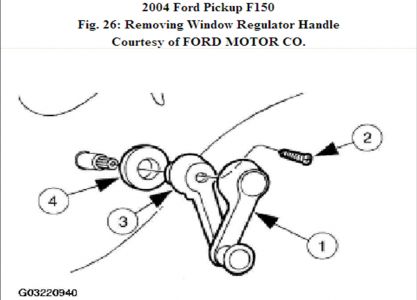
2. If equipped, remove the window regulator handle.
1. Separate the handle cover from the handle.
2. Remove the screw.
3. Remove the window regulator handle.
4. Remove the spacer.
Fig. 26: Removing Window Regulator Handle
Courtesy of FORD MOTOR CO.
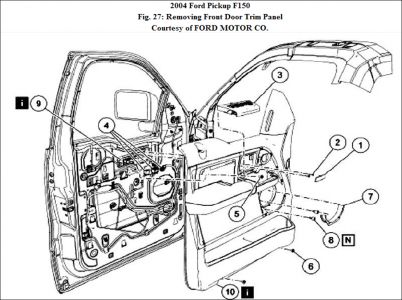
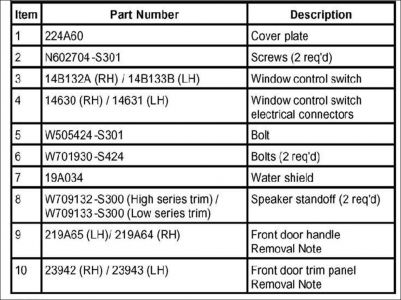
3. Remove the parts in the order indicated in the following table.
Fig. 27: Removing Front Door Trim Panel
Courtesy of FORD MOTOR CO.
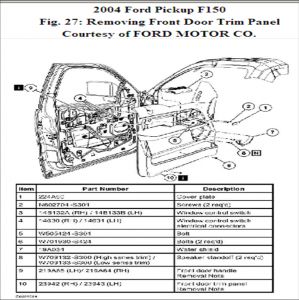
4. To install, reverse the removal procedure.
Item 9: Front Door Handle Removal Note
1. Guide the door handle through the opening in the trim panel.
Item 10: Front Door Trim Panel Removal Note
CAUTION: Do not pull directly outward on the front door trim panel, as damage may occur.
Remove 2 lower speaker mounts before lifting panel.
1. Lift upward and remove the front door trim panel.
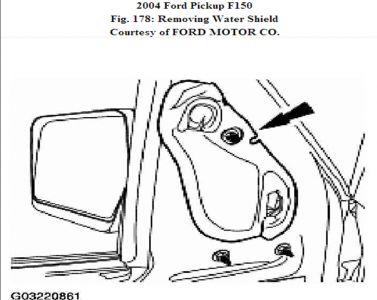
Item 2: Exterior Mirror Nuts Removal Note
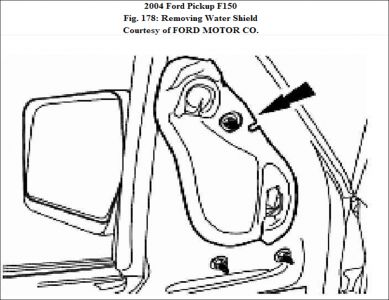
1. Remove the water shield.
Fig. 178: Removing Water Shield
Courtesy of FORD MOTOR CO.
Item 4: Exterior Mirror Glass Removal Note
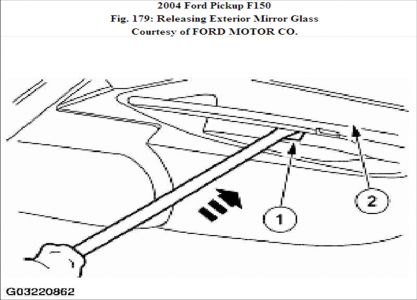
1. Position exterior mirror glass in the full UP position.
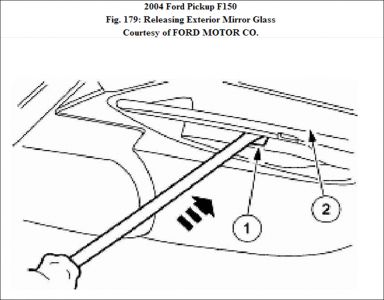
2. Locate the notch at the bottom of the exterior mirror glass.
3. Release the exterior mirror glass.
1. Insert a long flat-bladed screwdriver in the notch.
2. Push the screwdriver into the notch until the glass is released.
Fig. 179: Releasing Exterior Mirror Glass
Courtesy of FORD MOTOR CO.
4. If equipped with heated mirrors, disconnect electrical connectors from the exterior mirror glass.
Item 4: Exterior Mirror Glass Installation Note
1. If equipped with heated mirrors, connect the electrical connector to the mirrors.
2. Position the exterior mirror glass on the mirror motor.
CAUTION: Place a clean shop towel between hand and exterior mirror glass to prevent injury in the event of glass breakage.
3. Place a hand against the back of the exterior mirror housing and a hand flat against the exterior mirror glass. Press the mirror glass in place until it is fully seated.
Wednesday, May 9th, 2018 AT 1:12 PM
(Merged)


