Hi,
There are many different thing that can cause a problem with shifting. However, since it is limited to second to third gear, I feel it is likely a shift solenoid.
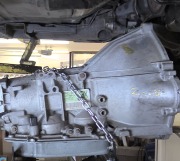
If you look at the attached pic, it shows the locations of the shift solenoids. In pic 2, I have provided a pic specific to the 2-3 shift solenoid. That is the one that should be replaced. When you remove the solenoid, there will be a shift valve, spring, and O-ring. Make sure the o-ring is in good condition and not damaged.
If you decide to replace the solenoid, you will need to drain the transmission fluid, remove the oil pan and filter, and then you will have access to the solenoids.
Here are the directions for replacement of the filter and fluid.
_____________________________________________
2000 Pontiac Grand AM L4-144 2.4L DOHC VIN T SFI
Oil Filter and Seal Replacement
Vehicle Transmission and Drivetrain Automatic Transmission/Transaxle Service and Repair Removal and Replacement 4T40-E/4T45-E Automatic Transaxle On-Vehicle Service Oil Filter and Seal Replacement
OIL FILTER AND SEAL REPLACEMENT
Removal Procedure
- Tools Required:
- J 6125-1B Slide Hammer
- J 23129 Axle Boot Remover
Caution: Refer to Vehicle Lifting Caution in Service Precautions.
Pic 3
1. Raise and support the vehicle.
2. Place the drain pan under the transaxle oil pan.
Notice: When removing the oil pan bolts, be careful not to damage the oil pan sealing surfaces. Such damage may result in oil leaks in this area.
3. Remove the oil pan bolts from only the front and the sides.
4. Loosen the rear oil pan bolts about 4 turns.
5. Lightly tap the oil pan with a rubber mallet or pry in order to allow the fluid to drain.
6. Inspect the fluid color.
Pic 4
7. Remove the remaining oil pan bolts.
Pic 5
8. Remove the oil pan.
Pic 6
9. Remove the oil pan gasket.
Pic 7
10. Remove the oil filter. Use a long screwdriver in order to pry the oil filter neck out of the seal.
11. Check the oil filter seal for damage or wear.
12. As needed, remove the seal using the J 6125-1B and the J 23129.
Installation Procedure
pic 8
1. Install a new seal, as needed. Before installing, coat the new seal with a small amount of J 36850 or petroleum jelly.
2. Install a new filter into the case.
Pic 9
3. Install the oil pan gasket. Use a new gasket if the sealing ribs are damaged.
4. Clean and dry the oil pan. Inspect the pan for damage and replace the pan if necessary.
5. Install the oil pan.
Pic 10
6. Clean and dry the oil pan. Inspect the pan for damage and replace the pan if necessary.
7. Install the oil pan.
Notice: Refer to Fastener Notice in Service Precautions.
8. Install the oil pan bolts.
Tighten
Tighten the bolts to 16 Nm (12 ft. Lbs.).
9. Lower the vehicle.
10. Fill the transaxle to the proper level with DEXRON(R) III fluid or the equivalent. Refer to Fluid Capacity Specifications.
11. Inspect the pan for leaks. Recheck the transmission fluid level. Refer to Transmission Fluid Checking Procedure.
___________________________________
Here are the directions for the oil feed pipe replacement in the trans. Make sure they are tight and the o-rings are good as well.
2000 Pontiac Grand AM L4-144 2.4L DOHC VIN T SFI
Oil Feed Pipes Replacement
Vehicle Transmission and Drivetrain Automatic Transmission/Transaxle Valve Body Service and Repair Procedures 4T40-E/4T45-E Automatic Transaxle Oil Feed Pipes Replacement
OIL FEED PIPES REPLACEMENT
Removal Procedure
Caution: Refer to Battery Disconnect Caution in Service Precautions.
Pic 11
1. Disconnect the negative battery cable.
2. Raise the vehicle. Support the vehicle. Refer to Vehicle Lifting.
3. Remove the transmission oil pan. Refer to Oil Pan Replacement.
4. Remove the transmission oil filter assembly. Refer to Oil Filter and Seal Replacement.
5. Remove the oil feed pipe bolts.
6. Inspect the eight oil feed pipe seal rings.
7. Replace the seal rings only if the seal rings are cut, swollen or damaged.
Pic 12
8. Remove the low and the reverse band oil pipe assembly.
9. Remove the eight low and the reverse band oil pipe assembly seals.
10. Inspect the oil feed pipes for plugged passages, bent pipes, or cracks.
11. Inspect the oil feed pipe seal rings. Verify the proper location of the seal rings. Replace the seal rings if these are cut, swelled or damaged.
Installation Procedure
pic 13
1. Install the eight low and the reverse band oil pipe assembly seals.
2. Install the low and the reverse band oil feed pipe assembly onto the transmission.
Notice: Refer to Fastener Notice in Service Precautions.
Pic 14
3. Hand start the bolts that attach the oil feed pipe assembly to the transmission.
Tighten
Tighten the bolts to 12 Nm (106 inch lbs.).
4. Install the transmission oil filter assembly. Refer to Oil Filter and Seal Replacement.
5. Install the transmission oil pan and gasket. Refer to Oil Filter and Seal Replacement.
6. Lower the vehicle.
7. Refill the transmission to the proper level.
8. Inspect the transmission oil level. Refer to Transmission Fluid Checking Procedure.
___________________________________-
Let me know if this helps or if you have other questions.
Take care,
Joe
Images (Click to make bigger)
Saturday, April 11th, 2020 AT 5:20 PM
(Merged)


