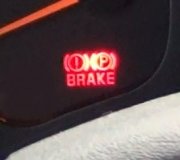
After changing the front break pads, the pedal began to sink to the floor

Tiny
ALEXV55
  • MEMBER
  • 2001 DODGE CARAVAN
  • 170,000 MILES
1) After changing the front break pads, the pedal began to sink to the floor. I bled all four wheels using the pumping by an assitant method but the pedal would still go to the floor when pressed. I replaced the master cylinder with a new one (bench bled it before installing) and bled all four wheels (LR, RF, RR, LF sequence). The pedal was rock solid, but sinks to the floor when pressed when the engine running. Should I bleed with engine running?

2) When bleeding LR and another wheel (don't remember if it was front or rear), I couldn't get the air pocket trapped in the plastic tubing completely out. It would slowly travel back up to the bleeding plug when I had the plug closed and the pedal was being pumped by the assistant for the next push. Is this normal or does it indicate that the bleeder plug isn't closing completely causing the fluid to be sucked back into the cylinder and introducing air? BTW, I installed new bleeder plugs on all four wheels.

3) I was eventually able to get the trapped air completely out of the tubing only after removing the tube, having the brake pumped, opening the bleeder plug and letting fluid squirt out, reattaching the tube, and bleeding the wheel again. When I opened the bleeder plug without the tubing on, it didn't look like the fluid was coming out with pressure. It didn't completely dribble, but I was expecting it to shoot out. Does that mean I need to change cylinder or caliper?

What other things I need to check or replace?
Thursday, April 26th, 2012 AT 7:02 PM
14 Replies

Tiny
CADIEMAN
  • MECHANIC
  • 3,544 POSTS
R/r l/r r/f and l/f u didn't bench bleed the master.rebleedit this video will help with a guide as well

https://youtu.be/WDxvEQrMkBg

and

https://www.2carpros.com/articles/brake-pedal-goes-to-the-floor

Please run down these guides and report back.

Was this
answer
helpful?
Yes
No
Thursday, April 26th, 2012 AT 9:54 PM
Tiny
DJCL
  • MECHANIC
  • 767 POSTS
Try removing the master cylinder cap filling it to the top and open all the bleader. Just let it drip for awhile keeping an eye in the level in the master cyilder
Was this
answer
helpful?
Yes
No
Thursday, April 26th, 2012 AT 10:08 PM
Tiny
ALEXV55
  • MEMBER
  • 43 POSTS
Thank you cadieman and djcl for your advice.

I followed both in that order and its still the same. The pedal sinks to the floor when pressed with engine running.
Was this
answer
helpful?
Yes
No
+1
Friday, April 27th, 2012 AT 5:07 PM
Tiny
CADIEMAN
  • MECHANIC
  • 3,544 POSTS
Pump it up and bleed the lines on the master. One then the other. Do u see pressure?
Was this
answer
helpful?
Yes
No
+1
Friday, April 27th, 2012 AT 5:27 PM
Tiny
ALEXV55
  • MEMBER
  • 43 POSTS
Not sure what you mean by bleeding the lines on master. Do you mean the two ports on the master cylinder, plug one bleed the other and then plug the bled one and bleed the second
Was this
answer
helpful?
Yes
No
+1
Friday, April 27th, 2012 AT 5:56 PM
Tiny
CADIEMAN
  • MECHANIC
  • 3,544 POSTS
Bleed the master lines 1 then pump it up to do the other. You should see fluid squirting out. Start here
Was this
answer
helpful?
Yes
No
-2
Friday, April 27th, 2012 AT 7:27 PM
Tiny
ALEXV55
  • MEMBER
  • 43 POSTS
I have found that my right side caliper bleeder screw is leaking. I have replaced the screw with another one and it got better, but after a few hard break testing, I see wetness around the bleeder screw. I had cleaned it well before driving test driving. Is there a way to fix it, or I must replace caliper.
Was this
answer
helpful?
Yes
No
+1
Monday, April 30th, 2012 AT 6:56 PM
Tiny
CADIEMAN
  • MECHANIC
  • 3,544 POSTS
Sorry but u need to replace the caliper. Just open the bleeder and let it gravity bleed. Some times when u cant fix something re ck your work its something simple or a new part that is no good.
Was this
answer
helpful?
Yes
No
+1
Monday, April 30th, 2012 AT 8:38 PM
Tiny
CJ MEDEVAC
  • MECHANIC
  • 11,005 POSTS
JUST GIVING YOU ANOTHER VIEW

NOTHING WRONG WITH THE OTHERS!

SEE MY "INCREDIBLE" ANSWER TOWARDS THE BOTTOM OF THIS POST

https://www.2carpros.com/questions/1999-ford-f-150-brakes--3

DO KEEP US POSTED ON PROGRESS

RETURN WITH A GRIN!

THE MEDIC
Was this
answer
helpful?
Yes
No
-1
Monday, April 30th, 2012 AT 8:54 PM
Tiny
ALEXV55
  • MEMBER
  • 43 POSTS
Ok, I now have replaced both front calipter, both rear cylinder, and master cylinder. Bled the master cylinder twice, once outside the car and second time after mounting it and using the pedal before connecting the lines.

Bled all four wheels. Firt I used the sequence in the sequence in factory manual,
- Left Rear Wheel
- Right Front Wheel
- Right Rear Wheel
- Left Front Wheel

The pedal was still going to the floor when I started the engine. Then I bled using the following sequence as mentioned by many mechancis

- Right Rear Wheel
- Left Rear Wheel
- Right Front Wheel
- Left Front Wheel

using above sequence, it took almost 45 minutes for the front right to bleed. The three took may be five minutes each. By the time I came around to bleeding the last one (left front) the break pedal would hardly go past half the distance to floor during pumping. Everything felt pretty.

Turn the engine on and it was a little better, it still went about 3/4 of the way to the floor and didn't feel as firm. Drove it some to see it made it better. While driving, when I do normal breaking, it engages almost where I think should be and then after couple of seconds it feels as if the pedal lost a little pressure and sinks almost 3/4 of a way. When I pump it once before applying the break, it engages at a normal height and breaks well.

Also, now my parkings breaks don't work at all. I am assuming I have to manually adjust the star wheel in the drum, which I can do, but what about the pedal still not working right.
Was this
answer
helpful?
Yes
No
+1
Monday, May 7th, 2012 AT 5:39 PM
Tiny
CJ MEDEVAC
  • MECHANIC
  • 11,005 POSTS
MOST LIKELY THE PROBLEM

YOUR BRAKES WERE PROBABLY "AIR FREE", TWO BOTTLES OF FLUID AGO

YES, YOU NEED TO ADJUST THE STAR-WHEELS

DOING IT WRONG MAY MAKE THE BRAKES SLACKER---TOO MUCH AND THEY WILL CONSTANTLY DRAG OR BE LOCKED UP

THIS MAY HELP--I'M GIVING YOU HIS 1ST TWO VIDEOS....HE PROBABLY HAS MORE

http://www.youtube.com/watch?v=TQcol1_L4gM

KEEP US POSTED ON YOUR PROGRESS

THE MEDIC
Was this
answer
helpful?
Yes
No
Monday, May 7th, 2012 AT 6:59 PM
Tiny
CADIEMAN
  • MECHANIC
  • 3,544 POSTS
U need to adjust the rear brakes. Remove the drum and adjust the star until u can hear the pads hitting the drums. Then put the tires on. Spin the tire it should not feel tight. Remove the rubberplug on the backing plate. You can use these for fine adjutments. Like a wheels thats too tight or loose. This will fix a low pel
Was this
answer
helpful?
Yes
No
Monday, May 7th, 2012 AT 7:38 PM
Tiny
ALEXV55
  • MEMBER
  • 43 POSTS
That was it! After I adjusted the rear breaks, the pedal doesn't sink anymore and remains firm. Breaks are working great.

Thank you both.
Was this
answer
helpful?
Yes
No
+2
Monday, May 14th, 2012 AT 7:46 PM
Tiny
CADIEMAN
  • MECHANIC
  • 3,544 POSTS
Dang thats the baby I new it. Ty for using 2carpros always try and donate.
Was this
answer
helpful?
Yes
No
Monday, May 14th, 2012 AT 8:08 PM

Please login or register to post a reply.

Sponsored links