SWAY BAR LINK CROOKED

1992 HYUNDAI EXCEL
13,000 MILES
Avatar
HOOKIE
  • MEMBER
  • 95 POSTS
Hello, on the passenger side the tire keeps getting worn on the outside. I replaced new control arm with new bushings, new inner and outer toe rods, new ball joints. when I went to replace the sway bar link, I used oOEM sway bar bushings that fit perfect, then poly rubber new bushings for the sway bar LINKS. ONE link is crooked at an angle..what would be casuing this? Its on the same side tire is worn..we adjusted tie rod ; both equal. The sway bar link is crooked on the side all the new parts are on.Also, new struts..any ideas what in the heck is causing this? the driver side link is straight and vertical...the passenger side is the problem..we tried several times and can't get it straight. PLEASE email thanks..it seems like caber and toe was out ..????
May 29, 2012 at 3:03 AM
Advertisement
Avatar
CARADIODOC
  • CERTIFIED EXPERT
  • 34,308 POSTS
You didn't mention anything about an alignment. With any of the parts you replaced, an alignment is necessary. What do you mean you adjusted both tie rods equal? There is no way to get close to the correct toe setting without an alignment computer. When the mechanic inspects the steering and suspension prior to doing the alignment he will be able to determine if anything is wrong with the anti-sway bar.

When only one tire is wearing on the outside edge, it has too much positive camber. When both tires are wearing on their outer edges, camber could be too high positive on each one or total toe could be too high meaning the front of the tires are closer together than the rear of the tires.
May 29, 2012 at 6:25 AM
Avatar
HOOKIE
  • MEMBER
  • 95 POSTS
Caradoc
Thanks for your fast reply..when I mean we set both tie rods equal, we measure same distance from end of nut to thread to put ends of tie rods back @ original place . I agree the car definitely needs an alignment..we just tried to get it as close as we could and replaced all the other parts. would an alignment MOVE the sway bar end LINk so that it would become straight again? That is what I am trying to ask.unless .the only thing I didn't replace were the coil springs..struts are new, but we still don't know if sway bar end where link goes thru is bent perhaps.
I am going to bring it to a shop for front end alignment.We tried to get it as close as it was so it wouldn't keep cchewing up the outer edge of the tires..both tires have wear on outer edge, more so on side where sway bar link is crooked.
thank you
May 29, 2012 at 1:04 PM
Advertisement
Avatar
CARADIODOC
  • CERTIFIED EXPERT
  • 34,308 POSTS
Yup, start with an inspection at the alignment shop, then the alignment. Measuring the tie rod ends will just get you close to the proper toe setting. To get more accurate, especially if you're starting with a straight steering wheel, just replace parts on one side, then make small fine tuning adjustments during short stops on a test drive until the steering wheel is straight again. You'll find that 1/4 turn doesn't make a big change in the steering wheel position but it makes a huge change on the alignment rack. I replaced the first front end part, the right outer tie rod end, on my '88 Grand Caravan at 213,000 miles, then tweaked the adjustment over several days. The steering wheel is straight again and tire wear is respectable.

Any chance you can post a photo of the anti-sway bar link you're concerned about? Can you see if the bar is centered in the mounting bushings? Do you have any reason to suspect damage to the suspension leading up to the need for new parts?
May 29, 2012 at 6:04 PM
Avatar
HOOKIE
  • MEMBER
  • 95 POSTS
I am going to try and give you some pics here..the tire is totally bald almost, the other pics are of the slightly crooked sway bar link. I stopped at a Master Mechanic..he said just what you said. The toe is toed in too much on this bad tire, and the sway bar was perhaps not centered when we installed all new bushings on it. I don't know how to center it, so I will also go to get an alignment. I really appreciate all your help and hope you get this pics..don't be surprised..the right tire is toast!Pics on route.Sorry,having trouble sending them..will try again in the am, thanks
May 30, 2012 at 2:55 AM
Avatar
HOOKIE
  • MEMBER
  • 95 POSTS
here's a pic
May 30, 2012 at 3:18 AM
Avatar
HOOKIE
  • MEMBER
  • 95 POSTS
takes awhile to open pic..large in pixels; sorry
May 30, 2012 at 3:21 AM
Avatar
HOOKIE
  • MEMBER
  • 95 POSTS
a good pic of crooked sway bar link..sorry, takes awhile to view..large pic
May 30, 2012 at 3:25 AM
Avatar
CARADIODOC
  • CERTIFIED EXPERT
  • 34,308 POSTS
That link doesn't look so unusual but unless the directions tell you different, you might want to run the nut down a little more. Normally the nut is tightened enough to just squeeze the bushings until they expand out to exactly the same diameter as the washers. Over-tightening the nut is worse because the bushings can't flex.

As for the tire wear, there are two angles to look at. "Camber" is the tilt of the wheel as viewed from in front or the rear of the car. This wheel could have too much positive camber meaning it's leaning out on top more than specified, but if it is, it isn't by much. Camber that's much too high will cause the wear spots circled in red, (those are down to the last layer of rubber just before the steel belts start poking out), while the left side will look almost like new yet. Here both sides of the tire are worn out fairly evenly so if camber is off, it isn't by much.

Incorrect total toe can cause the same wear pattern that you have but it will look quite different before the wear gets this far along. First it's important to understand the difference between toe and total toe. Suppose you start with a car that has a 100 percent perfect alignment and the steering wheel is straight. Almost all cars call for a very slight amount of toe-in meaning the fronts of the tires are closer together than the rears of the tires, commonly by 1/16". That is so they will be perfectly parallel when road and braking forces tug them back while driving. Now suppose you adjust only the right wheel even more to the left. The left wheel wants to go straight ahead and the right wheel wants to go to the left. The car finds the happy medium and goes a little to the left so you have to counteract that by turning the steering wheel to the right. You will end up turning the steering wheel until both tires are turned toward the center of the car exactly the same amount. That means both tires are scrubbing down the road equally even though you only misadjusted the right wheel. Toe is wrong on the right wheel but total toe is also incorrect, and it's that total toe that affects both tires.

Another condition is where both wheels are misadjusted equally but in the same direction. Suppose each one is adjusted 1/2" to the left. Both tires are steering to the left so you have to turn the steering wheel to the right to make the car go straight. In this case total toe is perfect and there will be no tire wear. The only symptom is the steering wheel is off-center when driving straight ahead. Total toe is good but each individual toe is incorrect.

Here's where the alignment mechanic will "read" the tire wear. Camber affects just that one tire. It causes that tire to want to pull in the direction it's leaning so it's important that it be correct on each wheel for proper wear and it's important it's the same on both sides so the two pulls balance each other out and the car goes straight when you let go of the steering wheel.

Toe is a different story. It's the total toe that is responsible for tire wear. It doesn't matter if one or both tires are set wrong or which way. When total toe is wrong there IS going to be equal wear on both tires. The steering wheel could be straight but only if both wheels are misadjusted an equal amount and in opposite directions.

Toe wear looks totally different than camber wear, (except in your case). First you have to understand what is meant by the "leading edge" of the tire. Lets use your right tire and exaggerate it for clarity. It is toed-in too much meaning it is turned to the left. Now imagine it turned even more, . . . and more. It's turned so far it's turned 90 degrees and pointing straight to the left of the car. Obviously you can't really turn it that far, but now it is easy to see that the right edge of the tire tread is in front so we call it the leading edge.

Next, take a pencil, stand it up so the eraser is down and resting on the table. Now put slight downward pressure on it and drag it sideways. You'll see the leading edge makes eraser crumbs but the trailing edge bends and lifts up off the table. No wear takes places on the trailing side. Do that long enough and the eraser will be worn at a slant. THAT is exactly what happens to each block of rubber on the tire's tread. If that wear is bad enough you'll be able to see it easily. If it's not so bad you'll be able to feel it by rubbing your fingers across the tread left and right or around the circumference. You're feeling the raised and lowered sides of each block of rubber. You can also determine whether the total toe is too much toed-in or toed-out by which side of the block is higher. That toe wear is always going to appear on both tires, as long as all other alignment angles are correct and equal.

Your tire is the exception to this explanation because it is worn too far. There are no blocks of rubber on the tread left to flex so while the same increased wear takes place on the leading edge, the entire tire has only the one leading and trailing edge and the result can look like what you have. If the left tire is not worn as far, you'll see and feel the feather edge when you rub your fingers over the tread.

Up to now all wear from misalignment assumes only one angle on one wheel is incorrect. Things get complicated when camber and toe are both off. The easiest to remember is when both tires are worn more on both inner or both outer edges, total toe could be off on either or both wheels, or camber could be off but it would have to be on both wheels. Incorrect and equal camber happens more often that you might think but some vehicles are well-known for it. Look at the very poorly designed Ford Bronco 2 with twin I-beam front suspension. When you raise it on a hoist, the suspension droops down and the wheels tilt out on top, . . . a real lot. The opposite happens when the coil springs get weak with age as they all do. Those wheels move through a wild arc as the vehicle goes up and down over bumps in the road and the tires wear excessively on both edges. Making adjustments to camber only affects the readings when the truck is sitting on the hoist. The wheels still go through the wild camber changes during driving so nothing is going to solve their terrible tire wear.

Many front-wheel-drive cars do not have provisions for adjusting camber because it changes very little with changes in ride height as the springs get weak or as the car bounces up and down going down the road. On those cars, if camber is off on one wheel, something is usually bent, and if it's off equally on both wheels but one's positive and one is negative, the cross member is likely shifted to one side. That pulls both lower control arms and ball joint to one side.

Off-center cross members is a common problem on General Motors front-wheel-drive cars because it is often removed to remove the engine or transmission for service. It can be reinstalled in the wrong location very easily. Chrysler fwd cars use special bolts to locate the cross member so this isn't a problem. The cross members on most import cars are a welded part of the structure and can't be mispositioned. When a cross member is mispositioned, either by careless reinstallation or from being bent, simply readjusting camber on both front wheels will make the numbers look good on the alignment computer but other suspension angles will be changed and make for a very miserable car to try to control. That would be "steering axis inclination" and is a topic of discussion for another time.
May 30, 2012 at 9:20 PM
Avatar
HOOKIE
  • MEMBER
  • 95 POSTS
Well thank you for all the info..you sure are well versed and educated in this tpoic..I am not on the other hand. so in simple terms, you are saying the camber isn't off much on that ONE worn tire, but the TOTAL toe is off?Bear with me because its like 100 degrees here in florida, so this heat is brutal.
the other tire only has a slight outer edge feathered, and the sway bar link is much straighter like completely horizontal...no bushings swished. I will try and loosens the sway bar link bolt a bit.
Also, initially, I replaced the RIGHT control arm (only one on right side of this car) because they rusted out badly on all the older Hyundais on that passenger side, thus I replced the control arm, balljoint, and bushings and axle. I am wondering some time ago, a mechanic did remove my crossmember to put a new oil pan gasket on, but its not welded..it comes off by 2 bolts up front, so you can't misalign it ( I don't think)..other than that, no accidents on this vehicle and the rear shocks were also replaced as there was a huge hyundai parts sale on Ebay.
So, fill me in a bit more, and many, many thanks for all your dedication and help. I did buy CAMBER BOLTS for this vehicle..not sure if I should give them to the mechanic who will do the alignment or not
Thanks!
May 30, 2012 at 9:57 PM
Avatar
HOOKIE
  • MEMBER
  • 95 POSTS
PS change cross member front rubber mount but not REAR ROLL stopper bracket bushing. No Coil springs have ever been replaced..all new struts, though, and rear shocks 3 yrs old.
May 30, 2012 at 10:07 PM
Avatar
CARADIODOC
  • CERTIFIED EXPERT
  • 34,308 POSTS
If there's only two bolts on your cross member, it likely isn't what the lower control arms are bolted to so its position isn't critical. If it was critical, as with the GM cars, those can easily be shifted 1/4" which will make the car real miserable to drive even after an alignment. If you didn't notice a change for the worse in handling, he either got it on right or its position isn't important. When it's wrong, either the steering wheel will oscillate left and right a little or the car will steer left and right a little as it goes up and down over bumps.

The angles of the anti-sway bar links is not important in itself, in fact, you can take the bar and links off and throw them away, and it will have no affect on tire wear or alignment. The car could even ride a little smoother but it will have a tendency to lean more on corners, that's all. The angle of the links though could be considered an indicator that something is mispositioned. I suspect if you looked at a dozen new cars that use the same style links, you'll find one or two where they aren't exactly the same.

There's two ways to make camber adjustable. The aftermarket world has developed "problem solver" parts for this type of thing. Here's some photos from rockauto.com showing your strut and the eccentric bolt that can be installed in place of one of the original bolts. Note the narrowed section in the middle. That allows movement so the knuckle can be shifted in and out a little. That lets it pivot on the lower ball joint stud and changes camber.

An easier trick is to simply grab a die grinder with a carbide bit and grind the upper mounting holes oblong, shown with my sad red arrows. That lets you retain the original bolt which is larger in diameter and presumably stronger. The advantage of the eccentric bolt is if you turn it so the wheel tilts in on top too far, THEN turn it the other way to bring the camber back up right to where you want it, and tighten it there, the knuckle will be resting against that bolt. That gives it added support to resist shifting position when you bounce through a large pot hole. By grinding the hole oblong to create the adjustment, you'll usually make it bigger than necessary and the knuckle will likely not be resting against the bolt. The only thing that prevents it from shifting when you drive over bumpy roads is the clamping force of the two bolts. This is how most GM front-wheel-drive cars have to be modified, and there are a few Chrysler models that don't have other provisions for adjusting camber and I've modified them the same way without experiencing any shifting problems. The only thing I ever ran into was another fellow thought he was doing me a favor by coating the knuckles with anti-seize compound. That was on a Dodge Dynasty. No matter how hard I tightened those two bolts, both wheels flopped in on top as soon as I let the car off the jack. Just could not build any friction. In fact, after that happened three or four times, I got frustrated and tightened the bolts so hard by hand that I snapped one by stretching it apart. When I took it apart to replace it, THAT'S when I found the anti-seize compound and had to wash it all off. A little grease doesn't hurt but even that isn't necessary.

As for the tire wear, why are the two worn to different depths? The one in the photo doesn't appear to have much of a camber problem so the wear would have to be attributed to toe or simply high mileage. Toe wear would show up on the other tire too.

At the risk of making this more confusing, on most cars changing camber changes toe too but changing toe doesn't affect camber. In this magnificent drawing, the top picture shows the relationship of the outer tie rod end stud with the hole it bolts to in the steering knuckle, (two blue arrows), and they are lined up. If you look back from in front of the car, you'll see that tie rod end is a lot higher off the ground than the lower ball joint. When camber is adjusted out on top as shown in the lower left drawing, the steering arm moves out with it. Now you can see the red and blue arrows aren't lined up. On most cars the tie rods are behind the center of the wheels so you would have to turn the wheel and spindle to the right to line up the arrows and install the tie rod end. All that means is once camber is set on that wheel, you have to readjust toe. The tie rods have to be lengthened to compensate for moving the top of the spindle outward.

Some cars, particularly older rear-wheel-drive models had their steering linkages lower down like in the right drawing. Tilting the wheel had relatively little effect on the position of the steering arm so adjusting camber didn't change toe very much. This also caused little toe change regardless how much camber change occurred as the suspension traveled up and down on bumpy roads. Made for more stable steering.

Manufacturers are always trying to design in improved handling and raising the steering linkage is one way to do that. During cornering, as the spindle goes up into the body, camber changes and causes toe to change too. That might cause the steering to respond more aggressively for a sportier feel or it might dampen the steering response for a more relaxed feel. Fortunately we don't have to worry about all of that. It's just helpful to understand what is taking place and how all the geometry ties together.
May 31, 2012 at 1:24 AM
Avatar
CARADIODOC
  • CERTIFIED EXPERT
  • 34,308 POSTS
Woops, forgot the drawings.
May 31, 2012 at 1:26 AM
Avatar
HOOKIE
  • MEMBER
  • 95 POSTS
Hi, I don't know hhow to ever thank you for all your help. I have learned alot just be reading all your posted, so many, many thanks again.This car is driving me nuts..to fill you in, that passenger tire that is all worn has only been on 8 months or so. All the tires get bald on that passenger side. Also, the steering wheel always pulls to the right if I am on a straight road-way driving
The driver side tire is only worn about one inch (on outer edge). the rest of the driver tire is fine.
This has been an on-going problem. I used an aftermarket passenger control arm, so I am wondering if that ADDS to the problem or if the axle I replaced (rebuilt) was wrong. I remember i used locktight on my new inner tie rods, and NOt the original locknuts that were on my old inner tie rods. I am trying to find fault in any my parts, but I suspect something is out of wack somewhere.
It will be interesting to find out the real culprit besides the toe. By the way, the 4 bolts I bought for CAMBER were very similiar to your picture, so I can give them to the alignment guy when I go. Thanks for the photos.
Everything has been apart on that passenger side. Like I said, the only thing I haven't replaced is the ENGINE mount on that side, and the rear roller stop bushing(rear crossmember). The center crossbar has 2 bolts in it's front with rubber washers and 2-3 bolts in the rear..can't see ..would have to have it up on lift, but if you say not to worry about that crossbar, I trust you!
Will let you know what happens ..also, excuse any typos..my keyboard also needs to be fixed.
Again, many thanks ~all your help is MUCH appreciated~
May 31, 2012 at 2:54 AM
Avatar
CARADIODOC
  • CERTIFIED EXPERT
  • 34,308 POSTS
The axle shaft shouldn't matter. The inner cv joint is called a "plunge joint" because the shaft can move in and out of it to change length as it turns and the suspension goes up and down.

From the tire wear, it sounds like you have a toe problem affecting both and a camber problem on the right side. Remember, tires want to roll in the direction they're leaning so besides being in specs for good tread wear, they have to be nearly equal side-to-side so their pulls counteract each other and the car goes straight. If the right tire is leaning out too much on top, that will make the car pull right when you let go of the steering wheel, and it will add to the toe wear.

The camber will typically change with the new lower control arm because no two are ever exactly alike. You can't really blame that on the aftermarket manufacturer. That can happen with original parts too. It's why we have to align cars when those parts are replaced.

I would like it if you could list the numbers from the alignment printout when the car is done. Most computers record and print the "before" readings from when the mechanic goes through the setup procedure, and it records and prints the "after" readings when he tells it he's done making adjustments. The manufacturer's specs will be listed too. I can interpret those numbers to explain the tire wear and pull.

There's one more primary angle that will be listed called "caster". It has very little or no effect on tire wear but it does have a big affect on pulling on rear-wheel-drive vehicles. I don't know why but it rarely causes a pull on front-wheel-drive cars even when it's off by a lot. Of main concern is it is the same on both sides. Think of a teeter totter. You want both people to be of the same weight but most importantly, they have to be the same distance from the pivot. Their distance from the pivot doesn't matter; it just has to be the same.

There's at least five ways to describe how caster does its thing. I went through one description with my students on Monday, then a different one on Tuesday. By Thursday, everyone understood the angle and by then all the descriptions made sense. Basically WHAT it does is causes the wheels to want to come back to straight ahead when you let go of the steering wheel after going around a corner. You can think of it as the rake of a fork on a bicycle or motorcycle. The fork goes forward as it goes down. It doesn't go straight down. On a bicycle that's what allows you to ride no-handed. It's your weight that pushes the wheel straight ahead. On a car, since the pivots, (the ball joints or upper strut mount) are off to the side of the wheel, caster makes the wheel want to flop in or turn in toward the center of the car. Like that teeter totter, when the caster on both wheels is the same, they both want to turn in equally hard. It's when you connect the steering linkage between them that they counteract each other and stay straight.

More than likely caster is not adjustable on your car and that's okay since it's not going to cause a problem, but it is nice to see what you have. I had a Chrysler LeBaron convertible that was crashed into a parked truck at 50 mph, then rebuilt and I aligned it. Found 3.00 degrees difference in caster side-to-side but the car drove perfectly straight. 3.00 degrees difference on a heavy rear-wheel-drive car would just about tug the steering wheel out of your hand.

Here's a tidbit you might find interesting when you look for a shop and mechanic to do the alignment. All alignment computers I'm familiar with can be set by the mechanic to display caster and camber to either one or two places after the decimal point. I always set mine to display two places, such as 3.25 degrees. Many mechanics set theirs to display 3.2 because it makes for faster alignments when they don't have to be so picky. What I found on the many Chryslers I aligned when I worked for a very nice dealership was they almost all called for 0.30 degrees camber meaning the tires were tipped out on top an amount too small to see, but it made for perfect tire wear. What I found though was they needed exactly 0.06 degrees more on the left wheel than on the right one to make up for "road crown". That's the tilt to the right of the roadway so rain runs off. The 0.06 degrees higher on the left provided a barely negligible pull to the left to offset the effects of that road crown. A full 1.00 degree was too much in many cases so I had to be very precise. If the computer was set to read to tenths of a degree, there could be 0.34 on the right, rounded off and displayed as 0.3 degrees, and there could be 0.36 on the left, rounded off and displayed as 0.4 degrees. The actual 0.02 degrees isn't enough difference to offset road crown but the 0.1 degree difference displayed would be too much difference. The bottom line is it may not be that critical for your car, and the proof is in the end result in how the car drives and wears tires. That's due in great part to the mechanic's experience and his familiarity with his computer. The only reason for even bringing it up is that given the opportunity to see the computer or the mechanic in action, you can tell if he values speed or accuracy more. With old heavy cars of the '70s and early '80s, some old alignment equipment measured caster and camber to 1/16 degree accuracy and that was plenty sufficient for those cars. Today's cars can be measured to the hundredth of a degree. Sneezing next to the car changes some readings!

Also, don't panic if you see some numbers that are out of specs after he's done with the alignment. All specs include a tolerance. A typical camber spec for my Chryslers would have been 0.30 plus or minus 0.25 degrees. There's a couple of issues here. First of all, at the allowable limits of 0.05 and 0.55 degrees, there is going to be noticeable uneven tire wear by the time the tires are worn out so no mechanic would leave them close to those limits. The reason for publishing such a high tolerance is as long as the numbers fall within that range, the manufacturer will pay to have it checked if it's under warranty but they will not pay to have it adjusted. You're expected to leave it alone. It is rare to have a car new enough to still be in warranty and to have the alignment off that little. Normally there would be a worn part, then the manufacturer WOULD pay for everything including necessary adjustments.

For those of us who understand that tighter tolerances are needed for good tire wear, there is a button on the computer to "reduce tolerances". On a typical car that will change the plus or minus 0.25 degrees to plus or minus perhaps 0.10 degrees or even 0.08 degrees. There's only two times that is noteworthy. One is on the computer screen during the alignment. For quick reference from a distance, numbers in the acceptable range are highlighted in green and numbers out of specs are highlighted in red. That's just to let the mechanic see at a glance when the adjustment is getting close. The second time it shows up is on the printout that you get. The mechanic may have hit the "reduce tolerance" button for more accuracy but that could make one or two readings fall outside those new tighter limits. The problem is that on some computers you only get one shot at pressing that button. You can reduce the tolerance but there is no button to go back to "expand tolerance". To do that he has to go through the entire setup procedure again which takes a long time so they just leave it as it is. THAT'S why you might find some measurements that appear to be not set to specs, so don't panic or complain over that until I see the actual numbers.

For reference, 0.00 degrees camber means the wheel is perfectly straight up and down. That is usually not desirable for best wear. If you could imagine a wheel laying flat on its side, that would be 90 degrees. Cars that call for a real lot of camber might call for 0.75 or even 1.00 degree. That is barely enough to see but it is what the manufacturer found to result in the best tire wear. Ford has always been the notable exception. Their Escorts and Tempos from the '80s called for over 2 1/2 degrees on the front and very high negative on the rear. Those tires looked like they didn't know which way to go. Ford tricked a lot of people into buying those "killer cars" because they rode much smoother than other small cars because they were riding on just the edges of the tires. What they didn't want you to know until after you bought it was they shredded front tires in as little as 15,000 miles. The aftermarket industry came up with a fix to stand the rear wheels up straighter but due to the design of the front struts, there was no way to fix the horrendous front camber and tire wear. Many tire stores refused to include a warranty on replacement tires for those cars because they knew they couldn't solve the problem.

As a side note, the proper camber setting tilts the spindle and places the vehicle's weight right in the center of the wheel bearing. On rear-wheel-drive cars and trucks it puts the weight right over the larger inner bearing. The smaller outer one is just to hold the wheel straight. This is one of the many things people mess up when they lower cars or put lift kits in trucks.

Other angles I can explain include steering axis inclination and thrust angle. Those are considered secondary angles and do not affect tire wear or handling directly. They are merely indicators that something else is wrong that needs to be looked into. Camber and toe will be measured on the rear wheels too. If there's no objectionable wear on those tires, expect that no adjustments will be made on the rear. Thrust angle is the direction the two rear tires, taken as a whole, are steering. As long as it's not too high, all that is necessary is the two front wheels must be adjusted so they're perfectly parallel to the rear ones to make the steering wheel straight. The computer takes that into account when it shows the mechanic where to set the toe for the front ones.

I'm sorry for getting so long-winded again, but if you get the opportunity to watch the alignment being done, you'll have an idea of what's taking place. As for keyboard problems, I have o go back now and pu in all the "t"s that my compuer forgo!
May 31, 2012 at 5:09 AM
Avatar
HOOKIE
  • MEMBER
  • 95 POSTS
Hi caradiodoc..
okay, I went to s new shop which was a mistake as my mechanic was away.The ownner was not only rude, but yelled at me when I tries to ask the repair guy a questions, and told me to " get out of the shop". I was on foot, and quite upaset as I am a woman who put my faith in a jerk!
He had an ad for $49.99 for all 4 wheel..when I gave hi my camber bolts , he wanted $90 and I settleds to give him $80. He gave me no receipt and was no where to be found when I came back 4 hrs later (after cooling down in the 94 degree florida heat).
I had asked for a printout before and after and al he left me was a BEFORE redings on the alignment. There were NO toe readings..all it said was toe set by WINGRADE. I will give oyu the before readings..also, they had 3 guys there reading directions on how to install the camber bolts..I looked when I got home and they put one upper CAMBER (NEW ADJUSTABLEBOLT) on the top of each Strut. The car seems to ride better but I have no idea what the after readings are, and was so upset, I didn't bother asking to be honest. I will send you the before readings next reply.. thanks
Jun 11, 2012 at 2:44 PM
Avatar
HOOKIE
  • MEMBER
  • 95 POSTS
Excsue the typos..keyboard not wroking!
Jun 11, 2012 at 2:45 PM
Avatar
CARADIODOC
  • CERTIFIED EXPERT
  • 34,308 POSTS
Every city has their share of rude business people. Sorry you found one, but I bet it's a long time before you go back there. Most shop owners don't want customers in the dangerous work areas but there are polite and tactful ways of saying that.

One very nice dealership owner I used to work for knew that it takes more advertising dollars to get one new customer than it takes to keep ten happy customers coming back, and every business owner wants more customers. What possible goal does that guy think he's going to meet by being rude?

I used to work for a crabby fellow at a tv repair shop in the '70s. He treated many of his customers the same way. Keep in mind that in both situations, the employees are not of the same attitude. Many of us are / were just as put off by the boss as the customers are.
Jun 11, 2012 at 9:26 PM
Avatar
HOOKIE
  • MEMBER
  • 95 POSTS
Caradiodoc~
Why thank you for your kind words. Yes, it's too bad I went to this shop, but you learn from mistakes. I am giving you the only info they gave me..I don't undertand what it means, as they never explained after they did an alignment on the 92 excel. On each front side, they put in ONe camber bolt on top of each front strut that adjusts (on the right front and Left front) strut.
The sheet I cannot fax as I have no fax, but it showed a pic of a vehicle facing forward, passenger side on right. Then it says :
* *
0.5 | 0.0 | degrees -0.5 -0.5 | 0.5
CAMBER

2.2 |.| |.| 2.2

CASTER
* *
-0.08 |-0.02 | 0.16 0.16 | 0.05 | -0.08 degrees
TOE
THE ASTERISKS ARE REALLY BOLD ARROWS ON THOSE NUMBERS
its says on top of page SAVE THE BEFORE MEASUREMENTS, so I don't know if these are before or after..fill me in if you can
I know its hard w/o a scan, but thanks!!! Wish I had you as my mechanic!!!
GH
Jun 15, 2012 at 9:51 PM
Avatar
HOOKIE
  • MEMBER
  • 95 POSTS
Typed wrong ~CAMBER measurements have bold arrows OVER ;
* *
0.5 |0.0 | -0.5 -0.5 | -0.5 | 0.5 degrees
CASTER says really nothing
TOE, the bold arrows are over -0.02 and 0.05 degrees
hope that helps..my asterisks moved when I sent you the previous email; sorry
Jun 15, 2012 at 9:59 PM
Avatar
HOOKIE
  • MEMBER
  • 95 POSTS
sorry it won't let me place arrows..the BOLD arrows on CAMBER are over |o.o| degrees and |-0.5| degree
TOE, BOLD ARROWS OVER
|-0.02| and |0.05| degrees
Jun 15, 2012 at 10:02 PM
Avatar
CARADIODOC
  • CERTIFIED EXPERT
  • 34,308 POSTS
I'm not quite sure how to interpret those numbers. Every alignment computer is different but the "SAVE THE BEFORE MEASUREMENTS" sounds like a message that appears on one I've used.

Camber and toe readings are always live. Camber actually changes as you turn the wheels. If you watch the left wheel, it will tip out on top when you turn to the left. It's the caster that causes that. To visualize caster, look at the front fork of a bicycle or motorcycle. It doesn't go straight down to the wheel. It goes forward as it goes down. That's why putting your weight on the bike allows you to ride no-handed. Cars are kind of the same way. Caster can not be measured directly. The computer calculates it by comparing the camber readings when you turn a prescribed amount to the left, takes a reading, then to the right, takes another reading, then back to centered. When you get back to center and it finishes taking its last reading, THAT'S when it will automatically save those as the "before" measurements. We call that procedure a "caster sweep". Some mechanics won't bother to do that on front-wheel-drive cars because most of the time it's not adjustable and most of the time it has almost no effect on pull, unlike the big effect it has on older rear-wheel-drive cars. If they don't bother to do that sweep, those "before" numbers don't get saved in memory for the printout, then they have to simply push the button to manually save those numbers. It's just like saving your work periodically in Microsoft Word.

If the mechanic never saves those measurements and doesn't do the sweep, the camber and toe will still always be live and you'll only see those measurements on the printout after the corrections have been made. They might do that to save time but I always saved the "before" readings, then at the end of the alignment I highlighted the ones I adjusted to show the owner what I did for them, then put one copy on the passenger front seat and I saved a copy for myself if I needed it for future reference.

Another reason they might not save the "before" readings is they forgot to adjust something beforehand. First let me explain that there are some computers out there that are REAL fast at getting the initial readings and they use the first technology in the world that does not require the car to be perfectly level, they don't require all four tires to be the same size, and you can even get adapters to align the car with the wheels and tires off. This technology was unheard of and would have been scoffed at ten years ago. Up until then, everything depended on gravity and some type of electronic or mechanical bubble level like in a carpenter's level. That's why the hoist and car had to be perfectly level. These new ones use a mirror attached to each wheel, and cameras that "see" spots on those mirrors. Nothing about anything depends on gravity.

My reason for explaining that is to clarify what I meant by "they might have forgotten to adjust something beforehand". Two common examples come to mind. The last step of the caster sweep is to center the steering wheel absolutely perfectly so on the printout it will show the two toe readings. If those are unequal, that explains why the steering wheel was off-center before. You do that caster sweep by tugging on one tire by hand, then the computer suddenly automatically saves those readings when both tires are equally straight ahead. It doesn't know or care at this point yet where the steering wheel is. I want to be able to show that to my customers so I simply let the computer do its thing; that "save" procedure just takes two or three seconds, then I climb up in the car, put the steering wheel straight which changes both toe readings, then I have to manually press the "save" button again. That puts the new readings into memory as the original "before" readings. Think of it as MS Word does an auto-save every ten minutes, but after one minute you have a lot of changes you don't want to risk losing so you manually click on "save" again, that's all. The point is, the computer saved the "before" readings automatically before you were ready.

The second thing we could forget, at least on the older equipment, was to adjust the tire pressures to make both rear tires exactly equal and both front ones exactly equal. Wrong pressures won't affect caster and toe but it will greatly affect camber. Since camber is always live, once the computer has saved the "before" readings, and I THEN come along and adjust tire pressures, both camber readings will change as one or both corners of the car go up or down. The correct camber readings are found when the tire pressures are correct so if I change pressures after the readings have been saved, I have to re-save them after changing those pressures.

There's a third thing that has a big effect on camber readings. That is holding the driver's door open to center the steering wheel. The weight of the door makes the car lean to the left a little. That might not sound like a lot but these computers are so extremely sensitive, that open door can turn a camber reading red meaning it's out of specs.

I've already found that I forgot to set the hoist down on the fold-down legs so it wasn't level. That's another cause for manually saving the "before" readings after the computer did it automatically.

To add some more confusion to the story, I was the only alignment specialist at a very nice family-owned Chrysler dealership all through the '90s and my computer used an old dot matrix printer, just black and white numbers. I found that real easy to interpret at a glance but you had to be experienced in alignment angles and know what to adjust. Many of these newer computers use a Windows XP program and a color printer that includes colored bar charts along with the numbers. That's so numbskulls with almost no training and no experience can watch an arrow move and it will turn green when they have some adjustment "close enough". That screen can be printed out too and that sounds like what they gave you. I'm not implying your car was aligned by someone with no experience. I'm simply saying they might prefer printing that screen thinking customers will understand bar charts easier than a page full of numbers. My assumption always was customers aren't going to understand the numbers no matter which screen I print; I want them to be able to hand the printout to an alignment specialist at a competitor's shop and have them say, "that guy did a good job for you". I never want to have to defend my shoddy work.

If they did give you a printout with colored bar graphs with arrows over the top, you still have to be careful when drawing conclusions on the quality of the job. Lightly slamming the door closed can settle the suspension and change some numbers. Also, as I mentioned, these computers are extremely precise and detect the slightest change. I started out aligning cars in the late '70s when there were no computers yet. We had light beams that could be read on a metal chart to an accuracy of 1/16 degree and that was plenty good enough for old heavy rear-wheel-drive cars and trucks. The computerized equipment can be set to read to .01 degree. Many front-wheel-drive cars at the dealership needed .06 degrees more camber on the left to offset "road crown", the lean to the right so rain runs off, and there would have been no way to measure that precisely with the old equipment. We used to joke that the computers were so sensitive that the readings would change if we sneezed! That's why you can't assume you got a bad alignment if a few numbers aren't perfectly equal on both sides.

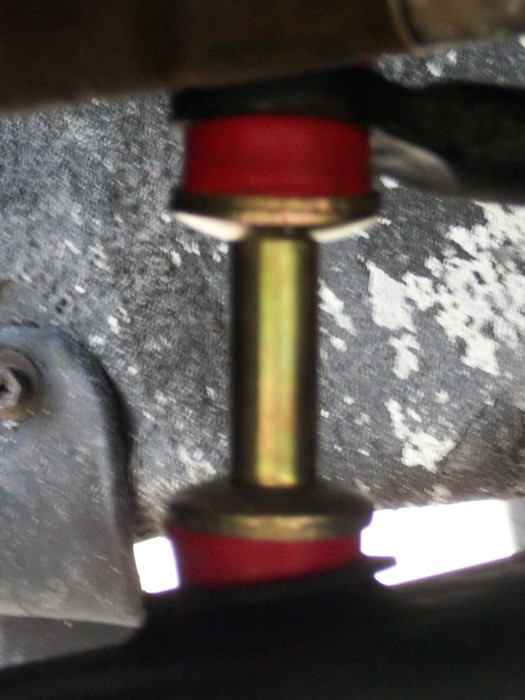
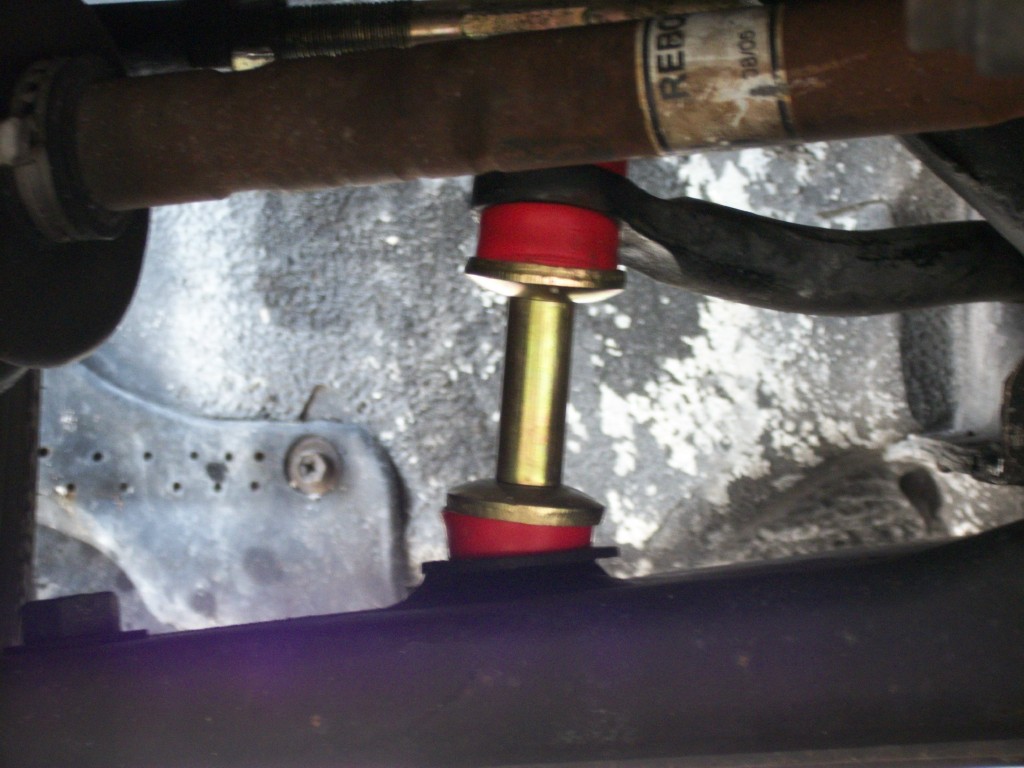
Those bar charts take me a little time to read since most of my experience was with a page full of numbers. As I recall, they show a camber chart for each wheel, and on top of each chart there's a number on the left and another on the right. Those are the limits which that wheel can be adjusted to and still remain within the acceptable range. A third number in the middle, often larger font, lists the actual reading for that wheel at the time the "print" button was pressed. Camber is not adjustable on some cars, (don't get me started on Ford front-wheel-drive cars and their horrendous tire wear problems), and it has to be made adjustable on some cars such as yours. I get the impression you think two "cam bolts" are needed on each front strut to make them adjustable but that's not correct. Only one bolt needs to be replaced to allow a wheel to be adjusted in or out a little. One bolt usually provides a real lot more adjustment than is ever needed.

There are three big things to look at to evaluate the quality of your alignment besides that printout. The first one is when you let go of the steering wheel on the highway, the car should go straight. Mismatched front tire sizes or brands will have different rolling resistances and cause a pull so take that into account if it applies. If you have the same brand and size tires, the car should go straight. All roads are different so if it pulls on one, try it on different roads before you go back and complain. Most mechanics have a regular route they test drive their alignments on and they learn how cars react there when they get few complaints from customers.

The second thing is the steering wheel should be perfectly straight when traveling on a straight road. If the car pulls to one side the steering wheel will be off-center a little as you counteract that pull. Gotta have the car going straight before you can evaluate the steering wheel position.

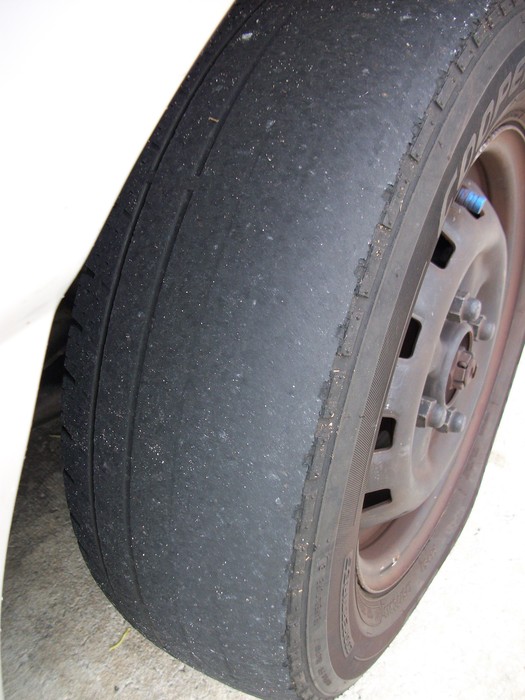
The third thing takes more time to evaluate. That is tire wear. Camber needs to be just about equal to make the car go straight but if both tires are tipped out too much on top, both will run on their outer edges and scrub that tread off. (That's the huge Ford issue). Camber wear always affects just that one tire, although camber can be set incorrectly on more than one tire.

Incorrect toe will cause the tires to slide a little sideways as they go down the road. That results in a feather-edge that you can feel when rubbing your hand one way around or across the tire tread but you don't feel the raised edges so much the other way. "Total toe" is just the sum of both of the readings. That will be wrong if one wheel is misadjusted AND the steering wheel will be off-center. Total toe will also be wrong if both wheels are misadjusted, but if they're both turned too much toward the center of the car or too much outward, but equally, you'll have that feather-edge wear but the steering wheel could still be straight. Incorrect total toe always causes wear on both tires even if just one wheel is misadjusted. Camber and toe are also measured on the rear of all cars and trucks now, and it can be adjusted on most front-wheel-drive cars. Usually the rear wheels might have to be adjusted once or twice in the life of the car. Caster is never measured on the rear because the wheels don't turn left or right. A few exotic cars are the exception such as the Dodge Viper and Chevy Corvette and they require some really sophisticated equipment.

There's a fourth thing I used to look for that was more subtle. When the front of the car goes up and down over a big bump such as when crossing railroad tracks, the steering wheel should stay straight AND the car should go straight. If you see the steering wheel wobble left and right a little both camber and caster are unequal. This is a big problem mostly on GM front-wheel-drive cars. I won't get into what else needs to be measured and corrected to solve that but many mechanics overlook it or aren't even aware of it. For other brands of front-wheel-drive cars, if you see that steering wheel wobble, there's a good chance something is bent. Even if it's misadjusted as on the GM cars, camber can be readjusted to make both readings appear to be correct, and tire wear will be okay, but that handling problem will still exist.

In looking at your numbers again:

0.5 |0.0 | -0.5 -0.5 | -0.5 | 0.5 degrees

I think we can break these camber numbers down to:

Left front wheel: 0.5 |0.0 | -0.5 the acceptable range is from 0.5 degrees to -0.5 degrees, (which is tipped in on top). You have 0.0 degrees which means that wheel is standing up perfectly straight and it's perfectly in the middle of the acceptable range.

Right wheel has the same acceptable range from plus half a degree to minus half a degree, and they have that one set all the way in on top to -0.5 degrees. While technically that's just in specs, to me that is not nearly close enough. Remember when I said a lot of the Chryslers I aligned went perfectly straight when I set the left camber 0.06 degrees higher? You have eight times that difference. You have 0.5 degrees difference which for most cars is a real lot. The car should be pulling left pretty noticeably. If it is not, either your model is very forgiving or that isn't the actual reading on the right wheel. Perhaps the mechanic left the door open when he pressed the "print" button and you really have closer to 0.2 on each wheel. Some old-school mechanics still put a 100 pound weight on the driver's seat, then adjust camber to what experience tells them is about right. Few people still do that because that is all taken into account with the design of the suspension geometry and when the manufacturer publishes the optimum alignment settings.

"CASTER says really nothing" suggests to me they never did the caster sweep. I would at least want to know caster is correct and equal. It only takes about a minute to do that sweep procedure and you only have to do it once.

I would also tweak both toe adjustments a fuzz:

-0.02 and 0.05 degrees

I'm used to having my computer read toe in inches instead of degrees but that's irrelevant. -0.02 means the left wheel is turned to the left a very tiny amount when the steering wheel was locked perfectly straight. The minus sign means "toe out" or steering away from the center of the car. The right one is positive 0.05 degrees which means it's toed in a small amount so that wheel is also turned to the left. Those numbers would both make the car go to the left, (they're steering to the left as opposed to trying to pull the car to the left which is what camber would do). To overcome the toe issue, you simply bring both wheels back to where they're equal by turning the steering wheel a little to the right. In this case, the top of the steering wheel is going to be to the right by about 1/4" and you're never going to see that. The difference that you have is 0.03 degrees which is just about perfect.

Your total toe specs. when both wheels are added together is:

-0.16 to 0.32 degrees.

-0.08 |-0.02 | 0.16 0.16 | 0.05 | -0.08 degrees

In the '80s a lot of front-wheel-drive cars called for a little toe out meaning the fronts of the tires were further apart than the rears. Tugging on the car to make it go put tension on the steering linkages and pulled the tires ahead a little. That made them perfectly parallel to each other when zipping down the road. Since the late '80s almost all cars, even front-wheel-drive cars call for a little total toe in. The fronts of the tires are closer together like a snowplow going down the road. The rolling resistance pulls the tires back to make them parallel more so than the force of pulling the car forward. I would have liked just a little more total toe in but I think yours is fine.

One final comment has to do with the camber and caster readings on the printout. Most alignment computers can be set up to read to one or to two places after the decimal point. This one is set up to read just one place as in 0.5 degrees. That is done to make the jobs go faster. Especially with those cam bolts you supplied, it's real easy to hit 0.5 degrees. I mentioned a lot of the cars I did needed 0.06 degrees more on the left than on the right, and that was pretty critical. My computer was set up to read to 0.50 degrees. It took more care and time to fine tune those measurements to the hundredth of a degree but in my case, 0.34 degrees would have gotten rounded off by the computer to 0.3 and 0.36 would have been rounded up to 0.4 degrees. The actual 0.02 degree difference wasn't enough to counteract road crown, and the rounded off numbers would have shown 0.1 degree difference which would have been too much and I would have had a tiny pull to the left. It depends on what the mechanic values more, speed or accuracy, and it depends on what has resulted in complaints and happy customers. If he regularly gets good results, there's no reason to whine and snivel about his computer setup.
Jun 16, 2012 at 9:50 AM
Avatar
HOOKIE
  • MEMBER
  • 95 POSTS
Hi caradiodoc..
And many, many thanks again. As I said, I wish you were my mechanic, as I learned more on here than anywhere I ahve ever been, so that si a compliment to you.
I am never going back to that shop, but glad you interpreted the results. Sorry I had so much trouble trying to email the printout, but my keyboard is messed up! I wish I had a fax, but did the best I could.
My steering wheel was and still is off as some neighbor here had a puller and most likely did not put the wheel on correct before I had the alignment done. When I got to the shop I asked if he could straighten it and he said he was not going to mess with it..so much for that. I guess I have to get a puller and have someone fix it..hope that doesn't ruin or change the alignment if I change position of the steering wheel itself.. It is at 9 o'clock instead of being centered at 12 o'clock. I knew I was dealing with a rude shop owner soon as I tried to show him the old worn, tire I sent you a pic of here. He could have cared less, and even less about tweaking any camber bolts. I had 4 bolts in the kit, but like you said, they used 2 bolts (one on each strut).So sounds like my toe is okay but on right side (CAMBER)is -0.5 degrees. I don't know if they had any doors open, but they must have sneezed loud..lol.
The right side tire I replaced so it was brand new at time of alignment, and the left tire(outer edge) was only slightly worn..very little. Also, the left tire is older, and a different brand..never thought about checking the air in them. Now it makes sense that would change camber from what you said.
So, a big thank you for all your explanation..I just hope they didn't mess up my old car!!
Today my window crack broke, so next I have to replace the regulator..do I have to remove the window or can I tape it up to hold it? Also, I can't get it to maually roll down half way...are you suppose to lower the window to remove the regulator..I don't see how I can because the handle broke off inside and is stripped..so much for another project!
Anyway, my deepest thanks for ALL your help. I really , really appreciate all I have learned on here from you. Keep up the great work and kudos to you!
Jun 17, 2012 at 12:48 AM
Avatar
HOOKIE
  • MEMBER
  • 95 POSTS
Excuse the typos..keyboard needs to be fixed, too!
Jun 17, 2012 at 12:49 AM
Avatar
CARADIODOC
  • CERTIFIED EXPERT
  • 34,308 POSTS
Well this is just wonderful! I typed for over two hours, then had a two-second power failure, . . . again, and lost everything. The last time this happened last week I somehow got an upgraded version of Firefox that doesn't hold anything in memory so I even have to start over trying to reassemble all the web pages I had open. Thanks a lot power company.

Let me start all over again!

In my previous reply I tried to explain away some of the things that could have happened on the alignment rack. Mechanics are real good at talking about car problems with other mechanics but like doctors, they aren't real good at putting things into words the rest of us can understand. A lot gets lost in translation.

However, . . . there is no way to justify the comment about not bothering with centering the steering wheel. Any shop could legitimately charge you extra labor for installing the cam bolts although many would not. It takes extra time to do it and that's not part of the normal charge for an alignment. Most shops don't charge extra labor when they sell you those parts because they're making a small profit on them already and installing those parts makes aligning your car easier and faster. Think of ordering a dinner at a restaurant. They can legitimately charge you for an extra vegetable, but they aren't going to charge you extra to heat it up. It's considered part of the job.

When I go to the barber, I don't have to tell him to cut the hair on both sides of my head; it's kind of implied. The same is true with centering the steering wheel. You shouldn't even have to request that. It's part of the job. There are actually a few exceptions but they are very few. In the '70s or '80s Volkswagen was too cheap to make toe adjustable on both front wheels. You took whatever you had on the right, adjusted just the left wheel for correct total toe and best tire wear, then removed the steering wheel, centered it, and reinstalled it that way. They are always splined so that even if the nut comes loose the wheel won't slip causing you to lose control. When you reinstall the wheel, you have to hope it's perfectly straight when it lines up with those splines. If it doesn't, you have to turn it one way or the other a little until it does. That makes the steering wheel off-center a little, . . . but not a quarter turn!

I looked up the parts for your car and nothing suggests yours uses that design. Instead, there is going to be a "master spline" that only allows your steering wheel to be installed one way. I have heard there are some that have four master splines that allow the steering wheel to be put on four ways, and that could be what happened to yours, but do you really think the mechanic was so busy he couldn't be bothered to install your steering wheel correctly? That's just one of the many little courtesy things we do to make you happy. It can take an extra 15 minutes which is what might have come into play, especially if they had other appointments or people waiting, but at least he could have been more tactful in how he said "no".

The first thing to do now is to determine if indeed the steering wheel is on wrong or if toe was adjusted wrong. If the steering wheel is on wrong, I'd have to wonder how he set toe. The standard procedure is to set it last after camber is done and caster too if it's adjustable. Both of those affect toe but small changes in toe don't affect camber or caster, so toe is done last. You put the steering wheel perfectly straight and lock it in that position with a special tool, then you adjust one front wheel, while watching the computer screen, until that wheel is perfectly straight ahead, (plus or minus the tiny amount of toe-in or toe-out they call for). Next you adjust the other wheel to the same setting. There is another way that involves one total toe adjustment, then the tires are pushed to straight ahead, then there is a separate adjustment that just turns the steering wheel until it too is straight. Just a different way of getting to the same place. That mostly applies to some pickup trucks and vans.

By starting with the steering wheel locked straight ahead, the steering gear assembly is also centered. That means you will be able to turn the steering wheel almost exactly the same number of turns in both directions. I know you said it's to the left a quarter turn but in case it's ABOUT a quarter turn and not exact, and to make counting easier, consider putting a piece of tape at the very top when you're driving straight ahead, or some other means of marking it for reference. Now turn it as far left as possible while counting the number of turns and fractions of a turn. A typical number might be 1 ¼ turn to full left. In that case you should also find it turns 1 ¼ turn to full right. If it does, toe is adjusted correctly and just the steering wheel is installed in the wrong orientation. Removing it and reinstalling it in the correct orientation won't change anything on the alignment. All the adjustments are done down by the wheels.

If you find there is a different number of turns going each way, within about a quarter turn leeway, start with it at full left, then count the number of turns to reach full right. Now turn it back half way. THAT is where the steering gear is centered. That is where the steering wheel should be reinstalled straight, then THAT is where it is supposed to be locked while each wheel is adjusted for correct toe.

Going along with explaining away the mechanic's apparent misdeeds, if your steering wheel is really installed a quarter turn off-center and he had turned it straight ahead, then set toe, a quarter turn on the steering wheel moves the steering linkages quite a bit. Each toe adjustment is the connection between two pieces like a threaded bolt and a nut. Threading the nut up more toward the bolt head shortens that linkage and turns the wheel out away from the center of the car. To make up for a quarter turn of the steering wheel, it is likely he wouldn't have enough threads to adjust it that far. On the other side of the car he would have to lengthen the linkage so much that nut could fall off. If only a few threads were still caught, the hammering action of bumps and potholes would tear those few threads out and you'd go sailing into a tree, . . . or oncoming traffic! That is not only a legitimate reason for leaving the steering wheel off-center, it shows that at least in that regard, he knows what he's doing.

A different way of approaching the same description is to crawl underneath the car, or turn first one way, then the other way and look inside each wheel to see how many threads are exposed on the two linkages. That is WAY easier to do than to describe. If you see nearly the same number of threads on both sides, toe is adjusted properly and just the steering wheel is installed wrong. You might also consider having a different shop perform a steering and suspension system inspection with the request to have them point out the toe adjustments to you. That is the threaded connection between the inner tie rod end and the outer tie rod end. On a typical car you will see perhaps ½" of exposed threads. You should see about the same on the other side, give or take, . . . oh, . . . ¼". What you don't want to see is no threads on one side and two inches on the other. That's about all there is, is two inches.

I worked at a Sears Auto Center in the '80s and they used to offer free front end inspections, obviously because they were hoping to sell you something, but regardless, it was free. I don't know if they still do that. If you need new tires and you go to a tire store, they are likely going to inspect the front end before they will give you the warranty on those tires. That inspection might not be as involved as one where they're looking for a specific problem such as a noise, but I would think they'd be willing to show you the tie rod ends. If no one will help you in that regard, I'll trot outside and take a picture of them on my old rusty trusty '88 Grand Caravan. It uses the same common rack and pinion design.

For your reference, turning one inner tie rod end ¼ turn is enough to make total toe out of specs and cause tire wear. That is the equivalent of threading a sewing needle when the total range of adjustment is the size of a basketball hoop. One turn on either adjuster won't move the tire enough to see with a tape measure but it will affect the steering wheel position and tire wear.

So, your mission for now is to turn the steering wheel from "lock to lock", (full left to full right), then place it half way in between and see where the steering wheel is. If it is off by exactly ¼ turn, remove it and put it back on correctly. If that's what you find, it almost certainly will have four master splines to allow it to be installed four ways.

If by some chance you find there are no master splines, like on those older Volkswagens, the steering wheel will be able to be installed in about 50 different positions. In that case you do the same lock-to-lock measurement, turn the steering wheel back exactly half way, remove it, hold it straight, then install it that way. An alternative method is to just set the removed wheel on loosely, go out and drive it, stop, (highly recommended), reposition it, drive it some more, and keep doing that until it's as close as you can get it. That has the added benefit that you can hold it up to show the driver in the next lane at the stop light while you have that startled look on your face, not that I've ever done that, . . . three or four times!

Finally, if you find the steering wheel is already straight when you turn it back half way, that is where is should have been locked while toe was being adjusted. Given the age of your car, and especially if it has had very few alignments in the past, the toe adjustments could have been rusted tight and real hard to turn. I've usually been able to free them up enough that I still worked up a sweat but at least they did turn. If that mechanic ever had one break on him from tugging too hard he might be a little skittish and just leave it with the steering wheel off-center. My main concern again would be that one of the adjustments is about to come apart, but regardless, he should have explained his reasoning to you. Even though he knows most customers won't understand what he's talking about, at least they'll remember he was polite and had a good reason for doing what he did.

As for your window, all manufacturers have gone to flimsy cable systems to save weight, and they break. The cable can fray or the plastic pulleys can crack. If you'd care to do me a favor, you can go here:

http://randysrepairshop.net/additional-resources.html

then click on the second item down for Rock Auto.com. Click through the brand, year, model, and engine size, then click on "Body – Interior". It's a short list with "Window Regulator" on the bottom. They're pretty cheap for your car. I think you'll find a lot of the answers you're looking for once you have the new part in your hands. If it's like the few others I've worked on, you remove two bolts from the plastic piece that bolts to the center bottom of the glass, then be sure to hold onto the glass and push it up so it doesn't roll forward and fall down. There's usually a hole in the inner door sheet metal where you can stab a screwdriver to keep the glass up.

There's always some sideways play between the glass and tracks when it's part way down but you want the glass to be positioned properly to seal against rain and wind noise when it's all the way up. For that reason, leave all the mounting bolts a little loose until you run the glass up and down a few times. Then run it all the way up and let it center and level itself in the upper channel, THEN snug the bolts down tight. Pay attention too to how hard you have to turn the nuts on the glass to get them loose, then copy that when you tighten them up again. Usually one fist on a small ¼" drive ratchet is way more force than is needed. Better to have them come loose later than to crack the glass.

If you find the glass goes up hard or sticks intermittently, spray the front and rear rubber channels with Silicon Spray Lube. I get mine from my friends at the Chrysler dealer's parts department but any hardware or auto parts store will have the same stuff. Spray it on liberally. It goes on like water, then evaporates and leaves a film of "slippery" behind. I use it once a year on the upper anchor of my seat belt too when it gets sluggish.
Jun 17, 2012 at 8:53 AM
Avatar
HOOKIE
  • MEMBER
  • 95 POSTS
Hi caradiodoc, again, many thnaks..this thread is longer than I thought! I meant to tell you, I had installed both inner tie rods with locktite (and a universal tie rod tool), so they are about 6 months old..the outer tie rods are also new, and so was the right control arm with new balljoint and bushings. I was trying to explain this to the owner, and I honestly don't think he thought a woman could install these items, but I did. When the car came home from the shop, the steering wheel was off the same way as before ..a guy came here (neighbor) and I think it's was on at 9 oclock crooked, that is whay I mentioned it to the owner. I didn't have a puller with me, otherwise I would have tried to center it before alignment. Like you said, maybe it only goes on one way.
The shop adjusted the Threads on BOTH tie rods = 1 and a quater inch from end of BOLT (Tie rod LOCKNUT)to ends of threads..I hope they don't fall out as I don't think there are many threads holding it..I'd say maybe 5 or so...
.So I hope I am driving safe..At any rate, I am also hoping the steering wheel is of a quater turn like you said. It has a nut holding it..I am trusting there are no airbAGS ON A 92 EXCEL! and YES, IT DOES NEED A PULLER AS YOU SAID AS IT IS SPLINED.
Excuse my caps..as for th ewinodw regulator, the cables did not break , but the handle stripped out . I got another regulator on amazon for only $6 and 6 to ship, but it wasn't for a hatchback, so the holes didn't line up; thus I knew it was three wrong one. The price was right, though! You know how us woman are..lol
Okay, I will fill you in as to wether my tie rod ends come flying off..so far I am alive and well..not to joke, but I'll let you know how the rest goes..
thanks, again.
Jun 17, 2012 at 3:45 PM
Avatar
KHLOW2008
  • CERTIFIED EXPERT
  • 41,814 POSTS
For removing the steering wheel, it might not be necessary to use a puller.

Loosen the holding nut and back it off 1 thread or more away from base. Hold either side of the steering wheel and rock it forward and backwards. Do not use excessive force so as to damage the steering. If it does not work, some WD-40 to the splines and banging the steering wheel should loosen it. Use a towel to cover the steering wheel while banging to prevent damage to the steering and your hands.

Unless the steering wheel is very stubborn, if not the above usually works.

Jun 17, 2012 at 4:49 PM
Avatar
CARADIODOC
  • CERTIFIED EXPERT
  • 34,308 POSTS
Do the lock-to-lock procedure to find out if it's the steering wheel that's wrong or the toe adjustments.
Jun 17, 2012 at 7:11 PM
Avatar
HOOKIE
  • MEMBER
  • 95 POSTS
Okay will do..right now it's a bit way too hot here in Florida..but will fill you in asap
thanks, you guys!
Jun 17, 2012 at 7:52 PM
Avatar
HOOKIE
  • MEMBER
  • 95 POSTS
okay guys..everything okay now ..my one question is, BOth inner tie rods (from end of nut )including threaded area= on eand a quater inch ..I hope they don't fall out. These are new inner tie rods..I triple checked the part # and they are supposedly the correct item for the 92 Hyundai Excel. The alignment with the camber bolts sounded a bit shady, but steers much better.
Now, second question, on my mom's 1998 KIA SPORTAGE, we had a check engine lite code (DOWNSTREAM 02 SENSOR BAD)..replaced it, then next day another check engine lite came on..was A BAD UPSTREAM (LOW VOLTAGE 02 SENSOR)..when you replce the downstream one, does it affest the UPSTREAM ONE? This was after mechanic installed new timing belt with tensioner and pulley.
thanks
GH
Jul 11, 2012 at 1:58 PM
Avatar
CARADIODOC
  • CERTIFIED EXPERT
  • 34,308 POSTS
The two should not be related. First be aware the fault codes never say a part is bad or to replace it. That's only true about half of the time. Codes only tell you the circuit or system that needs further diagnosis. Corroded connector terminals and a wiring harness that fell down onto hot exhaust parts and shorted together are also real common.

A perfect air / fuel mixture is ideal for least emissions but that would give the catalytic converter nothing to do AND no way to do it when the mixture isn't perfect. Instead, the computer commands a too lean mixture, then a too rich mixture a couple of times per second, then watches to see how the upstream oxygen sensor responds. When the exhaust is too lean, extra oxygen is stored in the catalytic converter. When it's too rich, the extra fuel mixes with that stored oxygen and is burned.

When the catalytic converter is working correctly, the exhaust leaving it will be a little lean for quite a while, then it will go rich for a long time. The switching rate will be very slow. When the converter loses its efficiency and makes no change in the composition of the gases, the readings from the downstream sensor will look the same as those of the upstream sensor since both are measuring the same thing. That's how the computer knows the converter isn't working, and it will set the appropriate code.

It is odd to have both oxygen sensors fail at nearly the same time but when they do they will usually not both set a code at exactly the same time unless it's electrical-related such as a wiring problem. There is always a long list of things that must be met to set a code and some of those things are that certain other codes must not already be set. The computer uses various sensor readings and other known data to compare to each other and figure out when one thing is wrong. If one of those things it compares to has already set a code, it knows it can't use that to compare to other things, so it won't set a code. In this case it knows it can't rely on the upstream O2 sensor readings to compare to the downstream sensor's readings so it won't set a code for the downstream one until after the first problem is fixed. That happens all the time with anti-lock brake systems that have a problem that was ignored long enough for a second problem to develop. By reading the codes, the mechanic only knows about the first problem and provides an estimate for the repair, THEN once the repair is done, a new code pops up that no one knew about and he has to start all over. That can be frustrating for the mechanic and the car owner.
Jul 11, 2012 at 5:26 PM
Avatar
HOOKIE
  • MEMBER
  • 95 POSTS
hi Cardio
thanks once again for all your help and fast response.
I disconnected the battery on the Kia Spotage (1998) and the O2 code cleared. I drove it and it does not come back on again which is a good thing. Maybe the wire was too close to exahust..all okay now.
Another question..The right PASSENGER IDLER ARM bushings are shot..should I replace the bushings ONLY (KIA SELLS THEM 2 red ones), or should I replace the whole IDLER ARM and why i9f so.
I have to seperate it from this balljoint looking thing on the centerlink. I don't know if that part is still ok but how do you pop the idler arm out from its hole (balljoint) w/o ruining the boot on that balljoint..it looks torn already. thanks
Jul 13, 2012 at 8:21 PM
Avatar
CARADIODOC
  • CERTIFIED EXPERT
  • 34,308 POSTS
No idler arm on the rear. That was a part used on old rear-wheel-drive cars and trucks' steering systems many years ago. I suspect you're referring to some kind of "lateral link", lower control arm, or some similar type of suspension part. There's too many designs to memorize and I don't know exactly how your bushings are replaced, but if they just slide out once the arm is unbolted, all you need is new bushings. In that case they might offer the entire arm because it is a new design with a pressed-in bushing, or it could be an answer to the hole wearing larger so the metal arm needs to commonly be replaced.

In a different design the bushings are pressed-in. You typically need a shop press to put the new ones in and a bushing removal tool to get the old ones out. For that type some aftermarket suppliers may offer the new arm, (especially when it isn't a very expensive part), with the new bushings already pressed in.

Either way, whether you press 'em in or just buy a new arm with them in already, if that is part of the suspension you can install it with the car on a hoist or on jack stands, but you must not TIGHTEN the bolts and nuts. When the car is raised up the suspension is drooping. If you tighten the bolts, then let the car down, you will put that new bushing into a permanent twist which will severely shorten its life. Many mechanics drive the car around in the parking lot to settle the suspension after it has been drooping, then they crawl underneath or drive onto a drive-on hoist, then tighten the nuts while the suspension is at rest.

When you're trying to remove a tapered stud from the mating hole, a pickle fork and hammer or air hammer are the tools of choice if the part and the boot will be discarded. Most of the time the part can be reused but typically the dust boot gets crushed in two areas, and the fork puts pressure between the ball and socket. A lot of these parts have nylon inserts that can be crushed or deformed from that pressure.

Another method is to hit the end of the stud with a hammer. Some have a small hex on the end so you will not damage the threads as long as you don't wail on it too long and hard. You might be able to find a different nut to run on just part way, then bang on that. Castle nuts are almost always ruined from hitting them. You can install them upside down, then hit them but again too much pounding is not a good idea if that nut is going to be reused.

My preferred method is striking the side of the casting the tapered stud goes into. It usually only takes a few blows to explain what you expect those parts to do. Be sure to completely remove the nut first so the tight friction fit holds the stud from turning when you try to unscrew the nut. The nuts usually will not come off with your fingers. You'll need a wrench or socket, but if you already broke the taper free, there's no way to hold the stud. Then you have to resort to a cutting torch, grinder, or cutoff air tool.

Use a torque wrench when tightening those nuts, then if you need to insert a cotter pin through a castle nut and a hole in the stud, and the slots in the nut don't line up, always go tighter until the next slots line up with the hole. Never loosen the nut to get the cotter pin in.

Be aware too that no two bushings, arms, or other dimensional parts are ever exactly the same so when you're done the car will have to be aligned again.
Jul 16, 2012 at 3:24 AM