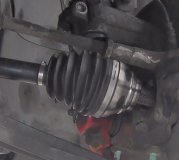
Here are the procedures.
REMOVAL & INSTALLATION
REMOVAL
CAUTION:Vehicle weight must not be allowed to rest on wheel bearings and hub, WITHOUT axle shaft installed and axle shaft nut tightened to specification.
1. Apply parking brake. Remove front wheel cap and cotter pin. Loosen castle nut and wheel nuts. Raise and support vehicle. Remove front tires and wheels. Remove brake caliper assembly from brake disc. Remove disc brake cover. Remove disc brake assembly. Drive out spring connecting axle shaft to differential and discard.
2. Disconnect tie rod end from linkage using a puller. Remove bolt retaining housing to strut. Remove ball joint of transverse link from housing. Remove housing and axle shaft assembly as a unit. Remove housing from axle shaft by using Puller (922493000 or 926470000 ) and Adapter (921122000 ). See Fig. 2.
3.
INSTALLATION
1. To install, reverse removal procedure and note the following: install a new side retainer ring (if equipped). Check seals at both ends of axle shaft and replace prior to installation if necessary. Lubricate transaxle seal lip with transaxle oil.
NOTE:
Always install new spring pin, cotter pint, washer and suspension retaining nuts.
2. Install axle shaft into transaxle case. Install NEW spring pin. See
Fig. 5. On all models with snap ring retained axle shafts, try to pull axle shaft out of differential by hand to ensure proper engagement of snap ring. Install axle shafts into wheel hub. Align suspension marks if made at removal and tighten retaining nuts. See the TORQUE SPECIFICATIONS.
3. Check camber setting and adjust if necessary. Stake axle shaft nut in place with a punch or install new cotter pin after tightening. Bleed brake system and replace transaxle fluid, (if required).
Images (Click to make bigger)
Friday, May 20th, 2011 AT 1:25 PM


