Auxiliaries belt / belt tensioner, replacing
Note! As the illustrations in this service information are used for different model years and / or models, some variation may occur. However, the essential information in the illustrations is always correct.
Removing the auxiliaries belt

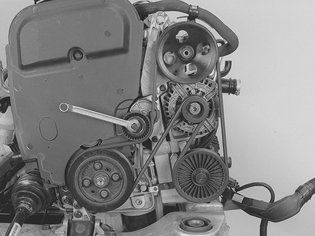
Use a wrench and turn clockwise as far as possible to relieve the load on the belt
Remove the belt.
Replacing the belt tensioner

Remove both the screws for the belt tensioner mounting from the auxiliaries belt bracket
Remove the tensioner
Install the new belt tensioner.
Tighten to 25 Nm .
Installing the auxiliaries belt

Use a wrench and turn the belt tensioner clockwise as far as possible.
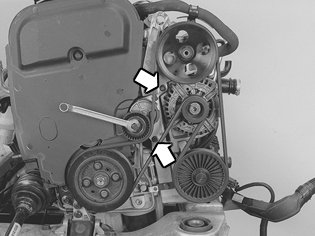
Install the belt in the following order:
1. Crankshaft
2. Generator (GEN)
3. A/C compressor. Idler pulley
4. Power steering pump
5. Belt tensioner.
Wipe clean.
Finishing
Carry out a function test:
Start the engine.
Check the rotation of the belt and the function of the belt tensioner.
Wipe the steering wheel and gear selector lever clean.
https://www.2carpros.com/kpages/auto_repair_manuals_alldata.htm
SPONSORED LINKS
Saturday, September 11th, 2010 AT 10:10 PM


