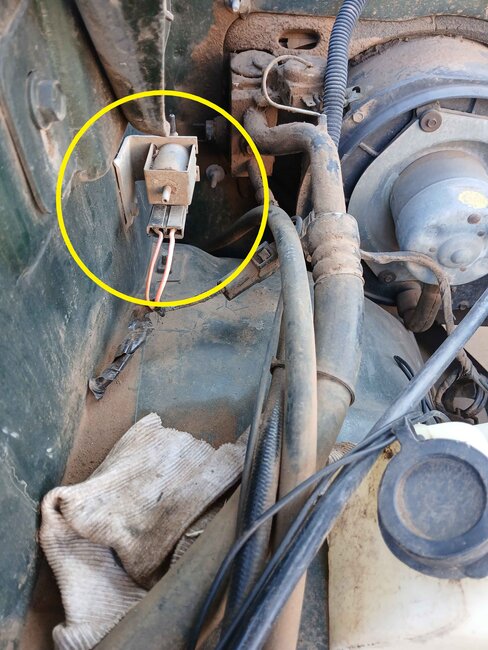
What you circled is a vacuum switch, but I don't remember for what or when it turns on and off. See if you have a vacuum hose diagram on the emissions sticker under the hood or on top of the radiator shroud.
The choke is opened two ways. The primary method is with the heat-riser valve in the right exhaust manifold. That closes with a coiled thermostatic spring, to block exhaust gas flow on that side. That forces the gas to flow through a port in the cylinder head, through a passage in the intake manifold that runs under the base of the carburetor, then out a matching passage through the left cylinder head, and out the left exhaust manifold.
As the hot exhaust gas flows through the intake manifold passage, it warms the base of the carburetor to prevent icing, and it flows right under the thermostatic spring for the choke. On older engines from the 1960s, and perhaps newer, if you remove the thermostatic spring, there was a stainless steel insert, or cup, that you could lift out, then you could see right into that passage. There was a huge advantage to that because it was common for that passage to become blocked with carbon. The symptom was the engine would start up just fine, but after about two or three minutes, it ran grossly flooded from the choke remaining closed. The blockage always occurred right in that area so it was easy to chip out without disassembling the intake manifold. On newer models, there is no insert to lift out. The manifold is cast without that opening, and there's no insert needed. To clear those, you do have to remove the intake manifold.
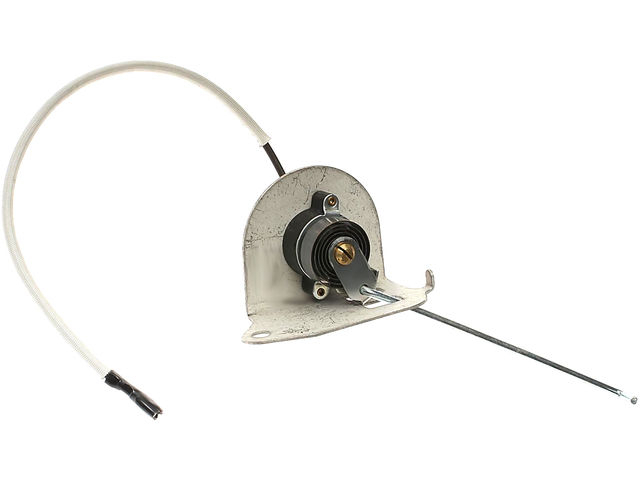
The second method of opening the choke is that electric heater you're asking about. Those insured the choke would open even if the exhaust passage became blocked. There was more to the story. Around the mid 1980s, our wondrous elected officials decided they wanted the chokes to be fully open within three minutes of starting, regardless what the outside temperature was. That resulted in a lot of vehicles that wouldn't run right until you'd sit on the side of the road, idling for a few minutes and wasting gas, until the engine fully warmed up. (My cousin had one of those for his tv repair business). Unplugging the electric choke heater made an improvement, but it still didn't fully solve the miserable running problem.
That choke heater does get connected to switched 12 volts. On all car models from the 1970s and 80s, that was a dark blue wire under the hood. The fed the ignition system, alternator field, voltage regulator, choke heater, and a number of other items. Often on truck models you'll find that function under the hood is a red wire instead of dark blue. Look at the two-wire triangular plug for the voltage regulator. The control wire is green. The other one, red or blue, is the color of everything switched under the hood.
You may also find a flat white box, roughly an inch wide by about an inch and half long, right next to the choke linkage going to that thermostatic spring. That, as I recall, was a thermostatic switch that turned the choke heater off when it wasn't needed. The red or blue wire goes to that, then the second terminal goes to the choke heater element.
The easiest way to test the choke heater is to just apply 12 volts to the terminal with a small jumper wire. You'll see the choke blade gradually open within about three minutes. You may need to open the throttle a little to let the choke blade snap closed first. That also puts it on the fast idle step on the cam on the driver's side. Once the choke opens, work the throttle a little by hand again to allow the fast idle cam to drop down to its normal, or "curb" idle position.
To check the exhaust passage for proper operation, feel the casting around the thermostatic spring right after starting the engine. It should get warm pretty quickly. Don't touch that later as it gets hot enough to burn your fingers.
If that area doesn't get hot, carbon blockage is much less common today due to better additives in the gas. The better suspect is a rusted heat riser valve. There is a large cast iron disc, or on some models, a rectangular weight about half the size of a Milky Way candy bar, that you should be able to rotate. Here too, don't grab that when the engine is hot. There were repair kits for those because they often wore on the shaft and would rattle rather loudly. The other common problem was for them to rust tight and not close when needed. Chrysler developed their "Rust Penetrant" for that purpose. It is a very effective penetrating oil that you can get from the dealer's parts department. It goes on black and sizzles, but you should wash it off after it has done its job. I used to use it on steering and alignment adjustments on cars I saw every year, in an attempt to keep those adjustments freed up. What I found is it does free them up, but then later, it opens the way for moisture to get in and rust the parts even more. Greases are the best choice for those applications. On a heat riser valve, the Rust Penetrant might be burned off, but I'd prefer to wash it off if possible.
I found these diagrams to help with figuring this out. The first one is a sad drawing of the hose layout. The second is for the 49-state version. Third is for the California version. Next is the PCV system, and the last is for the heating and AC controls.
Images (Click to enlarge)
Feb 22, 2025 at 4:10 PM