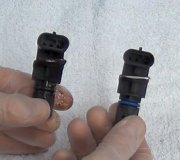
Yep, it needs replaced. It should be between 50 and 60 psi. The fuel tank needs removed to replace it. Here are directions for tank removal and replacement and pump replacement. All attached pics correlate with the directions.
_________________________________
2004 Chevrolet Classic L4-2.2L VIN F
Fuel Tank Replacement
Vehicle Powertrain Management Fuel Delivery and Air Induction Fuel Tank Service and Repair Removal and Replacement Fuel Tank Replacement
FUEL TANK REPLACEMENT
FUEL TANK REPLACEMENT
REMOVAL PROCEDURE
1. Relieve the fuel system pressure. Refer to Fuel Pressure Relief Procedure.
2. Drain the fuel tank. Refer to Fuel Tank Draining Procedure.
3. Raise the vehicle. Refer to Vehicle Lifting.
Pic 1
4. Disconnect the quick-connect fitting at the fuel filter.
5. Disconnect the fuel return pipe quick connect fitting.
6. Remove the rubber exhaust hangers. Allow the exhaust system to rest on the rear axle.
7. Remove the exhaust heat shield.
8. Loosen the fuel filler hose clamp at the fuel tank.
9. Disconnect the fuel filler hose from the fuel tank.
10. Disconnect the evaporative emission (EVAP) vapor pipe from the EVAP canister.
11. Disconnect the electrical harness from the multi-way rear body connector and fuel strap.
Pic 2
12. With the aid of an assistant, support the fuel tank (1).
13. Disconnect the fuel tank retaining straps.
14. Lower the fuel tank.
15. Remove the fuel sender assembly from the tank.
INSTALLATION PROCEDURE
pic 3
1. Install the fuel sender assembly to the fuel tank.
2. With the aid of an assistant, raise the fuel tank (1) to the vehicle.
NOTE: Refer to Fastener Notice in Service Precautions.
3. Install the fuel tank retaining straps.
Tighten the strap bolts to 35 N.M (26 lb ft).
4. Connect the wiring harness into the multi-way rear body connector.
5. Connect the EVAP vapor pipe to the EVAP canister.
6. Connect the fuel filler hose to the fuel tank.
Tighten the fuel filler hose clamp to 3 N.M (27 lb in).
7. Install the rubber exhaust hangers.
8. Install the exhaust heat shield.
- Tighten the exhaust shield bolt to 2 N.M (18 lb in).
- Tighten the exhaust shield nuts to 1 N.M (9 lb in).
9. Connect the fuel return pipe and fuel filter quick-connect fittings.
10. Lower the vehicle.
11. Refill the fuel tank.
12. Install the fuel filler cap.
13. Connect the negative battery cable.
14. Inspect for fuel leaks using the following procedure:
1. Turn ON the ignition, with the engine OFF for 2 seconds.
2. Turn OFF the ignition for 10 seconds.
3. Turn ON the ignition, with the engine OFF.
4. Inspect for fuel leaks.
___________________________________________
Fuel pump module
2004 Chevrolet Classic L4-2.2L VIN F
Fuel Sender Assembly Replacement
Vehicle Powertrain Management Fuel Delivery and Air Induction Fuel Tank Unit Service and Repair Procedures Fuel Sender Assembly Replacement
FUEL SENDER ASSEMBLY REPLACEMENT
FUEL SENDER ASSEMBLY REPLACEMENT
TOOLS REQUIRED
J 39765 Fuel Sender Lock Nut Wrench
REMOVAL PROCEDURE
CAUTION: In order to reduce the risk of fire and personal injury that may result from a fuel leak, always replace the fuel sender gasket when reinstalling the fuel sender assembly.
Pic 4
1. Remove the fuel tank (4).
2. Disconnect the wiring harness from the fuel sender and the fuel tank pressure (FTP) sensor.
IMPORTANT:
- The modular fuel sender assembly may spring up.
- When removing the modular fuel sender assembly from the fuel tank, be aware that the reservoir bucket is full of fuel. The reservoir must be tipped slightly during removal to avoid damage to the float.
- Carefully discard the reservoir fuel into an approved container.
3. Use the J 39765 in order to press down and rotate the retaining ring (1).
4. Remove the fuel sender assembly.
5. Remove the fuel level sensor from the fuel sender assembly.
INSTALLATION PROCEDURE
pic 5
1. Install the fuel level sensor to the fuel sender assembly.
2. Install the new seal on the fuel tank (4).
3. Align the fuel pipes parallel with the mark on the fuel tank.
4. Slowly apply pressure to the top of the spring loaded sender until the sender aligns flush with the retainer on tank.
IMPORTANT: Be sure that the retaining ring is fully seated within the tab slots.
5. Install the retaining ring (1) using the J 39765.
6. Connect the wiring harness to the fuel sender and the FTP sensor.
7. Install the fuel tank.
__________________________________
I hope this helps.
Images (Click to make bigger)
Wednesday, May 27th, 2020 AT 8:51 PM


