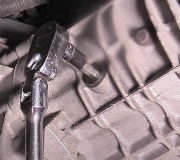
Yep, something must be broken inside, sorry. Here is how to remove the transmission so you can have it rebuilt:
1. Disconnect battery ground cable.
2. Remove air cleaner assembly, then disconnect TV cable at its upper end.
3. Raise and support vehicle.
4. Raise, then support transmission and transfer case, if equipped.
5. Drain fluid from transmission, then disconnect shift linkage assembly.
6. Disconnect propeller shaft from transmission, then remove front driveshaft from transfer case, if equipped.
7. Remove catalytic converter support bracket.
8. Remove transmission crossmember attaching bolts, then the crossmember.
9. Lower transmission enough to reach other components. When lowering transmission to gain access to other components, do not stretch or damage any cables, wires or other components.
10. Remove dipstick tube and seal. Cover transmission dipstick bore to prevent dirt from entering
11. Disconnect speedometer cable from transmission.
12. Disconnect vacuum modulator line from transmission, if equipped.
13. Label, then disconnect all electrical connectors from transmission assembly.
14. Disconnect, then cap transmission fluid cooler lines.
15. Remove transfer case shifter and position aside, if equipped.
16. Remove damper and support, if equipped.
17. Note location of transmission support braces, then remove braces. Support braces must be installed in their original locations.
18. Remove torque converter housing cover attaching bolts, then the cover.
19. Using a piece of chalk or equivalent, mark flywheel and torque converter from assembly alignment.
20. Support engine assembly using a suitable jack.
21. Remove flywheel to torque converter attaching bolts.
22. Remove transmission bellhousing to engine block attaching bolts. Note positions of any brackets or clips for assembly.
23. Slowly and carefully slide transmission assembly rearward, off locating pins, then install torque converter holding fixture tool No. J-21366 or equivalent.
24. Reverse procedure to install.
This guide can help you as well
https://www.2carpros.com/articles/how-to-remove-an-automatic-transmission-rwd
Let us know if you need anything else.
Saturday, August 24th, 2024 AT 10:19 AM


