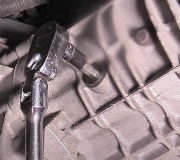
Start by disconnecting the battery and putting the car up on jack stands.
https://www.2carpros.com/articles/jack-up-and-lift-your-car-safely
This guide will give you an idea of what you are in fro when doing the job.
https://www.2carpros.com/articles/transmission-replacement-removal-manual
Here are the instructions
Removal
NOTE: Completely clean all transmission components, including torque converter, cooler, cooler lines, main control valve body, all clutches and all check balls after any transmission servicing that may generate contamination. Contaminants are a major cause for recurring transmission troubles and must be removed from the system before the transmission is put back into service. In addition, the cleaning of debris from the direct clutch check ball is often omitted. This omission can lead to a repeat servicing of the transmission. Cleaning and flushing procedures for check ball can be found in this section.
NOTE: Do not soak oil filter in solvent cleaner. The filter material could disintegrate. Replace filter if transmission fluid is contaminated.
Disconnect the battery ground cable.
Raise the vehicle on a hoist and support with suitable safety stands.
Place a drain pan under the transmission fluid pan. Starting at the rear of the transmission fluid pan and working toward the front, loosen the bolts and allow the fluid to drain. Then remove all of the pan bolts except two at the front, to allow the fluid to drain further. With fluid drained, install two bolts on the rear side of the pan to temporarily hold the transmission fluid pan in place.
Remove the four heated oxygen sensors (HO2S).
Disconnect the transmission range (TR) sensor electrical connector.
Loosen the 16-pin transmission electrical connector screw and disconnect the electrical connector.
NOTE: To maintain initial driveshaft balance, mark the rear driveshaft yoke and axle companion flange so they may be installed in their original positions.
Remove the four bolts connecting the driveshaft to the rear axle and slide shaft rearward from the transmission.
Install a seal installation tool in the extension housing to prevent fluid leakage.
Remove the bolt and nut securing the transmission shift cable and bracket to the transmission and secure the transmission shift cable and bracket out of the way.
Disconnect the cable from the terminal on the starter motor. Remove the two bolts and remove the starter motor.
NOTE: Place a wrench on the crankshaft pulley bolt to turn the converter to gain access to the nuts.
Remove the four converter nuts through the starter motor hole.
Remove the two nuts attaching the extension housing insulator to the transmission support cross member.
Raise the transmission with a transmission jack to provide clearance to remove the cross member.
Remove the four bolts and nuts securing the transmission support cross member to the side supports.
Remove the two through bolts and nuts securing the transmission support crossmember to the side supports and remove the transmission support crossmember.
Remove the two bolts attaching the extension housing insulator to the extension housing and remove the insulator.
Remove two screws attaching heat shield to passenger side of transmission. Remove heat shield from transmission.
Remove four bolts and nuts connecting LH and RH exhaust inlet pipes to dual three way catalytic converter and remove gaskets.
Remove four bolts connecting LH and RH exhaust inlet pipes to exhaust manifolds. Remove LH and RH exhaust inlet pipes.
Disconnect two transmission cooler lines from transmission.
Remove the bolt holding the transmission fluid filler tube to the converter housing and remove the filler tube and the dipstick.
Secure the transmission to the jack with a strap.
Remove the five remaining converter housing bolts securing the converter housing to the cylinder block.
Carefully move the transmission and converter assembly away from the engine and, at the same time, lower the jack to clear the underside of the vehicle.
Remove the torque converter and mount the transmission in a suitable holding fixture.
Let us know what happens and please upload pictures or videos of the problem.
Cheers, Ken
Wednesday, February 7th, 2018 AT 4:00 PM


