Open the vehicle's hood and secure it in an upright position.
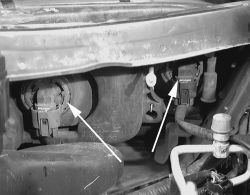
Unfasten the locking ring which secures the bulb and socket assembly, then withdraw the assembly rearward.
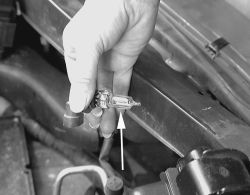
If necessary, gently pry the socket's retaining clip over the projection on the bulb (use care not to break the clip.) Pull the bulb from the socket.


To install:
Before installing a light bulb into the socket, ensure that all electrical contact surfaces are free of corrosion or dirt.
Line up the replacement headlight bulb with the socket. Firmly push the bulb onto the socket until the spring clip latches over the bulb's projection.
WARNING
Do not touch the glass bulb with your fingers. Oil from your fingers can severely shorten the life of the bulb. If necessary, wipe off any dirt or oil from the bulb with rubbing alcohol before completing installation.
To ensure that the replacement bulb functions properly, activate the applicable switch to illuminate the bulb which was just replaced. (If this is a combination low and high beam bulb, be sure to check both intensities.) If the replacement light bulb does not illuminate, either it too is faulty or there is a problem in the bulb circuit or switch. Correct if necessary.
Position the headlight bulb and secure it with the locking ring.
Close the vehicle's hood.
Saturday, June 26th, 2010 AT 1:23 AM

