Hi,
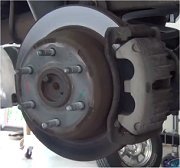
Replacing front brake pads and rotors isn't too hard to do. Since they usually last around 30,000 miles, you can get lifetime parts and never have to pay for parts again.
Let's get started. First, here is a link that shows in general how it's done. You can use this as a guide when working on your vehicle:
https://www.2carpros.com/articles/how-to-replace-rear-brake-pads-and-rotors
Here are the directions specific to your vehicle. The pics below correlate with the directions.
__________________________________________
2002 Subaru Forester L F4-2.5L SOHC
Rear
Vehicle Brakes and Traction Control Disc Brake System Brake Pad Service and Repair Procedures Rear
REAR
REMOVAL
1. Loosen wheel nuts, jack-up vehicle, support it with safety stands, and remove wheel.
pic 1
2. Remove the bolt on the bottom.
3. Raise caliper body and suspend it securely.
NOTE: Do not disconnect the brake hose from the caliper body.
pic 2
4. Remove pad from support.
NOTE: If brake pad is difficult to remove, use the same procedure as for front disc brake pad.
INSTALLATION
1. Apply thin coat of Molykote AS880N (Part No. 26298AC000) to the frictional portion between pad and pad clip.
CAUTION: Do not allow oil or grease to adhere to the sliding surface of pad and disc rotor.
2. Check disc rotor thickness and runout.
3. Install pad on support.
4. Install caliper body on support.
Tightening torque: 38 Nm (3.9 kgf-m, 28 ft. lbs.)
NOTE: If it is difficult to push piston during pad replacement, loosen air bleeder to facilitate work.
5. Depress brake pedal several times.
6. Check that brake fluid level is at max line.
___________________
Rotor Replacement
2002 Subaru Forester L F4-2.5L SOHC
Rear
Vehicle Brakes and Traction Control Disc Brake System Brake Rotor/Disc Service and Repair Procedures Rear
REAR
The content of this article/image reflects the changes Identified in
TSB # 18-101-06
as of 02/13/2006
and applies to 2002 Legacy, Forester & Impreza Models
REMOVAL
1. Disconnect ground cable from battery.
2. Loosen wheel nuts, jack-up vehicle, support it with safety stands, and remove wheel.
pic 3
3. Remove the two mounting bolts and remove the disc brake assembly.
4. Suspend the disc brake assembly so that the hose is not stretched.
5. Pull down and release parking brake.
6. Remove the disc rotor.
NOTE: If the disc rotor is difficult to remove try the following two methods in order.
pic 4
1. Turn adjusting screw using a slot-type screwdriver until brake shoe gets away enough from the disc rotor.
pic 5
2. If disc rotor seizes up within hub, drive disc rotor out by installing an 8-mm bolt in holes B on the rotor.
INSTALLATION
1. Install in the reverse order of removal.
2. Adjust parking brake.
_____________________
I hope this helps. Let me know if you have other questions.
Take care and God Bless,
Joe
Images (Click to make bigger)
Friday, February 26th, 2021 AT 10:33 PM


