Welcome to 2CarPros.
The master cylinder is bad. You hear air from the power brake booster. However, if the pedal will go slowly to the floor, brake fluid is bypassing the plungers in the master cylinder and allowing it to happen. It's not uncommon.
_____________________________________
Take a look through this link:
https://www.2carpros.com/articles/brake-pedal-goes-to-the-floor
I feel confident if there are no leaks and the fluid is full, the master cylinder needs replaced. Here is a link that shows in general how it is done:
https://www.2carpros.com/articles/how-to-replace-a-brake-master-cylinder
____________________________
Here are some specifics for your vehicle:
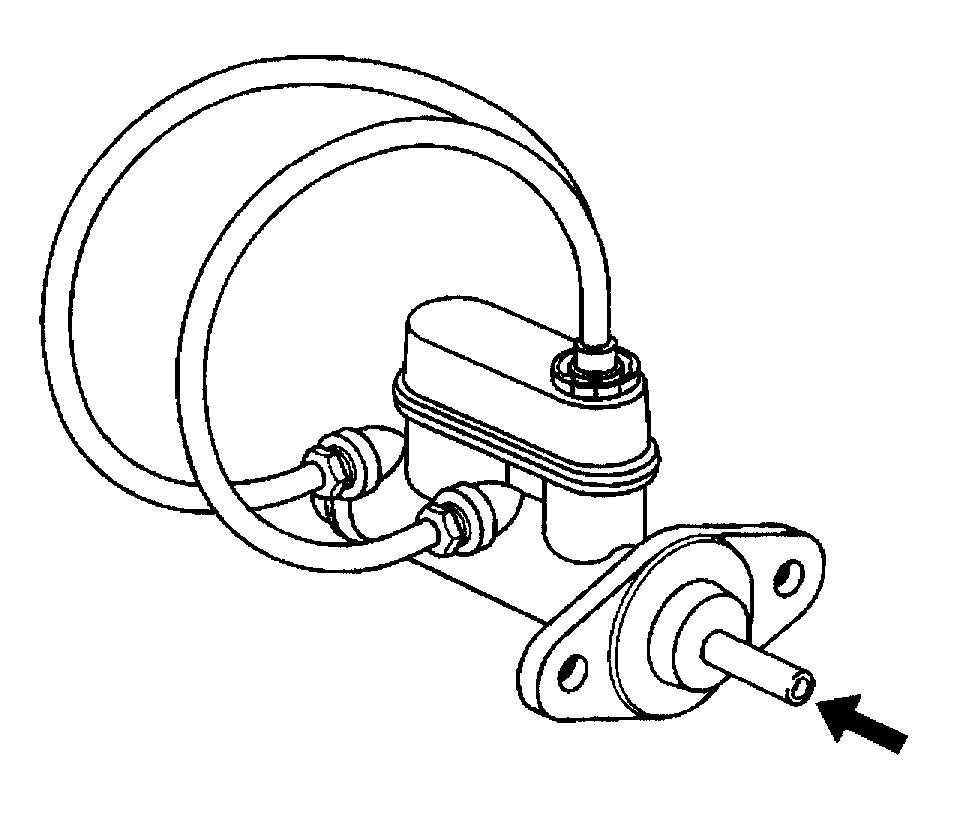
Bench bleeding (picture 1)
1. Plug all the ports with suitable fittings which cannot damage the pipe seats.
2. Run hoses from the fittings back into the reservoir.
3. Hold the master cylinder securely by the mounting flange so as not to cause any distortion and to enable the pistons to be stroked.
4. Fill the reservoir with new brake fluid.
5. Open the secondary port to the atmosphere and depress the pistons to fully bottom out the master cylinder. To depress the pistons use a rod with a blunt end which will not damage the pushrod location on the primary piston, or cause contamination in the master cylinder bore.
6. Close the secondary port and return the pistons to their released position.
7. Repeat Steps 4 and 5 until fluid flows freely from the port until there is no evidence of air bubbles.
8. Repeat Steps 4, 5 and 6 using the primary port.
9. With the ports plugged, stroke the pistons. A solid feel should be evident with a piston travel of approximately 4 mm (0.157 inch).
10. If the above piston travel is excessive, repeat the bleeding operation steps 4, 5, 6 and 7; then recheck the piston travel.
_________________________
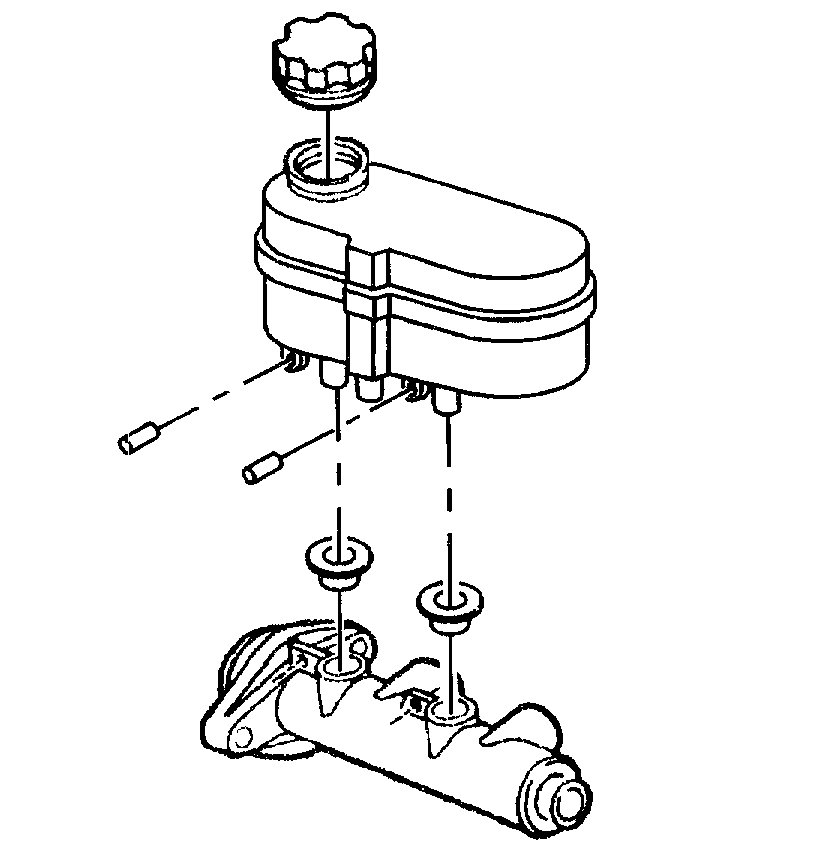
Often times when you purchase a new MC, you have to reuse the old reservoir. Here are the directions for removal and replacement. See attached pics.
MASTER CYLINDER RESERVOIR REPLACEMENT
REMOVAL PROCEDURE
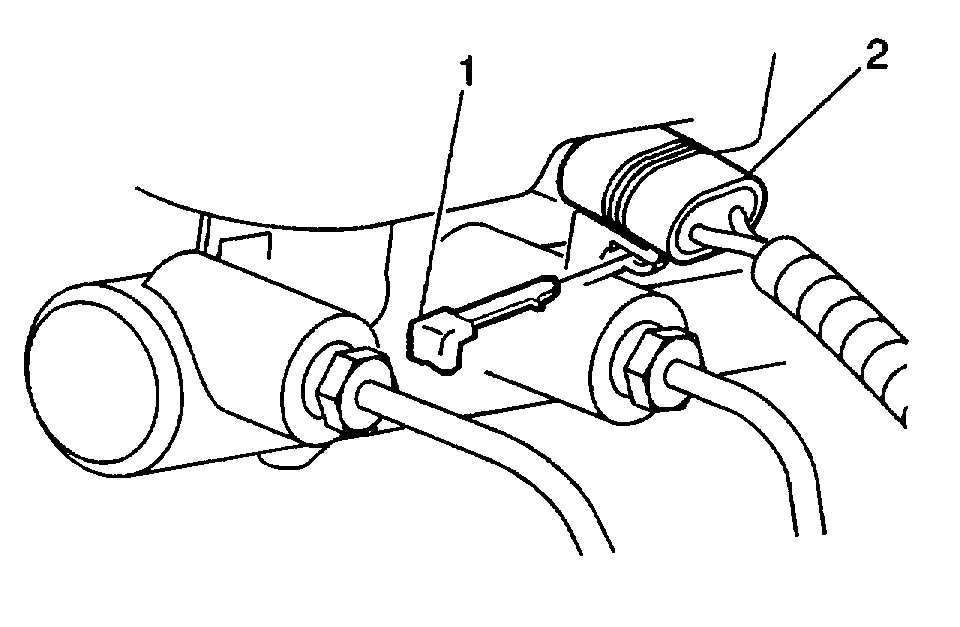
pic 2
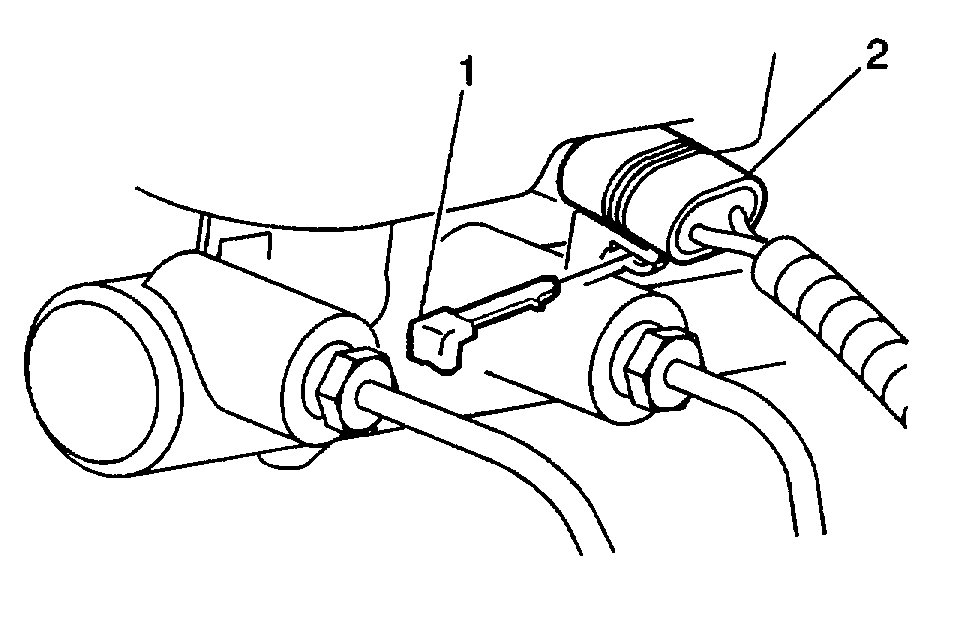
1. Remove the retainer (1) and the electrical connector (2) from the fluid level sensor.
2. Drain the brake fluid from the master cylinder reservoir.
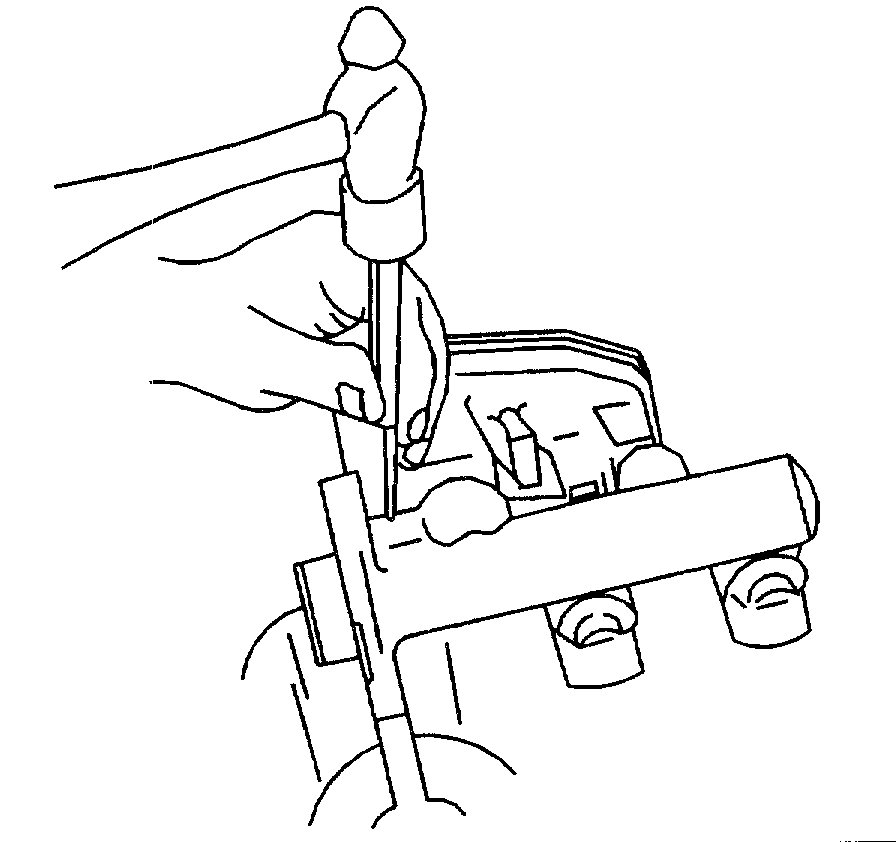
pic 3
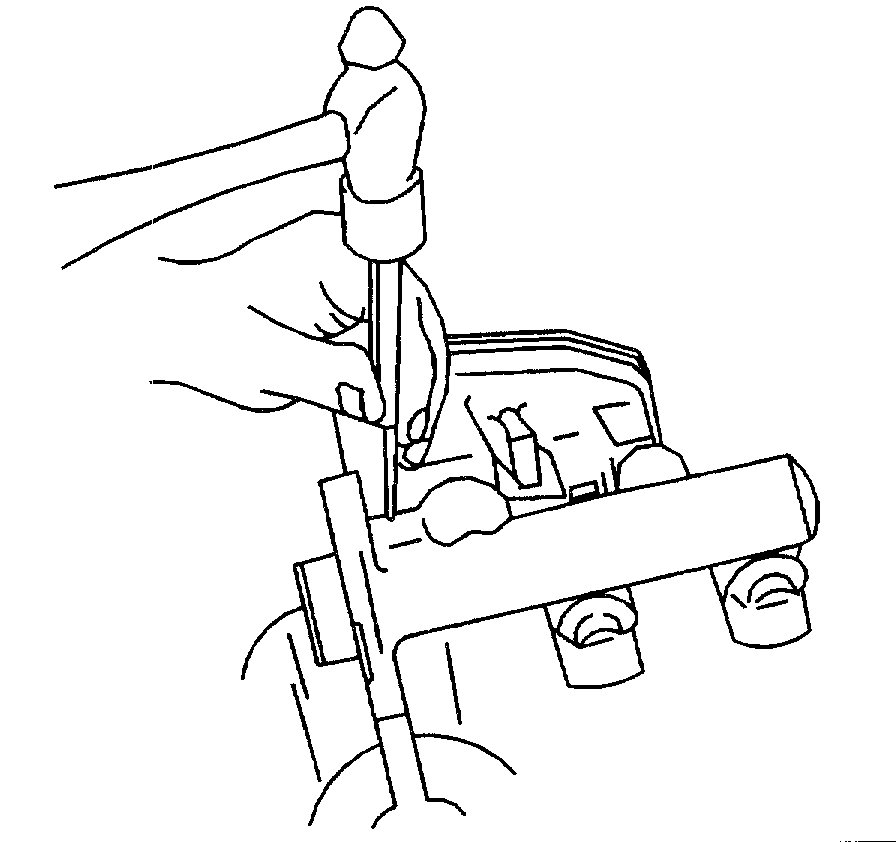
3. Tap back the pins until clear of reservoir. Be careful not to damage the reservoir or master cylinder. If needed, loosen or remove the strut cross bar for access.
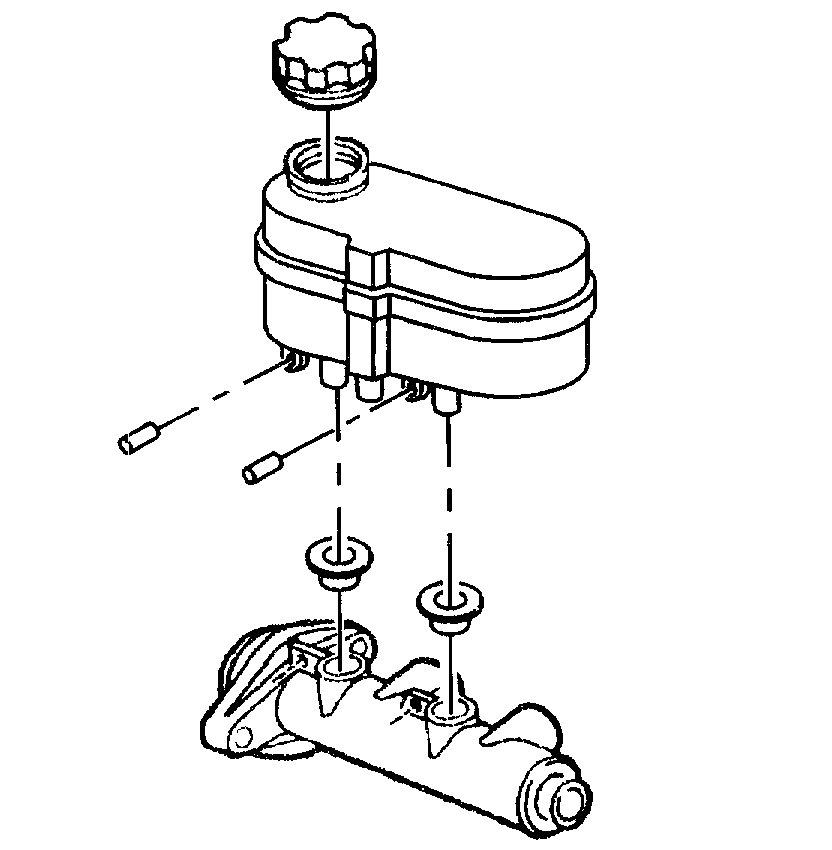
pic 4
4. Remove the reservoir.
5. Remove the seals.
6. Inspect the reservoir for cracks or deformities. If found, replace the reservoir.
7. Clean the reservoir with clean denatured alcohol and dry the reservoir with Unlubricated compressed air.
INSTALLATION PROCEDURE
1. Lubricate the new seals and the reservoir bayonets with clean brake fluid.
pic 5
2. Install the seals, making sure they are fully seated.
3. Install the reservoir onto the master cylinder by pressing straight down by hand until pin holes are aligned.
pic 6
4. Tap in pins to retain reservoir. Be careful not to damage the reservoir or master cylinder. If strut cross bar had been loosened or removed, reinstall.
5. Fill the master cylinder reservoir to full level mark using only Delco(R) Supreme 11 Brake fluid, or equivalent DOT 3 brake fluid, as specified.
pic 7
6. Install the electrical connector (2) to fluid sensor, and secure with the retainer (1).
7. Bleed the hydraulic system. Refer to Hydraulic Brake System Bleeding.
________________________________
Let me know if this helps or if you need anything.
Take care,
Joe
Images (Click to make bigger)
Wednesday, July 31st, 2019 AT 8:00 PM
