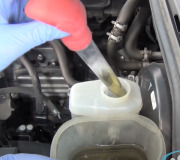
I'm not familiar with your brand, but I see you've been waiting a while for a reply. A few of your comments caught my attention. First of all, please do not even refer to brake fluid as "oil" because I don't want to take the slightest chance of causing a misunderstanding. The rubber parts that contact brake fluid are absolutely not compatible with any petroleum products, including engine oil, transmission fluid, power steering fluid, penetrating oil, axle grease, or gear lube. Every year I did a demonstration for my students where I put fresh, clean brake fluid into two beakers with a rubber wheel cylinder lip seal in each one. In one of them I added a single drop of power steering fluid or engine oil, then let both of them sit for a week. One week later the contaminated seal had grown from about an inch in diameter to about 1 1/8", and it was soft and mushy. That is what happens in a car with contaminated fluid. The first hint is usually the lip seals in the master cylinder grow past the fluid return ports and block them. That prevents the fluid from releasing back to the reservoir, so it keeps the brakes applied. As the dragging brakes heat up, the brake fluid does too, and it expands. Since it still can't release, it applies the brakes even harder, often until the car won't move. An additional clue is if you try to push the brake pedal, it will be too high and hard. The next clue, once you start looking further, is the rubber bladder seal under the reservoir's cap will be blown up and mushy, and you won't be able to stuff it back into place.
It is critical you understand that the only acceptable repair for contaminated brake fluid is to remove every single part that contains rubber parts that contact the brake fluid, flush and dry all the steel lines, then install all new parts that have rubber in them. That includes the calipers, wheel cylinders, rubber flex hoses, master cylinder, ABS hydraulic controller for vehicles with ABS, or the combination valve and / or height-sensing proportioning valve. The cost of this repair can easily exceed an older car's value. The contamination soaks into every part in the system. If one part is not replaced, the contamination will leach out of it and recontaminate all the new parts. Experienced brake system specialists even wash their hands with soap and water to prevent contaminating parts with fingerprint grease. I know you didn't say you contaminated the system. I feel compelled to point this out for the benefit of others who might read your reference to "oil" while researching their topic.
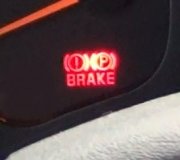
The next thing I noticed was your reference to nothing coming out from part of the hydraulic system. That is a very common mystery on GM front-wheel-drive cars. There are always two parts to the hydraulic system. In the past, one part ran the front brakes and one part ran the rear brakes. Since well over 80 percent of stopping is done by the front brakes on front-wheel-drive cars, since they have a much higher percentage of total weight on the front, if the front brakes failed, the rear brakes would lock up the two rear wheels, and you'd skid and skid, and they'd find you in the next county! Instead, all front-wheel-drive cars now use a "split-diagonal" system where one part of the hydraulic system runs the left front and right rear, and the other part of the system runs the other two wheels. With a failure of one part of the system, you'll still have one working front brake. Some of the non-adjustable suspension geometry has been modified to prevent a horrendous brake pull to one side when one font brake isn't working. On Chrysler products, that alignment geometry has been so well perfected, that the only way to know there is a failure in the hydraulic system is the red warning light turns on. On other brands, at most you will see a very tiny wiggle in the steering wheel as you apply the brakes, ... And that red warning light.
GM went a little further with this design. Imagine a teeter totter inside the master cylinder with a valve on each end. As long as both halves of the hydraulic system have no leaks and are working properly, both will have equal fluid pressure when you press the brake pedal. Those two equal pressures keep that teeter totter balanced and it stays in a neutral position. When you have a leak in half of the system, no pressure can build up in it, but it does in the good half. Those unequal pressures cause the teeter totter to move, and one of the valves blocks the port leading to the half of the system with the leak. By far the most common complaint from car owners is the left front brake pads, for example, are worn out and are being replaced for the third time, while the right front pads still look like new. The complaint from mechanics is they can't get any fluid to flow from the right front or left rear bleeder screws. Both problems are caused by the right front brake never applying because no fluid can get out of the master cylinder from that one port.
Besides that valve closing due to a leak, it will also close when anything causes unequal pressures in the two halves of the system. That includes improper bleeding procedures. All master cylinders will build up crud and corrosion in the lower halves of their bores where the pistons don't normally travel. It is critically important that when you feel you must bleed brakes with a helper, he must never push the pedal over half way to the floor. Doing so runs the rubber lip seals over that crud and can rip them. The symptom usually is a slowly sinking pedal, and that often doesn't show up for two or three days. Instead, I have only used "gravity-bleeding for over 30 years. Most of the time I don't even have a helper around. This damage to the master cylinder can occur too when the driver is suddenly surprised by a leak, like a popped rubber flex hose. If you catch yourself fast enough, you can avoid pushing the pedal too far, but most drivers instinctively push it all the way to the floor. For precisely that reason, many mechanics automatically include a rebuilt master cylinder in the repair estimates, rather than waiting for you to come back angry because you still have a problem after the repairs were completed.
When you do bleed with a helper, if you have a master cylinder like that GM style, as soon as you open a bleeder screw, you lose the pressure in that half of the system, and that valve trips. From then on you won't get any more fluid flow to that wheel and the one diagonally-opposite it. Many mechanics think that can be avoided by bleeding the wheels in a specific sequence, but that is not true. Also, some people diagnose the problem as something wrong in the master cylinder, replace it, then pedal-bleed the system and cause the exact same problem. The solution to this, ... And it is the only solution I have ever found that works every time, ... Is to go to one of the bleeder screws that is not flowing any fluid, open it, and give it a very short, quick burst of compressed air. Leave the cap loose on the reservoir. The goal is not to push the fluid all the way back up to he reservoir. All you need to do is give it a tiny shove to unseat that valve, then let the fluid gravity-bleed. Most of the time, if you do this right, you'll have brake fluid running out of the bleeder screw within less than 15 to 20 seconds.
When you bleed one or all wheels by gravity-bleeding, close each bleeder screw, one at a time when fluid shows up. If none of them flow any fluid after a few minutes, "irritate" the brake pedal by hand a little, just enough to convince the fluid to start flowing. Once it starts, it will siphon out on its own. Once all four wheels are bled this way, push the brake pedal down no further than half way just once. That will wash any remaining bubbles into the calipers and wheel cylinders. Open each bleeder screw, one at a time, for a couple of seconds to burp those last bubbles out, and you're done.
If you need to replace the master cylinder, I can share how I do that so bleeding at the wheels is not necessary. I don't even have to remove the wheels.
For my next comment of value, part of what you described is a common symptom of rear drum brakes that are out of adjustment. The difference is though, you described the problem as being different at different times of the day. A seriously-out-of-adjustment problem acts differently. You will have an unusually-low brake pedal because it takes a lot of fluid to run the rear shoes out all the way until they contact the drums. When you release the pedal, it takes some time for the shoes to slowly retract. If you push the pedal a second time right away before the shoes are fully retracted, it will take less fluid to run them out to the drums, so the pedal won't go down so far. Pump the pedal rapidly two or three times, and the pedal will get nice and high and hard, and it will stay that way as long as you hold pressure on it. As soon as you release it for more than four or five seconds, the shoes will fully retract, and the next time you push the pedal it will be real low again.
This adjustment issue usually occurs when the self adjuster cable or some other part of the adjusting system breaks, and sometimes when the drums are machined excessively and the shoes are not manually adjusted when the brakes are reassembled.
As for the mechanic who says you need a new power booster, if that has failed, the brake pedal will be hard to push, that's all. It has nothing to do with how far the pedal moves, just how easily it moves.
Now that I've posted this wondrous reply, your request will go "off the list", and no one else will see it or have the chance to reply. You and I are the only two who will be in this conversation and get automated e-mails directing us back here. For that reason, if you think I can't be of further help because I'm not familiar with your vehicle, you should post a new question. That will give the other experts a chance to reply. Of course, feel free to ask me followup questions. I've never seen your car brand or model, but I am a brake system specialist.
Monday, November 28th, 2016 AT 9:17 PM


