Welcome to 2CarPros.
The fluid shouldn't have any brownish color to it. It should be a bright reddish pink. The first thing I would suggest is to change both the fluid and the transmission filter. Here are the directions for doing it. The attached pics correlate with the directions.
____________________________________
2004 Jeep Truck Grand Cherokee 4WD L6-4.0L VIN S
Fluid and Filter Replacement
Vehicle Maintenance Filters Fluid Filter - A/T Service and Repair Procedures All RH/RE 30/32/42/44/46/47/48 3 and 4 speed Fluid and Filter Replacement
FLUID AND FILTER REPLACEMENT
STANDARD PROCEDURE - FLUID AND FILTER REPLACEMENT
The service fluid fill after a filter change is approximately 3.8 liters (4.0 quarts).
REMOVAL
1. Hoist and support vehicle on safety stands.
2. Place a large diameter shallow drain pan beneath the transmission pan.
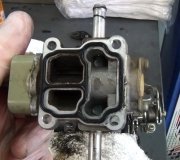
Pic 1
3. Remove bolts holding front and sides of pan to transmission (Fig. 98).
4. Loosen bolts holding rear of pan to transmission.
5. Slowly separate front of pan and gasket away from transmission allowing the fluid to drain into drain pan.
6. Hold up pan and remove remaining bolt holding pan to transmission.
7. While holding pan level, lower pan and gasket away from transmission.
8. Pour remaining fluid in pan into drain pan.
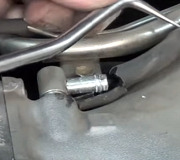
Pic 2
9. Remove screws holding filter to valve body (Fig. 99).
10. Separate filter from valve body and pour fluid in filter into drain pan.
11. Dispose of used trans fluid and filter properly.
INSPECTION
Inspect bottom of pan and magnet for excessive amounts of metal or fiber contamination. A light coating of clutch or band material on the bottom of the pan does not indicate a problem unless accompanied by slipping condition or shift lag. If fluid and pan are contaminated with excessive amounts or debris, refer to Testing and Inspection.
Check the adjustment of the front and rear bands, adjust if necessary.
CLEANING
1. Using a suitable solvent, clean pan and magnet.
INSTALLATION
1. Position a new transmission oil filter onto the valve body
2. Install the screws to hold the filter to the valve body Tighten the screws to 4 Nm (35 inch lbs.).
3. Clean the gasket surfaces of the transmission oil pan and transmission pan rail.
NOTE: The original transmission pan oil gasket is reusable, inspect the sealing surfaces of the gasket. If the sealing ribs on both surfaces appear to be in good condition, clean the gasket of any foreign material and reinstall.
4. Position the oil pan gasket onto the oil pan.
5. Position the oil pan and gasket onto the transmission and install several bolts to hold the pan and gasket to the transmission.
6. Install the remainder of the oil pan bolts.
For OE type reusable pan gasket: tighten the bolts to 13.6 Nm (125 inch lbs.).
For aftermarket pan gasket: tighten the bolts to 17 Nm (150 inch lbs.).
7. Lower vehicle and fill transmission.
___________________________________
That is where I would start. If, however, the check engine light is staying on when the engine is running, you really should have the computer scanned to see if there are any diagnostic trouble codes related to the transmission.
Do this and let me know if it helps.
Joe
Images (Click to make bigger)
Saturday, October 12th, 2019 AT 8:57 PM


