Hi,
When I am checking for play, I place my hands at 3 and 9 o'clock on the tire and wiggle back and forth. With a ball joint, hands need to be at 12 and 6 o'clock or use a pry bar under the tire and see if there is up and downplay.
It appears in this case, that the play is coming from the inner tie rod.
For some reason, I don't have the specifics for a 2002 Swift. However, I will try my best to explain how it's done.
_____________________________________
To replace the Inner Tie Rod, you will need a few things.
A jack and two jack stands.
17mm Socket and ratchet.
19mm open end wrench.
Torque wrench (if you rent the tool mentioned below).
Wire cutters.
A pair of pliers.
A rubber mallet.
Crescent wrench.
A tie rod separator is sometimes referred to as a pickle fork. There are other types that have fingers and a screw that pushes on the tie rod screw.
First, you need to jack up the from end. Place the jack on the jacking platform located on the vehicle centerline roughly even with the wheels between the wheels. Use jack stands under the car in solid places in case the jack fails.
Remove the wheels from both sides and disconnect the outer tie rods by removing the cotter pins and castle nuts (17mm socket). Then use the tie rod separator to remove it from the steering knuckle.
Unscrew the tie rod from the inner tie rod shaft. Keep count of how many turns it takes to unscrew it! You will need to install it again with that same number of turns.
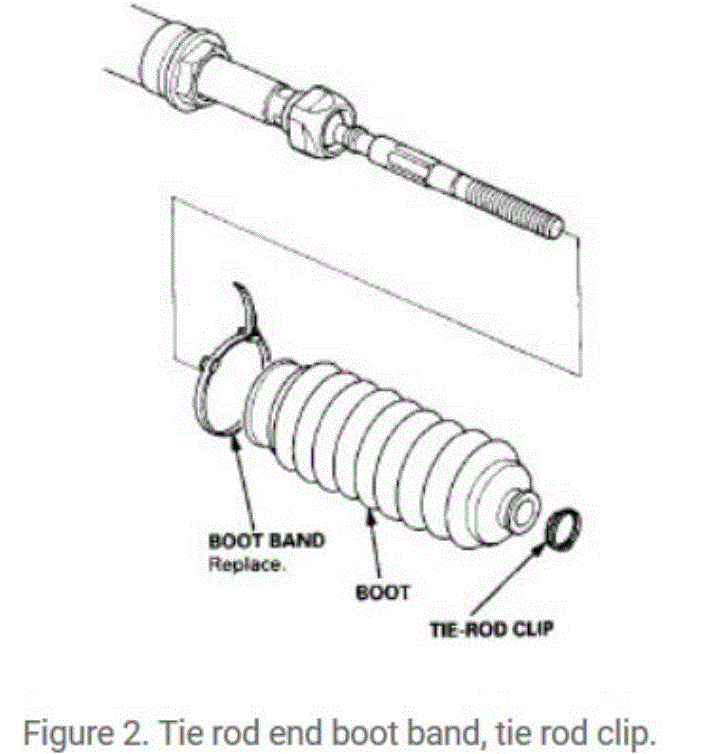
Remove the boot on the inner tie rod (use the pliers to get the small clip off the small end, and the wire cutters to cut the big band (you will need a new band to complete the installation).
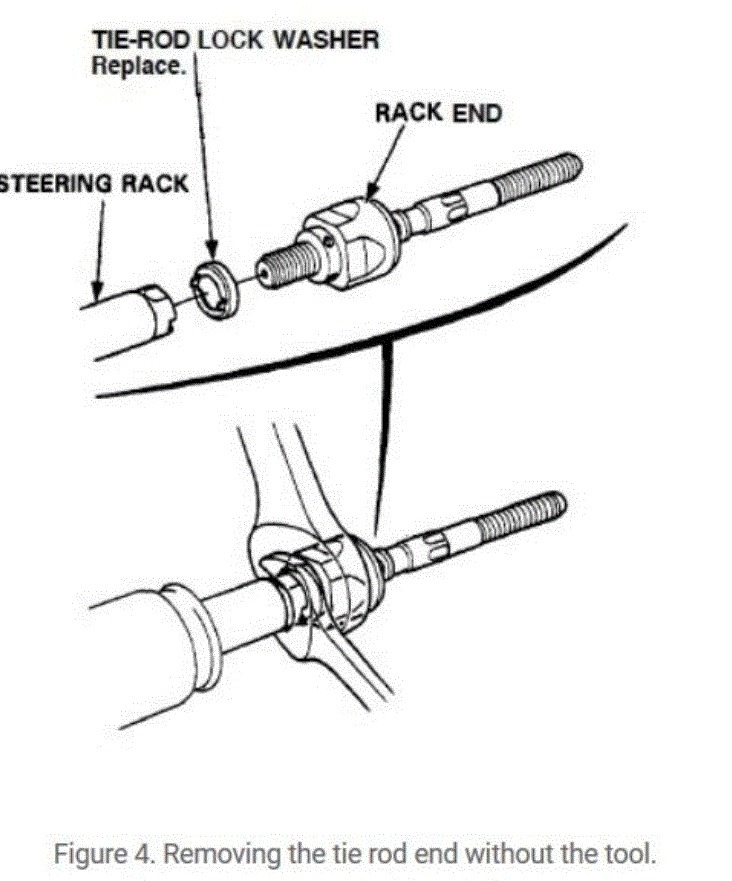
Remove the inner tie rod by using a crescent wrench to hold the rod on the steering rack, and an open-end wrench to loosen the inner tie rod. You could also rent a tool to do this.
Install the new inner tie rod, and torque to approximately 40 ft-lbs. Then you can assemble the boot, boot band, and clip.
Install the outer tie rod using the turn count you observed when you removed it from the old inner tie rod.
Reinstall the ball end of the tie rod to the steering knuckle, tighten the nut snug and then turn to the next window in the castle so you can put the cotter pin through the hole.
Insert the cotter pin and bend the ends to keep it secure.
Let me know if this helps.
Take care,
Joe
See pics below.
Images (Click to enlarge)
May 24, 2022 at 1:51 PM