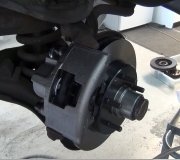
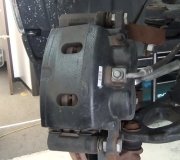
Sounds like you have more experience or training than the average beginning mechanic, but there is some confusion we need to clear up. First of all, please explain further, "I noticed it was not as smooth as it should have been it seemed like the brake pads were sticking and not releasing all the way when the brake pedal was not being used".
Very few people understand the need for lubricants and anti-squeal devices. Brake pads are going to vibrate; period; and we can't stop that. Some older products in tube or spray-form claimed to stop the noise by stopping the vibration. Throw those away. If any type of glue or adhesive is used, you'll find it has hardened like it's supposed to, but it has broken free from the things it was supposed to stay attached to. You will never ever find an old, worn brake pad that has to be pried off by tearing that adhesive.
Proper procedure when installing new pads is to first drag a flat file over the rim of the piston and the fingers of the caliper where the pads' backing plates make contact. You aren't trying to shine them up. The goal is simply to knock off any dirt, rust, or that old glue, so the pads sit squarely against those surfaces. Dragging your fingernails down a black board will create a much louder squeal than dragging the entire palm of your hand down the board. Similarly, a speck of debris caught under the pad will let it vibrate easier.
Next, those contact surfaces need to be lubricated with a special high-temperature brake grease that contains molybdenum disulfide. "Rusty Lube" was one trade name, but there are others. It is important to not get any grease or other contaminants on the friction surfaces. Brake grease is designed to not migrate over time. It stays where you put it. The pads are going to vibrate, and this grease lets them do that freely without transferring those vibrations to the caliper, which would amplify it to the point you can hear it.
Next, please clarify what you found related to the metal plate. A lot of pads come with thin sheet metal strips glued or clipped to the back of the pads to act as insulators between the pad and caliper. They are supposed to add a layer of isolation that stops the vibration from the pad from reaching the caliper. You can stick them back in without gluing them again, but you have to remove any old adhesive so everything sits squarely.
All brake pad friction material is bonded to a steel plate about 1/4" thick. Some are riveted, but most are glued. Sometimes they develop a little crack where water gets in. Freezing and rust build-up can push the linings to the point they crack off the backing plate. Often you won't have any symptoms of that. Sometimes that will cause a harmless, but elusive rattle. When you remove the pad in two pieces, the only proper thing to do is replace all of them on both wheels.
Be aware too the new, harder lining material is prone to vibrating. Basically, the higher the quality, the more likely they are to make noise, so we need to take as many steps as possible to avoid that. Most GM pads already come with the leading and trailing edges beveled so there is no sharp edge dragging on the rotor. That removes the fingernails-on-the-back-board squeal. When the new pads aren't beveled, I used to grind them on a bench grinder, then I figured out I could do the same thing with the flat file. Later, that became simply dragging the edges on a concrete floor a few times. What I found is if the edges were beveled just enough so there was no squeal during the break-in period, they wouldn't squeal once they wore down past that bevel. Be aware too that any bevel on the edge inhibits the squeegee action after driving through deep water. Disc bakes are far superior to drum brakes in this regard because they scrape the water off the rotors. By keeping those bevels to as little as 1/64", you reduce the amount of time before that desirable characteristic returns.
Brake rotors should be machined when the pads are replaced, or they must be replaced if they are thinner than the published legal limit. If you look at the hub the rotor slides onto, you'll see one or three access holes in it where the socket goes through to remove the wheel bearing bolts. Water can splash through those holes and cause round spots of rust to form on the backside of the rotor. Those spots have to be scraped off. If the rotor is reinstalled in a different orientation, those raised spots will prevent the rotor from sitting squarely on the hub. It will wobble, and that will make the wheel wobble. The person doing the machining will clean those rust spots off, but you also have to look at the rust ring at the outer edge of where it contacts the hub. Chips of rust and scale can crumble off and get stuck between the rotor and hub. That will also cause a wobble. If a rotor's wobble is bad enough, it will push the piston into the caliper. You'll have a low brake pedal the next time you push it.
For this type of rotor that slides onto the hub, clean its center hole and the mating surface on the hub, then coat it with a light film of grease. This doesn't have to be brake grease but it should be something that won't smoke when it gets hot. Failure to lube this spot can cause a crunching noise when cornering.
This is most common on the front of GM front-wheel-drive cars, but it can happen on any vehicle with this type of rotor.
For my next comment of value, you found brake fluid leaking out of the caliper at one point, so you're done. Replace it. Brake fluid loves to absorb humidity out of the air, through the porous rubber hoses. That moisture settles in the low spot in the caliper and creates a rust spot. That can be cleaned up in the caliper housing, but it also causes a spot of chrome to lift on the piston, then rust forms under it. The piston needs to slide in and out of the square-cut seal freely to self-adjust and to apply the brakes and release smoothly. It can't do that when that rust spot catches on the rubber seal. You should never NEED a c-clamp to push a piston into the caliper, but when there's a rust spot on the piston and it gets forced past the seal, it can rip it, causing the leak. It is also possible for debris to settle in the caliper behind the piston. That can make it impossible to push the piston in far enough to get the new pads in.
When you install the caliper, any mounting bolts or any other surfaces the caliper slides on must be cleaned too. Flat mounting surfaces are cleaned with the flat file, then lubricated with the brake grease. If yours uses bolts, those must be replaced if they're bent, have grooves worn in them, or have rust spots where the chrome has lifted. Grease them too.
For my final comment of value, this may not apply to your vehicle, but it is a huge problem for owners of front-wheel-drive GM cars. Almost all front-wheel-drive vehicles use a "split-diagonal" hydraulic system that puts one front brake and the opposite rear brake on the same circuit. That insures that with a failure in half of the system, you'll still have one functioning front brake. Front brakes do about 80 percent of the stopping because front-wheel-drive vehicles have a much higher percentage of weight on the front. GM master cylinders have a valve built in that blocks fluid flow to a circuit that has a leak. That prevents total loss of all brake fluid, but it causes a problem when bleeding the brakes.
Gravity-bleeding is the only method I use which just means opening the bleeder screw and waiting for fluid to flow out. Loosen the cap on the reservoir so vacuum doesn't build up that would inhibit the free flow of that fluid. Too many do-it-yourselfers and inexperienced mechanics think pedal-bleeding with a helper is the only way to do the job, but that has the potential for causing all kinds of problems. First of all, crud and corrosion build up in the lower halves of the bores in the master cylinder where the pistons don't normally travel. Pushing the pedal over half way, whether surprised by a sudden leak, or when bleeding improperly, runs the rubber lip seals over that crud and can rip them. That causes a slowly-sinking brake pedal, and that can take two or three days to show up.
In addition, getting back to that valve only in GM cars, it trips when equal pressures don't build up in the two parts of the system. That is what happens when pedal-bleeding. As the pedal is pushed, pressure builds up in one half of the system, but not in the half that has a bleeder screw open. That causes the valve to trip, and from then on, you will never get any fluid to flow to that wheel and the one in the opposite corner. A lot of people don't even notice the problem until they wear out the front pads on one corner of the car two or three times when those on the other front corner still look like new. Most people correctly figure out the master cylinder is causing the problem, but after replacing it, they bleed at the wheels again and cause the same problem to the new master cylinder. Proper procedure is to never push the brake pedal over half way to the floor, and it's best to just do gravity-bleeding.
Some service manuals, and even some experienced mechanics will tell you this problem can be avoided by bleeding the four wheels in a specific sequence, but that is not true They usually say to start with the right rear wheel, but in fact, the valve will trip if a leak develops in the line to that wheel just as easily as it will trip for any other wheel, so it will trip just as easily when pedal-bleeding. When I need to bleed all four wheels, I start with the wheel I'm standing closest to. Open all four bleeder screws, then wait for the first one to start flowing. Close that bleeder, then wait for the next one. When all are closed, "irritate" the brake pedal a little by hand, then open each bleeder screw once more to burp the few remaining bubbles that washed into the calipers and wheel cylinders.
Remember that when new pads are installed, you had to push the pistons back into the calipers to make room for them. Now you need to adjust them back out by pumping the brake pedal. Don't push it more than half way to the floor or you'll trip that valve.
The only way I've ever found to reset that valve is to loosen the cover on the reservoir, open one of the bleeder screws for a wheel that won't bleed, then give that screw a short, quick burst of compressed air. Other people have ways to do the same thing, but I've never found any other method that works so reliably. It just takes a short "pop" of air. You don't want to push air all the way back to the master cylinder because you'll just have to bleed it all out again.
Saturday, December 30th, 2017 AT 9:06 PM


