Many of those stories are from me. Every year I did a demonstration for my students where I started with two beakers partially filled with clean, fresh brake fluid, and I dropped in a new wheel cylinder lip seal into each one. In one beaker I added one drop of engine oil or power steering fluid. One week later, the contaminated seal had grown by about 20 percent and was mushy and slimy.
My concern gets pretty harsh, but since you sucked the contaminant out right away, there's a really good chance the system can be saved. Even though you pumped the brake pedal a few times, the contamination didn't go far down the lines. The fluid only goes a few inches, then it returns when you release the brake pedal. What I'd suggest you avoid now is any type of bleeding or flushing at the wheels. That IS going to make any remaining contamination go down all the way.
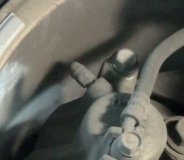
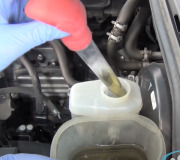
A better solution is to suck all the fluid out of the reservoir, then remove the two front wheels. Use a large flat blade screwdriver to pry the piston back into one caliper housing. That's the same thing we have to do when installing new, thicker brake pads. The caliper doesn't have to be removed to do this. Doing so will push all the brake fluid behind the piston back up into the reservoir. Depending on how worn the front pads are, that could fill the reservoir anywhere from just a little to well over quarter full. Now suck that fluid out. If there's any power steering fluid still present, it will all be in the reservoir now.
Repeat this with the piston in the other front caliper. Use a clean rag to wipe out the reservoir as well as possible. If you are able to remove it, the better approach is to wash it out with Brake Parts Cleaner in a spray can. Let it dry for a few minutes, then pop it back on and refill it. Be aware most reservoirs are rather difficult to remove. They have a pair of tubes that extend out the bottom and plug into rubber grommets. They go together a whole lot easier than they come apart.
Here's a couple of notes regarding brake systems. First, the brake fluid should never be topped off unless an external leak was just repaired. As disc brake pads wear, the piston moves out of the caliper to self adjust. Brake fluid fills in behind it. That's why the level in the reservoir goes down over time. There's enough volume in the reservoir to handle both front pistons being extended as far as they will go until one of the worn pads starts grinding metal on metal. During a routine brake job, when we push the pistons back in to make room for the new pads, that fluid gets pushed back up into the reservoir. If someone topped it off previously, it's going to be badly over-filled. The excess fluid will spill over and make a mess. Brake fluid loves to eat paint, so it must be washed off the body panels with water. This is also why we never top off brake fluid during other routine services such as oil changes. Only two things can make the fluid level drop in the reservoir. One is an external leak which must be diagnosed and repaired, or it's an indication that a brake system inspection is due soon, as the pads are wearing down and likely need to be replaced. Worn pads makes the fluid level drop very slowly, as in years or thousands of miles. External leaks cause a loss of fluid in the reservoir relatively quickly, as in days or weeks, and faster with city driving when the brakes are applied more frequently. About half of external leaks get worse over time and leak faster and faster.
My second comment of value has to do with the application of the brake pedal after the repairs are completed. This also applies to regular brake jobs right after new pads are installed. As I mentioned, the pistons had to be pried or pushed back into the caliper housings. Once all the service is completed, the last step is to run those pistons back out which is what adjusts them. After that, they continue to self adjust each time you press the brake pedal. This process of adjustment simply involves pressing and releasing the brake pedal repeatedly until it becomes high and firm, like normal. A lot of misinformed people, and even some service manuals will tell you to push the brake pedal all the way to the floor, then release it. If you do that, it can take as little as one or two presses to get the firm pedal, or it could take a half dozen or more. That procedure won't cause a problem on a vehicle less than about a year old which is why it can appear in a service manual. The problem is after a while, crud and corrosion build up in the lower halves of the bores in the master cylinder where the pistons and rubber lip seals don't normally travel. When you push the pedal all the way to the floor, it runs the lip seals over that crud and can rip them. That results in a slowly sinking pedal when you hold steady, normal pressure on it, and it usually takes two or three days to show up. The fix for that is a rebuilt master cylinder. Rebuilding one yourself is usually not recommended. Most times the kits are available, but they actually usually cost more than the professionally rebuilt unit with a warranty.
To avoid this possibility, never push the brake pedal more than halfway to the floor. If you do pedal bleeding with a helper, this applies too. Have your helper pretend there's a block of wood under the pedal and never go further than halfway.
If you DO have to replace the master cylinder, here's a link to an article on how to do that:
https://www.2carpros.com/articles/how-to-replace-a-brake-master-cylinder
Here's another related article:
https://www.2carpros.com/articles/brake-pedal-goes-to-the-floor
Let me know if it becomes necessary to do this as I have a simple trick that avoids having to bleed at the wheels. Besides being a huge time saver, this can avoid the need to use a scanner when bleeding if the vehicle has anti-lock brakes. Bleeding at the wheels pushes brake fluid down to them, and any air in the lines goes down too and can get trapped in two chambers in the ABS hydraulic controller. That air can only be expelled by using the scanner to command the computer to open two valves, then the air can continue down to the wheels.
Finally, every manufacturer has a time or mileage recommendation to replace the brake fluid. It loves to absorb moisture out of the air, including through the rubber flex hoses which are porous. Over time, that moisture leads to corrosion of metal parts and it lowers the fluid's boiling point from well over 400 degrees to closer to 212 degrees. It's rather easy for the brakes to get hot enough, and that heat migrates into the fluid where the moisture vaporizes. That leads to one type of brake fade, in this case, a soft and mushy pedal.
The procedure is just to open a bleeder screw to drain some fluid, then, after that is done at each wheel, an equal amount of new fluid is added to the reservoir. If you can see the level, add new fluid until the level is the same as when you started. When you can't see the level, I drain enough to fill a small, old brake fluid bottle, then refill with one bottle of the same size. Very few of us actually do this because brake systems cause such little trouble, but in this case, where you're removing some and adding new fluid, think of this as performing some of that maintenance procedure.
The most common symptom to watch for is the brake pedal becomes very high and firm as you drive. You won't be able to push the pedal down, and as the brakes heat up, they'll self-apply harder and harder, often until the vehicle won't move. This is caused by the rubber lip seals in the master cylinder expanding from the contamination, and growing past the fluid return ports, blocking them. The trapped fluid heats up and expands which applies the brakes even harder and causes them to get hotter. To identify this, use a line wrench, (flare-nut wrench) to loosen the soft metal line nuts at the master cylinder. You'll see a little spurt of fluid come out and the brakes will be released. That proves the seals in the master cylinder are the only thing that can be causing the locked brakes.
If you're lucky, you won't see those spurts of fluid and the brakes will not release. That points to a different cause with the same symptoms. In this case the fluid is being trapped in a rubber flex hose. For Chrysler products that is commonly caused by rust buildup inside the crimp where a mounting bracket is crimped around the middle of the hose. Just open up that crimp a little with a large flat blade screwdriver or a Channel Lock pliers. This can happen on a lot of import models too, but it requires replacement of the hose. To identify which hose / wheel is causing the locking, you have to crawl underneath and open the bleeder screw on the caliper. Here again, you'll see a spurt of fluid, and the brake will release.
Let me know how this goes and if we need to look into this further.
Sunday, August 27th, 2023 AT 7:51 PM


