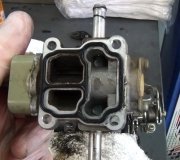
Replacing the IAC valve is a fairly simple job for the do-it-yourselfer. I will post the steps of removing and installing your IAC valve to better assist you in the repair.
REMOVAL:
Disconnect the negative battery cable.
Remove the air cleaner outlet tube.
Unplug the electrical connection.
Remove the IAC valve. On thread-mounted units, use 11/4 in. (32mm) wrench and on flange-mounted units, remove the screw assemblies.
Remove the IAC valve gasket or O-ring and discard it.
INSTALLATION:
Clean the old gasket material from the surface of the throttle body assembly on the thread mounted valve. On the flange-mounted valve clean the surface to ensure proper O-ring sealing
If installing a new IAC valve (except for 1998-00 2.2L equipped models and all models with the 2.3L or 2.4L engine, for those models see the last step in this procedure), measure the distance between the tip of the valve pintle and the mounting flange. If the distance is greater than 1.10 inch (28mm), use finger pressure to slowly retract the pintle until the measurement is within specification (refer to the accompanying illustration).
Install the valve with a new gasket or O-ring. Tighten the thread mounted assembly 13 ft. Lbs. (18 Nm) and tighten the flange mounted attaching screws to 28 inch. Lbs. (3 Nm).
Engage the electrical connector to the IAC valve.
Install the air cleaner outlet tube.
Connect the negative battery cable.
To set the pintle position on 1998-00 models equipped with the 2.2L engine and all models equipped wit the 2.3L/2.4L engines, turn the ignition key to the ON, engine OFF position for five seconds. Turn the ignition key to the OFF position for ten seconds, then start the engine and check for proper idle operation.
Thanks for using 2CarPros. Com!
SPONSORED LINKS
Wednesday, February 4th, 2009 AT 10:24 PM


