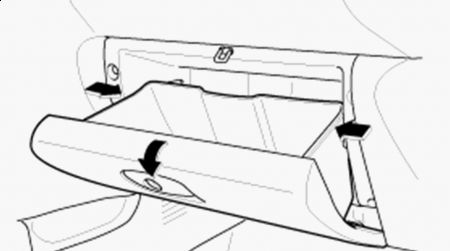
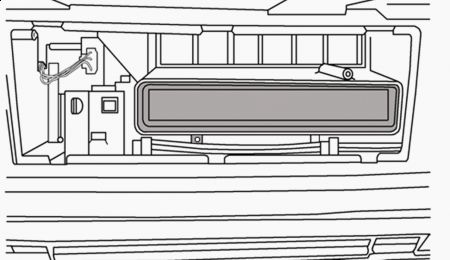
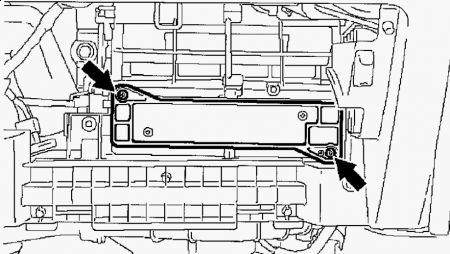
REMOVAL & INSTALLATION NOTE: Manufacturer's terminology for this filter is Cabin Air Filter or Clean Air Filter. NOTE: Little service procedure information for cabin air filter is available from the manufacturer. The procedures in this article are typical of most Misubishi vehicles. NOTE: Most Mitsubishi vehicles did not come factory-equipped with a cabin air filter. They were dealer-added options. Consequently, some vehicles may not have an installed cabin air filter, but may have a sealed filter compartment. See Fig. 3. In such cases, the sealed compartment will need to be punched-out and a new air filter frame acquired before a cabin air filter can be installed. The filter is located behind the glove compartment. Open the glove compartment, (disconnect damper rod, if equipped) push on the sides while pulling down to release the latches. Allow the glove box to swing down on its hinges. See Fig. 1 . 1. Fig. 1: Removing/Installing Glove Compartment (Typical) Courtesy of MITSUBISHI MOTOR SALES OF AMERICA Remove the 2 air filter screws. See Fig. 2 . 2. Fig. 2: Identifying Cabin Air Filter Screws (Typical) Courtesy of MITSUBISHI MOTOR SALES OF AMERICA. NOTE: The filter is optional and may not be installed in all vehicles. If the filter compartment is sealed as shown, use a flat head screwdriver to punch through the perforated plastic cover. See Fig. 3. Some vehicles may not have the filter frame pre-installed in the compartment. If so, accquire the filter frame before installing filter element. Fig. 3: Identifying Cabin Air Filter Sealed Compartment (Typical) Courtesy of MITSUBISHI MOTOR SALES OF AMERICA. Remove cabin air filter. Remove the old filter frame (if present) by sliding it out towards you. Remove old filter from its frame and install new filter, ensuring that Air Flow arrow is pointing down. See Fig. 4 . 3. Fig. 4: Removing/Installing Cabin Air Filter (Typical) Courtesy of MITSUBISHI MOTOR SALES OF AMERICA Install in reverse order.


Tuesday, May 5th, 2009 AT 3:31 PM


