Hi,
First, here is a link that explains how to replace a cabin air filter:
https://www.2carpros.com/articles/how-to-change-an-air-cabin-filter
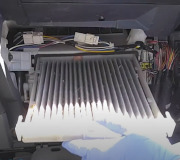
Here are the directions for the cabin air filter specific to your vehicle. The attached pictures correlate with the directions.
______________________________________________
2018 Infiniti Truck QX30 FWD L4-2.0L Turbo
Air Conditioner Filter - Removal And Installation
Vehicle Heating and Air Conditioning Cabin Air Filter / Purifier Service and Repair Removal and Replacement Air Conditioner Filter - Removal And Installation
AIR CONDITIONER FILTER - REMOVAL AND INSTALLATION
Removal and Installation
REMOVAL
1. Disengage fixing pawls, and then remove filter cover.
image
NISSSWT0000000013550903-01-JMIIA4494ZZ
Pic 1
: Pawl
2. Remove air conditioner filter.
pic 2
NISSSWT0000000013550903-02-JMIIA4493ZZ
CAUTION:
If the filter is deformed/damaged when removing, replace it with a new one. Deformed/damaged filter may deteriorate the dust collecting performance.
INSTALLATION
Note the following item, and then install in the reverse order of removal.
CAUTION:
When installing, handle the filter with extreme care to avoid deforming/damaging.
_______________________________
Here is a link that shows in general how to replace an engine air filter
https://www.2carpros.com/articles/how-to-replace-a-car-air-filter
Here are the ones specific to your vehicle's engine air filter.
2018 Infiniti Truck QX30 FWD L4-2.0L Turbo
Air Cleaner Filter (2.0L Turbo Engine) - Removal And Installation
Vehicle Powertrain Management Fuel Delivery and Air Induction Air Cleaner Housing Air Filter Element Service and Repair Removal and Replacement Air Cleaner Filter (2.0L Turbo Engine) - Removal And Installation
AIR CLEANER FILTER (2.0L TURBO ENGINE) - REMOVAL AND INSTALLATION
Removal and Installation
REMOVAL
1. Remove engine cover. Refer to Removal and Installation
2. Remove vacuum tube from clamps image.
pic 3
NISSSWT0000000013536860-01-JSBIA9533ZZ
3. Loosen air cleaner housing cover mounting bolt image.
image NOTE:
The bolts remain the air cleaner housing cover image.
4. Pull up air cleaner housing cover image and remove air cleaner filter element image.
pic 4
NISSSWT0000000013536860-02-JSBIA9534ZZ
INSTALLATION
Note the following, and install in the reverse order of removal.
image NOTE:
Clean the inside of air cleaner housing and the air cleaner housing cover.
___________________________________________
Let me know if this helps or if you have other questions.
Take care,
Joe
Images (Click to make bigger)
Saturday, January 11th, 2020 AT 6:04 PM


