1999 GMC Van Alternator

1999 GMC VAN
143,000 MILES • 6 CYL • 2WD • AUTOMATIC
Avatar
RMT4279
  • MEMBER
  • 7 POSTS
I am looking for a list or procedure steps for removal of the alternator, which I need to replace.
Sep 1, 2010 at 2:43 PM
Advertisement
Avatar
SATURNTECH9
  • ASE Certified Mechanic
  • 30,869 POSTS
  • ASE Certified Mechanic
Do you have a safari savanna etc?Which engine?Let me know so i can get you the correct info.
Sep 1, 2010 at 2:47 PM
Avatar
RMT4279
  • MEMBER
  • 7 POSTS
My vehicle is a 1999 GMC Safari Van
Sep 1, 2010 at 2:57 PM
Avatar
RMT4279
  • MEMBER
  • 7 POSTS
The engine is a 4.3 liter V-6
Sep 1, 2010 at 3:00 PM
Avatar
SATURNTECH9
  • ASE Certified Mechanic
  • 30,869 POSTS
  • ASE Certified Mechanic


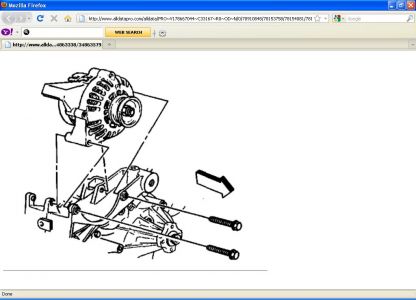
https://images.2carpros.com/forum/automotive_pictures/416332_1999_gmc_safari_alternator_replacement_part1_1.jpg


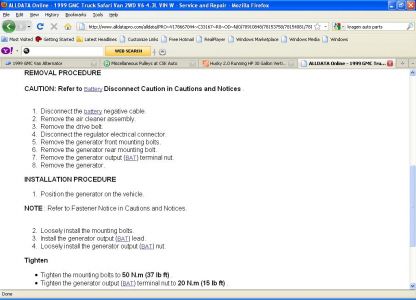
https://images.2carpros.com/forum/automotive_pictures/416332_1999_gmc_safari_alternator_replacement_part2_1.jpg


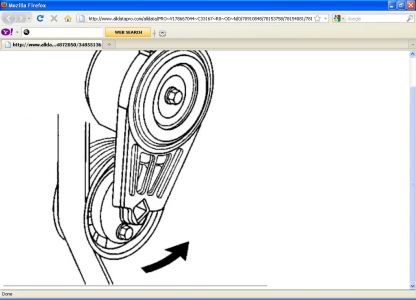
https://images.2carpros.com/forum/automotive_pictures/416332_1999_gmc_safari_alternator_replacement_part3_1.jpg


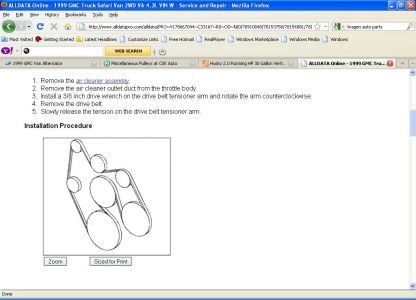
https://images.2carpros.com/forum/automotive_pictures/416332_1999_gmc_safari_alternator_replacement_part4_1.jpg

There you go.
Sep 1, 2010 at 3:08 PM
Avatar
RMT4279
  • MEMBER
  • 7 POSTS
Can you resend the screen shots about removal procedures only. I am not able to read the print after printing them.
Thanks
Sep 1, 2010 at 3:19 PM
Avatar
SATURNTECH9
  • ASE Certified Mechanic
  • 30,869 POSTS
  • ASE Certified Mechanic
1. Disconnect the battery negative cable.
2. Remove the air cleaner assembly.
3. Remove the drive belt.
4. Disconnect the regulator electrical connector.
5. Remove the generator front mounting bolts.
6. Remove the generator rear mounting bolt.
7. Remove the generator output (BAT) terminal nut.
8. Remove the generator.

INSTALLATION PROCEDURE

1. Position the generator on the vehicle.

NOTE : Refer to Fastener Notice in Cautions and Notices.

2. Loosely install the mounting bolts.
3. Install the generator output (BAT) lead.
4. Loosely install the generator output (BAT) nut.

Tighten

* Tighten the mounting bolts to 50 N.m (37 lb ft) .
* Tighten the generator output (BAT) terminal nut to 20 N.m (15 lb ft) .

5. Connect the regulator electrical connector.
6. Install the drive belt.
7. Install the air cleaner.
8. Connect the battery negative cable.
That should do the trick.
Sep 1, 2010 at 6:38 PM
Avatar
WRENCHTECH
  • ASE Certified Mechanic
  • 20,761 POSTS
  • ASE Certified Mechanic
Maybe this will be easier to see

Sep 2, 2010 at 7:00 AM
Avatar
RMT4279
  • MEMBER
  • 7 POSTS
Thanks for your help. I was able to get the old one out and a new one installed.
Sep 2, 2010 at 11:50 AM
Join 2CarPros for free, one of the most advanced car repair communities on the internet. From first-time drivers to seasoned mechanics, everyone is welcome to reply, share details, and get better answers. You can add a temporary image or video first; uploads are limited to 20 MB.
Ask a Free Question
Repair Safety Notice: This information is for general instructional purposes only. Vehicle repair can be dangerous. Verify all information, follow manufacturer service procedures, use proper tools and safety equipment, and consult a qualified repair shop when needed.