Welcome to 2CarPros.
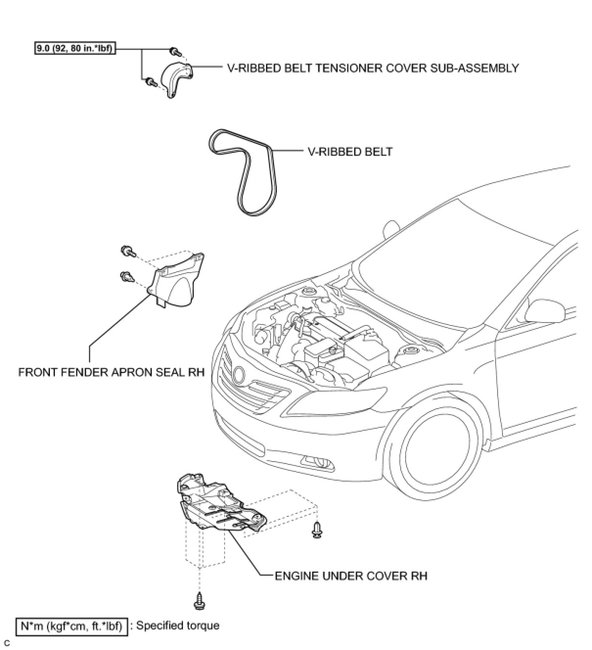
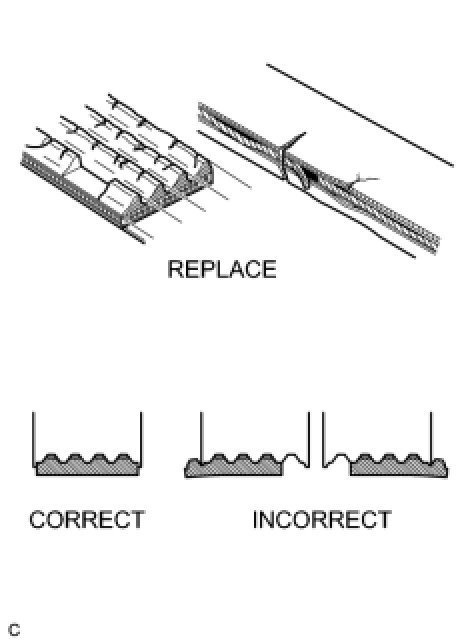
Most often, a chirping noise is the result of a drive belt. What I need you to do is have a helper start the car to create the noise while you open the hood and try to determine if the noise is from the drive belt. The first picture I attached shows what the belt looks like. Now, if it seems to come from the belt, try this trick. Pour a small amount of water on the belt to see if it changes the sound in any way. If it does, either the belt is slightly loose or it is dry and cracked from age and needs replaced. Note, the second pic attached shows different conditions of the belt which can cause issues. If it is loose, the tensioner will need replaced. It is an automatic tensioner. Please make sure to protect your eyes, clothing, and don't get too close to moving components.
Also, here is a link you may find of interest:
https://www.2carpros.com/articles/chirping-noise
____________________________
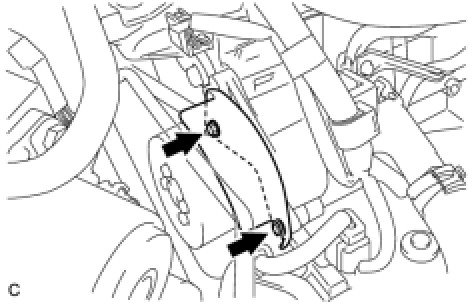
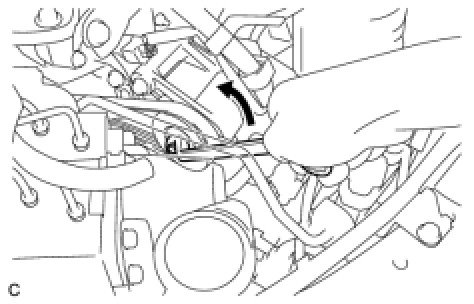
If you find the belt needs replaced, here are the directions. Pics 3 and 4 correlate with these directions.
REMOVAL
1. REMOVE FRONT WHEEL RH
2. REMOVE ENGINE UNDER COVER RH
3. REMOVE FRONT FENDER APRON SEAL RH
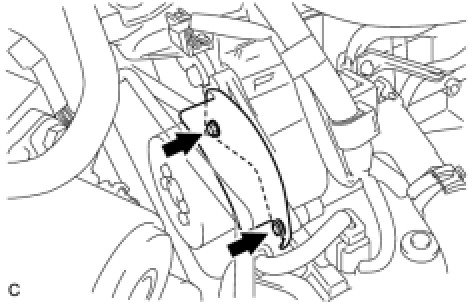
4. REMOVE V-RIBBED BELT TENSIONER COVER SUB-ASSEMBLY
picture 3
(a)Remove the 2 bolts and V-ribbed belt tensioner cover.
5. REMOVE V-RIBBED BELT
picture 4
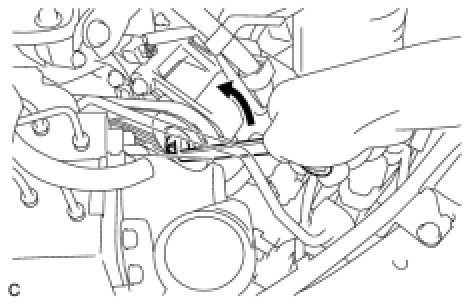
(a)Loosen the V-ribbed belt tensioner counterclockwise, then remove the V-ribbed belt.
NOTICE:
- Be sure to connect the tools so that they are in line during use.
- When retracting the tensioner, turn it clockwise slowly. Do not apply force rapidly.
- After the tensioner is fully retracted, do not apply force more than necessary.
_______________
INSTALLATION
1. INSTALL V-RIBBED BELT
picture 5
(a)Loosen the V-ribbed belt tensioner arm counterclockwise, then install the V-ribbed belt.
picture 6
(b)If it is difficult to install the V-ribbed belt, perform the following procedure:
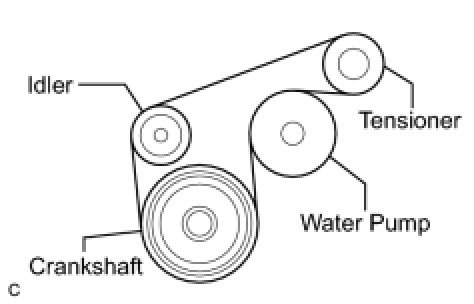
(1)Put the V-ribbed belt on every pulley except the tensioner pulley as shown in the illustration.
(2)While releasing the belt tension by turning the belt tensioner counterclockwise, put the V-ribbed belt on the tensioner pulley.
NOTICE:
- Be sure to connect the tools so that they are in line during use.
- When retracting the tensioner, turn it clockwise slowly. Do not apply force rapidly.
- After the tensioner is fully retracted, do not apply force more than necessary.
(3)After installing the V-ribbed belt, check that it fits properly in the ribbed grooves. Check to confirm that the belt has not slipped out of the grooves on the bottom of the crank pulley by hand.
2. INSTALL V-RIBBED BELT TENSIONER COVER SUB-ASSEMBLY
picture 7
(a)Install the V-ribbed belt tensioner cover with the 2 bolts.
Torque: 9.0 Nm (92 kgf-cm, 80in-lbf)
3. INSTALL FRONT FENDER APRON SEAL RH
4. INSTALL ENGINE UNDER COVER RH
5. INSTALL FRONT WHEEL RH
Torque: 103 Nm (1,050 kgf-cm, 76ft-lbf)
_____________________________________
Let me know if this helps or if you have other questions.
Take care,
Joe
Images (Click to make bigger)
Thursday, May 9th, 2019 AT 7:16 PM
