CAUTION: When installing or removing the drive belt, never exceed 30 ft. lbs. torque on the tensioner center bolt, Fig. 13. Care should also be taken to avoid bending or twisting the tensioner. If the belt tensioner or idler assembly produces a whining noise, inspect for bearing failure. If the drive belt becomes frayed, check belt tensioner assembly alignment and ensure belt edge does not contact the tensioner pulley flange.
NOTE: Serpentine drive belt performance will not be impaired by cracks in the belt ribs. However belt replacement will be required if any of the following conditions occur: Belt ribs are missing, the belt slips or is frayed, or the belt tensioner runs out of travel before adjustment is proper.
1.Disconnect battery ground cable.
2.Remove coolant reservoir.
3.Loosen drive belt tensioner and remove drive belt.
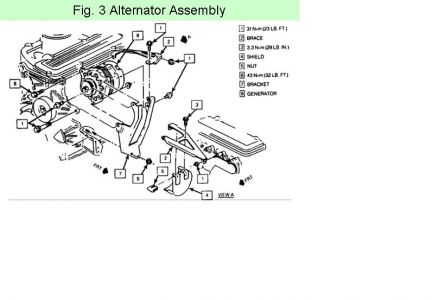
4.Remove two alternator bolts.
5.Remove belt tensioner pulley.
6.Remove power steering pump as follows:
a.Disconnect return and pressure hoses from the pump.
b.Loosen drive belt tensioner. Separate belt from power steering pulley.
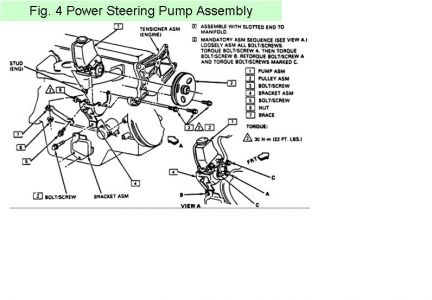
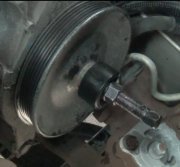
c.Remove three front pump retaining bolts, Fig. 4. Bolts can be accessed through hole in the pulley.
d.Remove one retaining bolt from rear of the pump, then remove the pump.
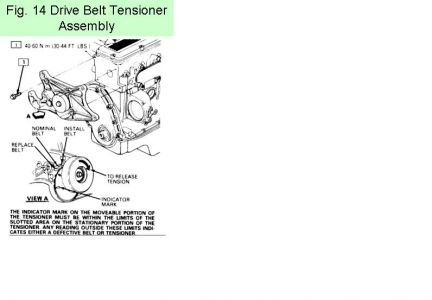
7.Remove four tensioner retaining bolts, Fig. 14, then the tensioner.
8.Reverse procedure to install noting the following:
a.Clean tensioner bolts and prior to installation apply a suitable lock compound to bolt threads. Refer to Fig. 14 for torque values.
b.When installing power steering pump, refer to Fig. 4 for bolt tightening sequence and torque values.
c.When installing alternator bolts, refer to Fig. 3 for torque values.
d.When installing serpentine drive belt, refer to Fig. 16 for belt routing.


Saturday, October 4th, 2008 AT 9:57 AM


