Good morning,
I attached a recall for you to view on this issue.
I would call the dealer and give them your VIN number and see if your car is involved in the recall.
If the plate fractures, it could bounce the shifter back to neutral.
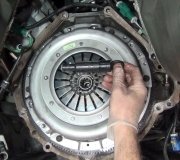
Beyond that, it sounds like you will need a clutch.
https://www.2carpros.com/articles/how-to-replace-a-clutch
Roy
Report Receipt Date: MAY 16, 2016
NHTSA Campaign Number: 16V302000
Component(s): POWER TRAIN
Potential Number of Units Affected: 39,217
RECALL Subject: Clutch Diaphragm Spring May Fracture
Manufacturer: Chrysler (FCA US LLC)
SUMMARY:
Chrysler (FCA US LLC) is recalling certain model year 2012-2016 Fiat 500 vehicles manufactured June 21, 2010, through January 12, 2016, equipped with a manual transmission. The clutch diaphragm spring may fracture and fail, causing an inability to switch gears.
CONSEQUENCE:
If the clutch diaphragm spring fails, the driver may not be able to shift gears or the vehicle may lose motive power, increasing the risk of a crash.
REMEDY:
The remedy for this recall will include the installation of a clutch pedal limiter and a clutch pedal switch. Interim notices will be mailed to owners in June 2016. Owners will receive a second notice when remedy parts become available. Owners may contact Chrysler customer service at 1-800-853-1403. Chrysler's number for this recall is S34.
NOTES:
Owners may also contact the National Highway Traffic Safety Administration Vehicle Safety Hotline at 1-888-327-4236 (TTY 1-800-424-9153), or go to www.safercar.gov.
REMOVAL
1. Remove battery tray See: Battery Tray > Removal and Replacement > Battery Tray - Removal.
2. Remove air cleaner assembly See: Air Filter Element > Removal and Replacement > Air Cleaner - Removal.
imageOpen In New TabZoom/Print
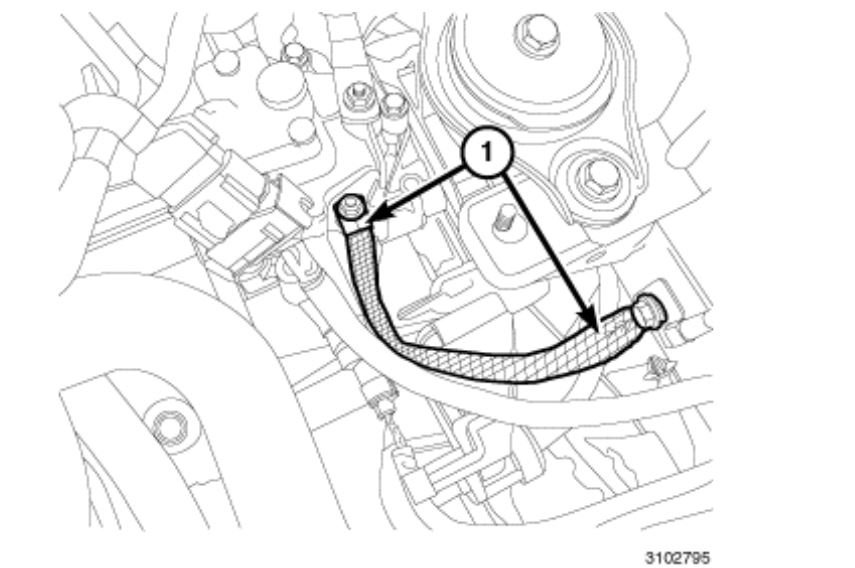
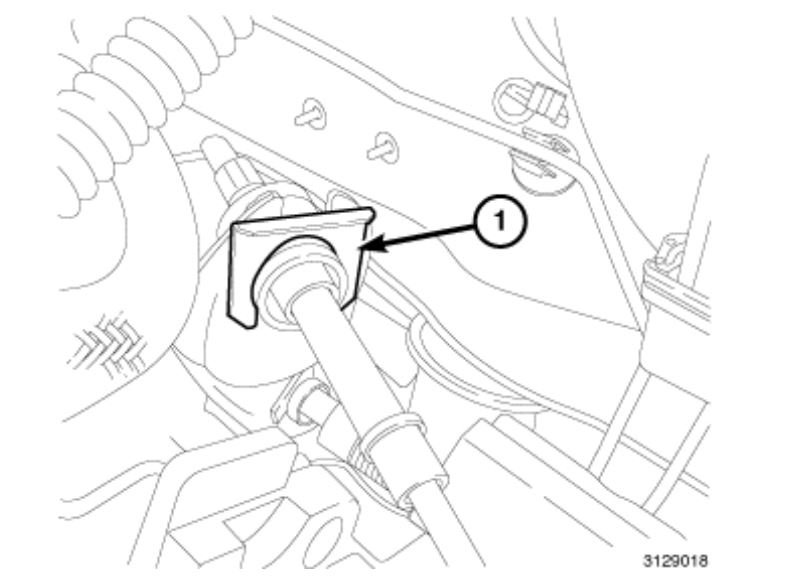
3. Remove the ground strap (1) from the transmission.
imageOpen In New TabZoom/Print
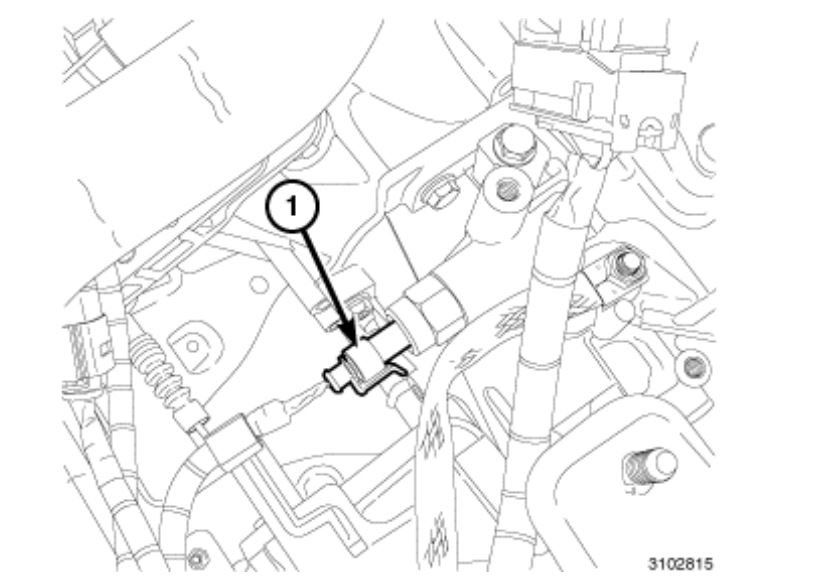
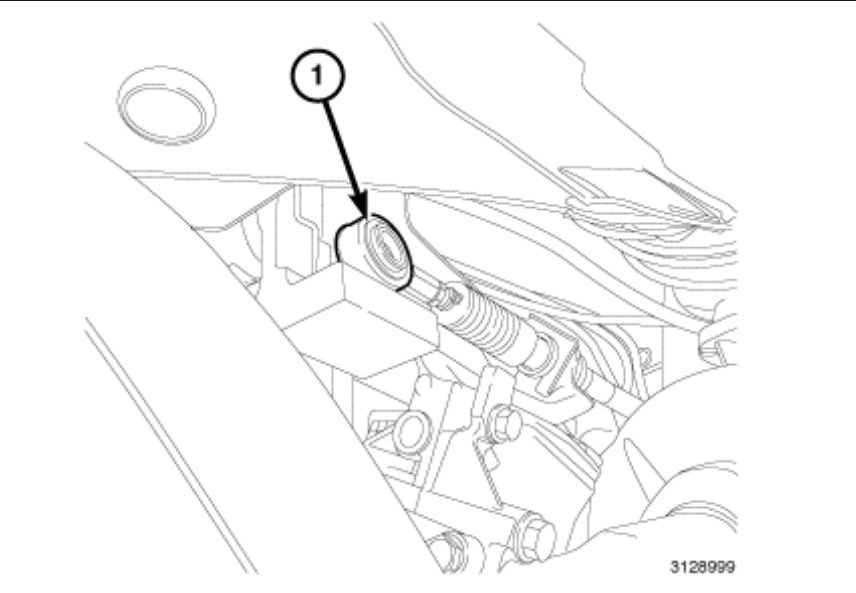
4. Disconnect reverse lamp switch connector (1).
imageOpen In New TabZoom/Print
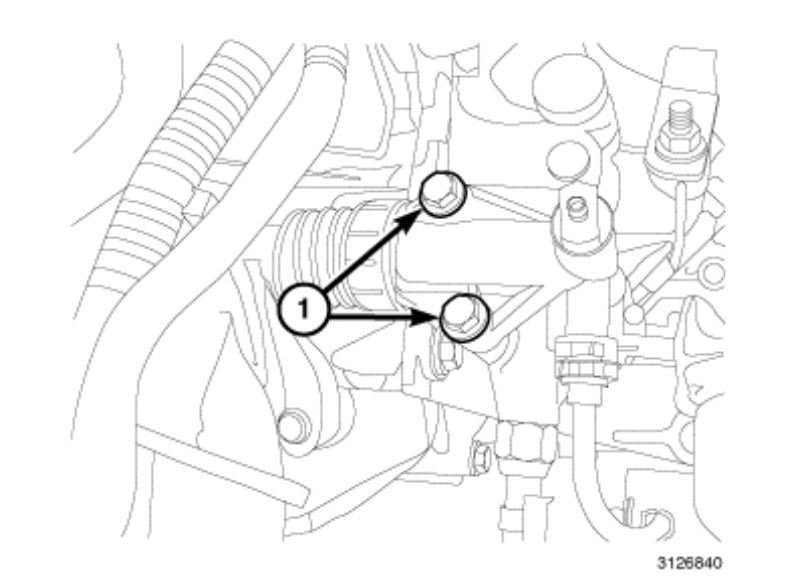
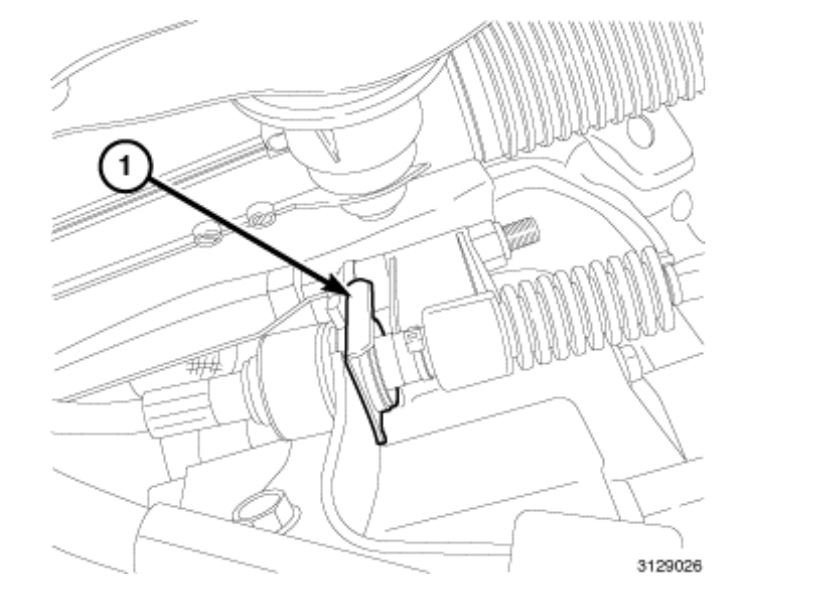
5. Remove the slave cylinder bolts (1) and secure the cylinder out of the way.
imageOpen In New TabZoom/Print
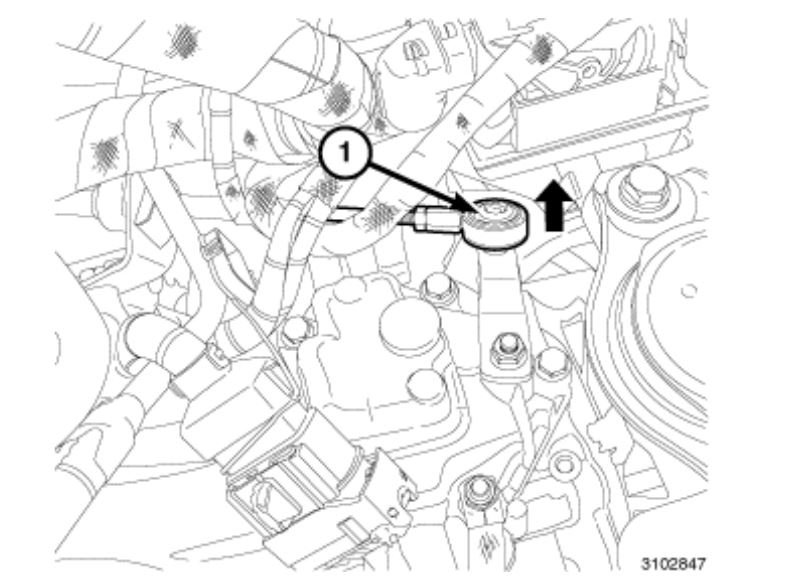
6. Disconnect shift selector cable (1) from the lever.
imageOpen In New TabZoom/Print
7. Disconnect the cable from the mounting bracket (1).
imageOpen In New TabZoom/Print
8. Disconnect the shift cable (1) from lever.
imageOpen In New TabZoom/Print
9. Disconnect the cable from the bracket (1).
imageOpen In New TabZoom/Print
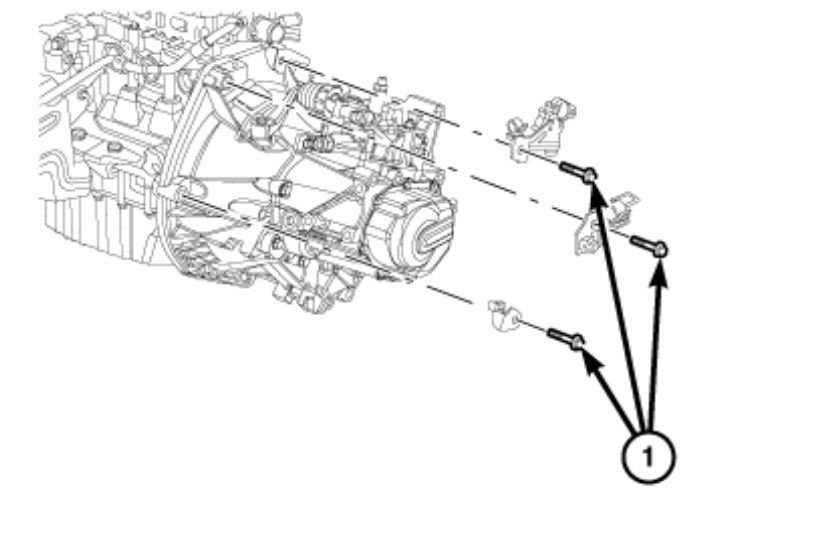
10. Remove upper bell housing bolts (1).
11. Remove the upper starter bolts
12. Raise vehicle on hoist.
13. Remove the belly pan if equipped See: Underbody Cover > Removal and Replacement > Belly Pan - Removal.
imageOpen In New TabZoom/Print
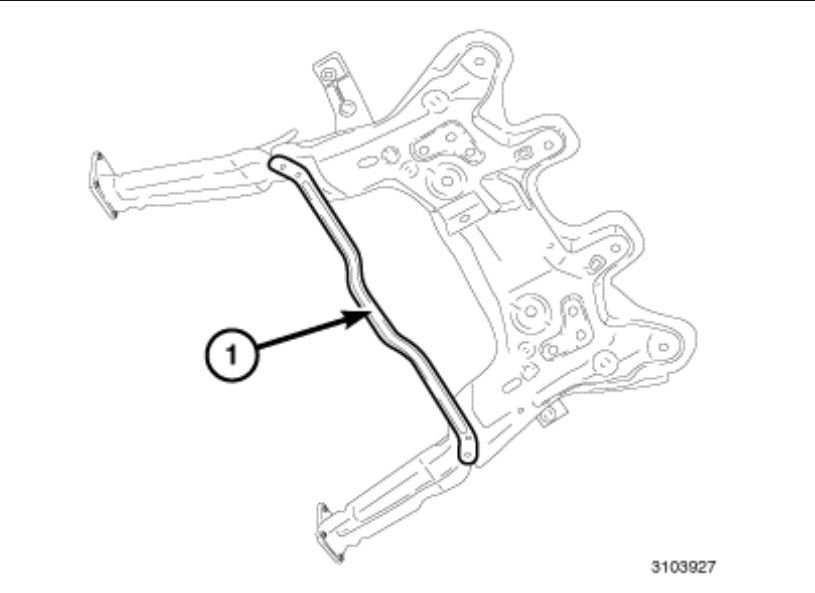
14. Remove the cross car cradle brace (1).
15. Drain the transaxle fluid See: Fluid - M/T > Procedures
16. Remove both halfshaftsSee: Axle Shaft Assembly > Removal and Replacement > Half Shaft - Removal.
17. Remove the Front Fascia See: Front Bumper Cover / Fascia > Removal and Replacement Front Bumper Fascia - Removal.
imageOpen In New TabZoom/Print
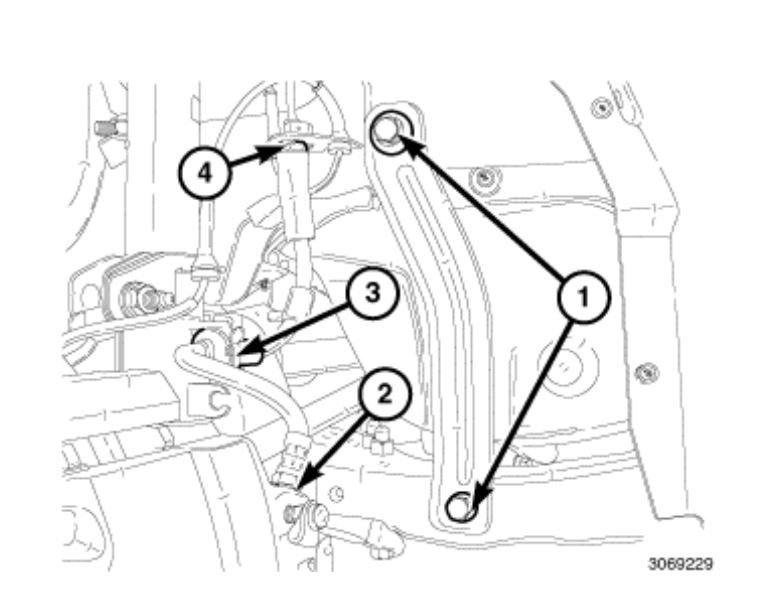
18. Remove two bolts (1) and the left vertical brace from the vehicle.
imageOpen In New TabZoom/Print
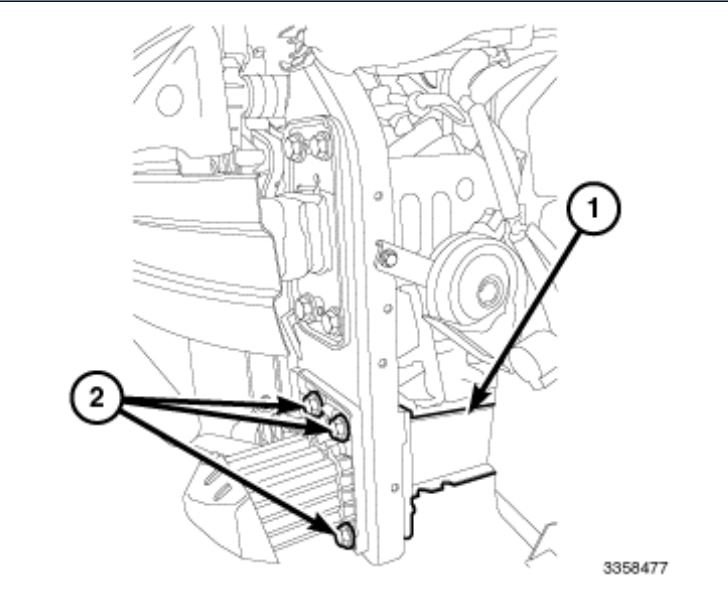
19. Remove four bolts (2) and the left lower frame extension (1).
imageOpen In New TabZoom/Print
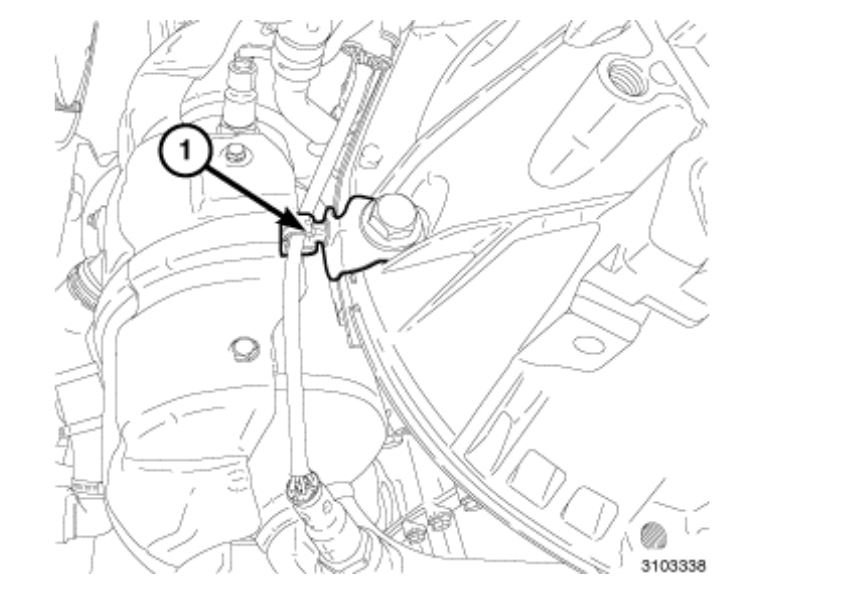
20. Disconnect the oxygen sensor wire from the loom/clip (1).
21. Carefully support the engine with a screw jack or the equivalent.
22. Install a suitable transmission jack to the transmission.
imageOpen In New TabZoom/Print
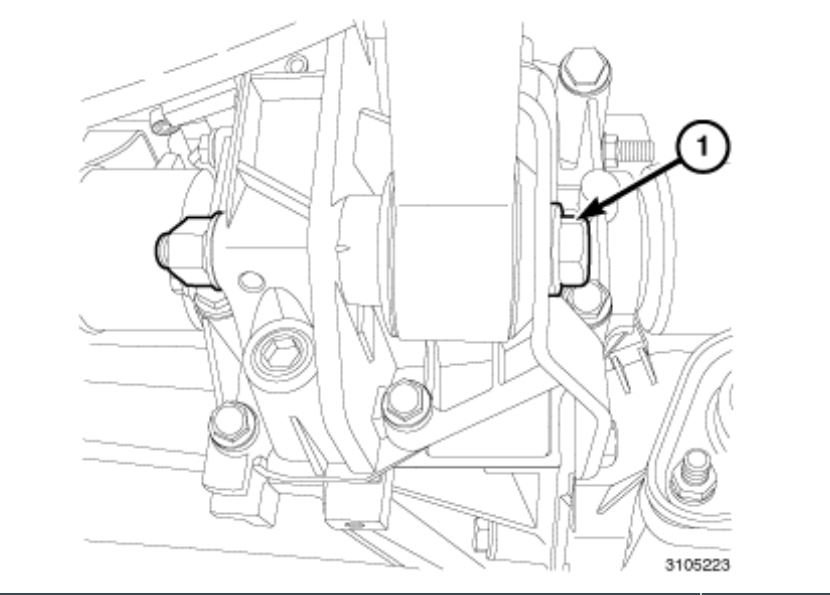
23. Remove the left side bolts (1) and mount.
imageOpen In New TabZoom/Print
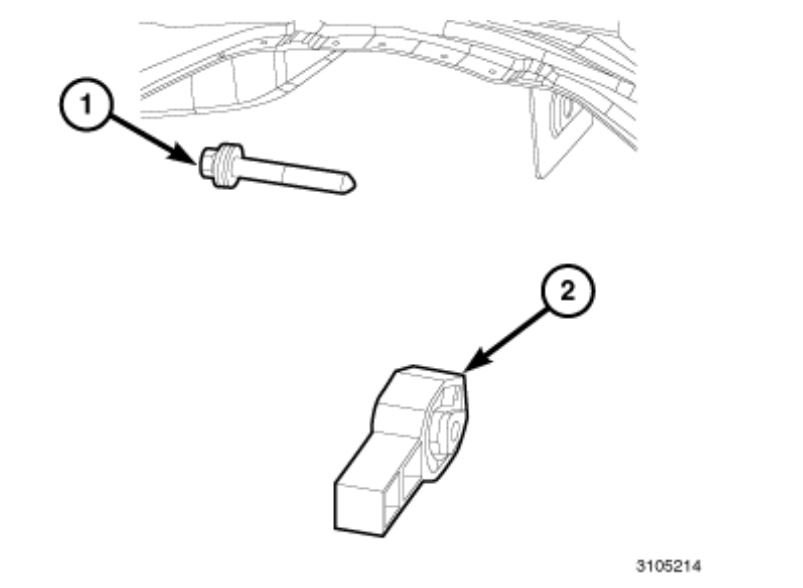
24. Remove the rear transmission mount bolt (1) from the frame.
imageOpen In New TabZoom/Print
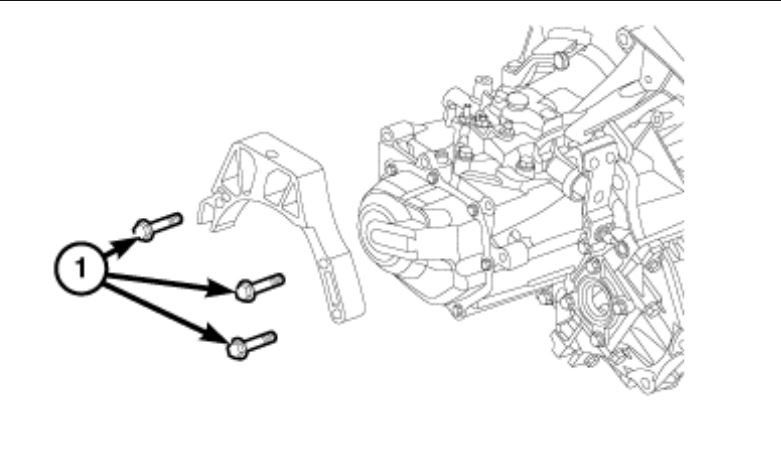
25. Remove the rear transmission mount bracket bolt (1) and bracket from transmission.
imageOpen In New TabZoom/Print
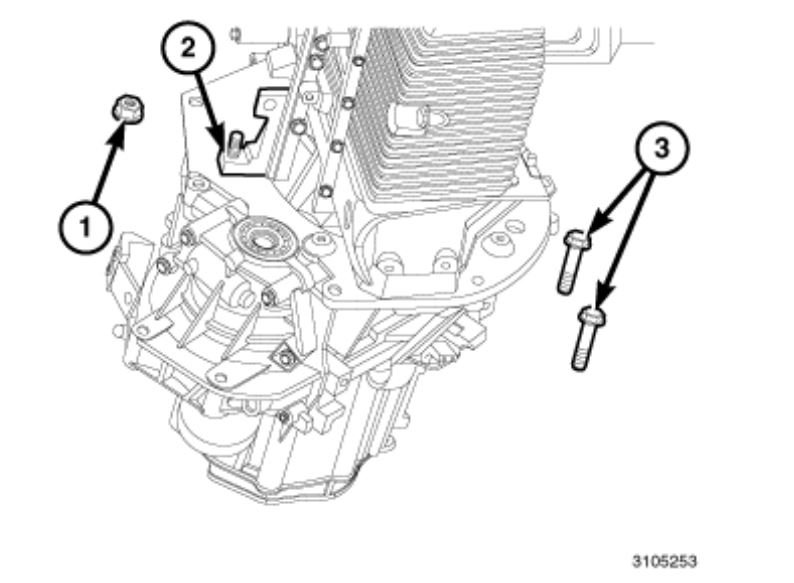
26. Remove the remaining transmission bell housing bolts (3).
27. Remove the nut (1) and the stud (2) from the transmission case to facilitate removal.
28. Remove transaxle from vehicle.
Images (Click to make bigger)
SPONSORED LINKS
Tuesday, June 30th, 2020 AT 4:40 AM
