Welcome back:
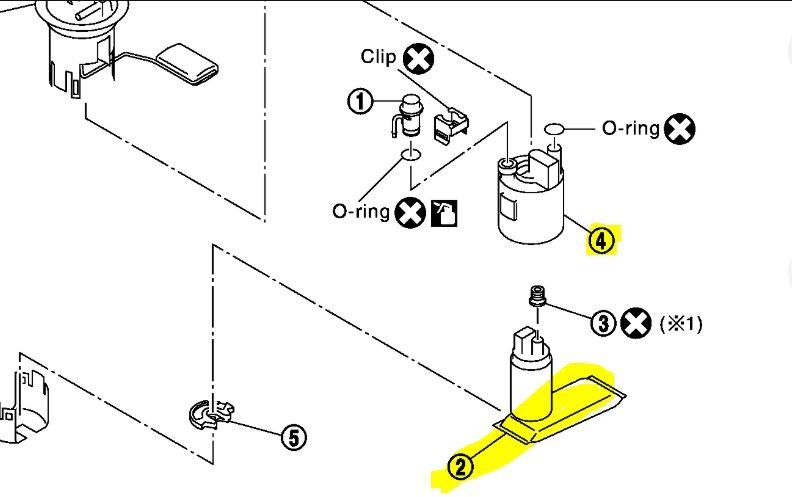
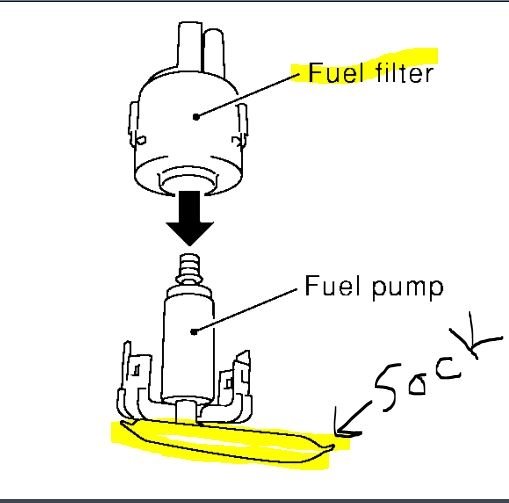
Checking the fuel filter is a big job because it is in the fuel tank. There is also what is called a sock at the bottom of the pump which sits low in the tank. That too can be plugging.
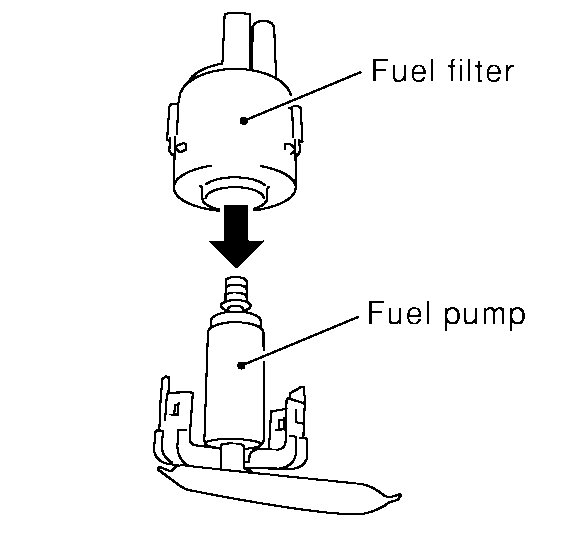
I attached a picture where I highlighted the sock and the number 4 which shows where the filter is actually located. The good news is that it can be accessed via a fuel pump port under the rear seat, so that tank doesn't need removed.
As far as concerns, I am going to provide the directions for fuel filter replacement. Note that the directions also include the pump and level sensor. If you do remove the pump to check, I would suggest replacing both the sock and the filter.
The attached pictures correlate with the directions. As long as you follow the directions provided, you shouldn't have any concerns.
__________________________
2002 Nissan-Datsun Maxima GLE V6-3.5L (VQ35)
Fuel Pump, Fuel Level Sensor Unit and Fuel Filter
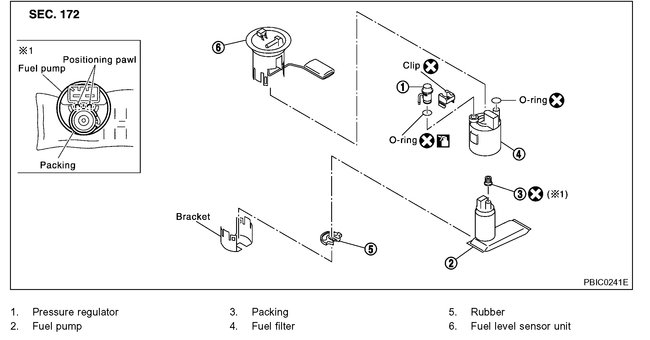
FUEL PUMP, FUEL LEVEL SENSOR UNIT AND FUEL FILTER
pic 2
Fuel Pump, Fuel Level Sensor Unit and Fuel Filter
pic 3
REMOVAL
1. Release fuel pressure from fuel line.
Refer to "Fuel Pressure Release".
2. Remove rear seat bottom. Refer to "Removal and Installation".
3. Remove inspection hole cover located under the rear seat.
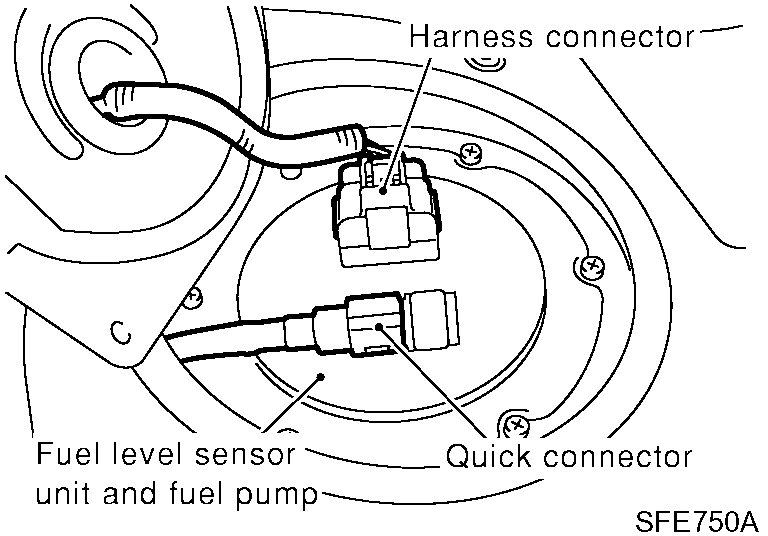
4. Disconnect electrical connector.
5. Remove the quick connectors.
- For removal of quick connectors, refer to step 5. Of "Fuel Tank Removal".
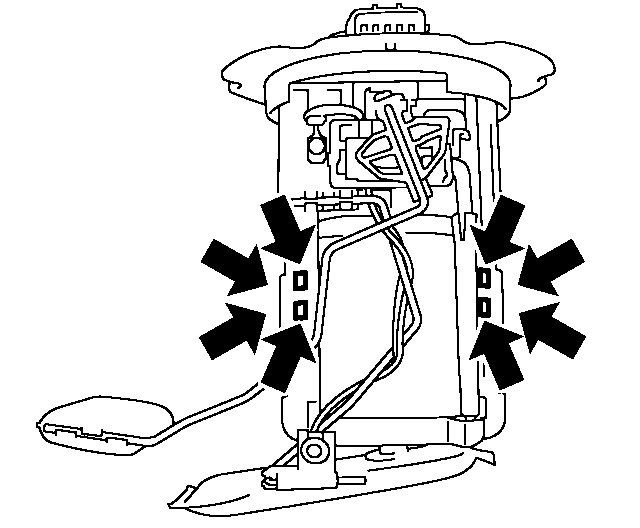
6. Remove the six screws.
Pic 4
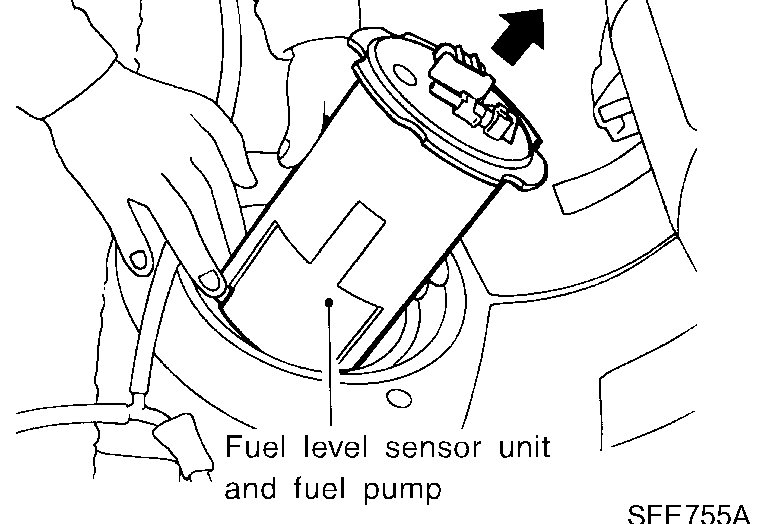
7. Pull out the fuel level sensor unit and fuel pump.
- Do not damage the arm of the fuel level sensor and fuel tank temperature sensor.
Pic 5
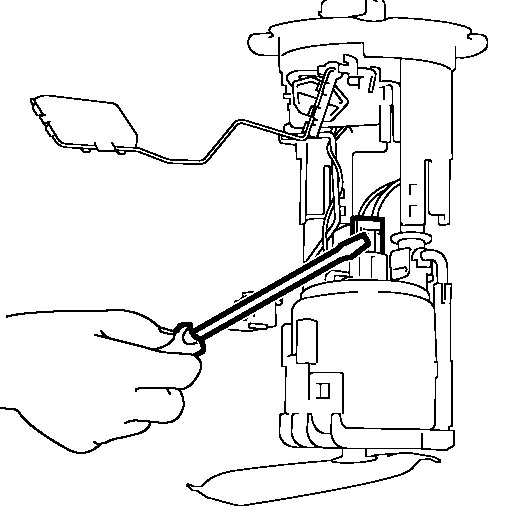
8. Remove flange of fuel level sensor unit and fuel pump.
- Using a screwdriver, remove the snap fit portion as shown in the figure.
Pic 6
9. Push fuel level sensor flange.
- Using a screwdriver, remove the snap fit portion as shown in the figure.
10. Pull up the fuel level sensor.
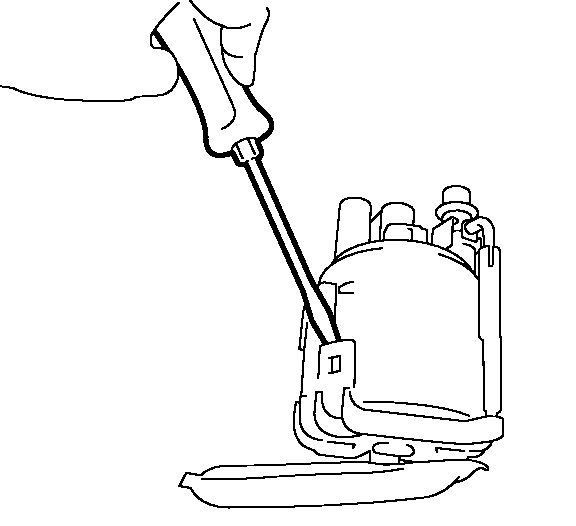
Pic 7
11. Remove fuel filter from chamber.
- Using a screwdriver, remove the snap fit portion as shown in the figure.
12. Remove pressure regulator clip, then pull out pressure regulator.
Pic 8
13. Remove fuel pump, then push down the fuel pump as shown in the figure.
14. Remove packing from fuel pump.
Pic 9
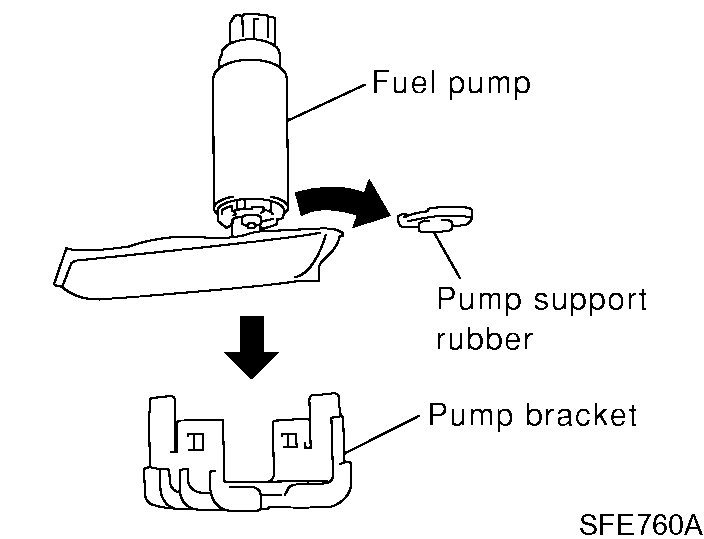
15. Remove the pump support rubber from the fuel pump.
INSTALLATION
Install in the reverse order of removal paying attention to the following.
- Install the fuel filter and fuel pump with the tabs aligned, make sure a click sound of secure engagement is heard.
- Securely connect the harness connector of the fuel pump.
- Install the pressure regulator O-ring as follows.
CAUTION:
- When replacing, always use a new O-ring, packing and clip.
- Handle it with bare hands. (Do not use gloves.)
- Visually check the O-ring, mounting parts and mating parts for foreign materials and flaws.
- Before installing, apply new engine oil.
- To avoid damage, do not apply an excessive force (pulling or starching).
Fuel Pressure Regulator
pic 10
- Install the pressure regulator as follows.
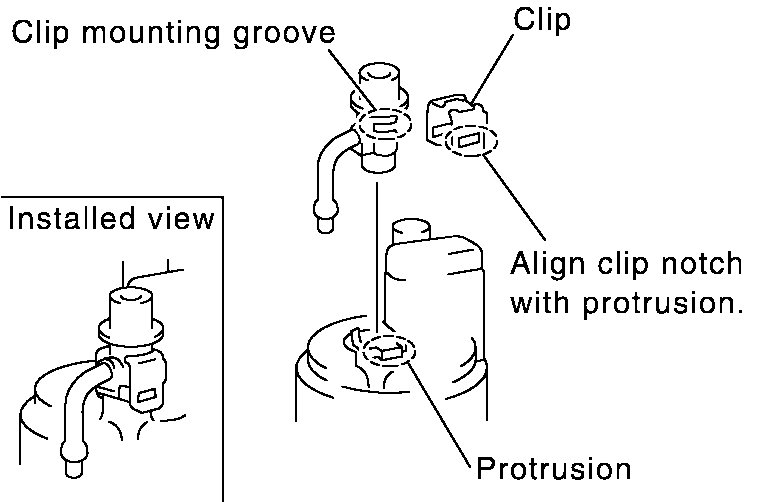
1. Insert the clip to the groove of the regulator.
2. With the clip installed, insert the regulator straight by matching the fuel filter protrusion and the clip notch.
3. Make sure that the fuel filter protrusion and clip notch are securely engaged.
Pic 11 is a clearer picture of the filter and sock.
__________________________
Let me know if this helps or if you have other questions.
Take care,
Joe
Images (Click to make bigger)
Friday, August 30th, 2019 AT 9:25 PM
