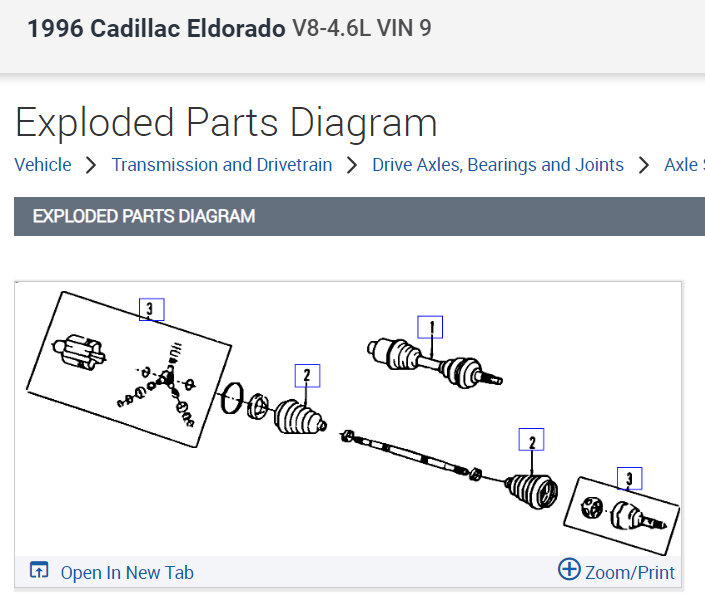
Yep, the CV drive axle can cause this issue. Here is how to change it out to help fix the problem.
REMOVAL
1. Raise and support vehicle, then remove tire and wheel assembly.
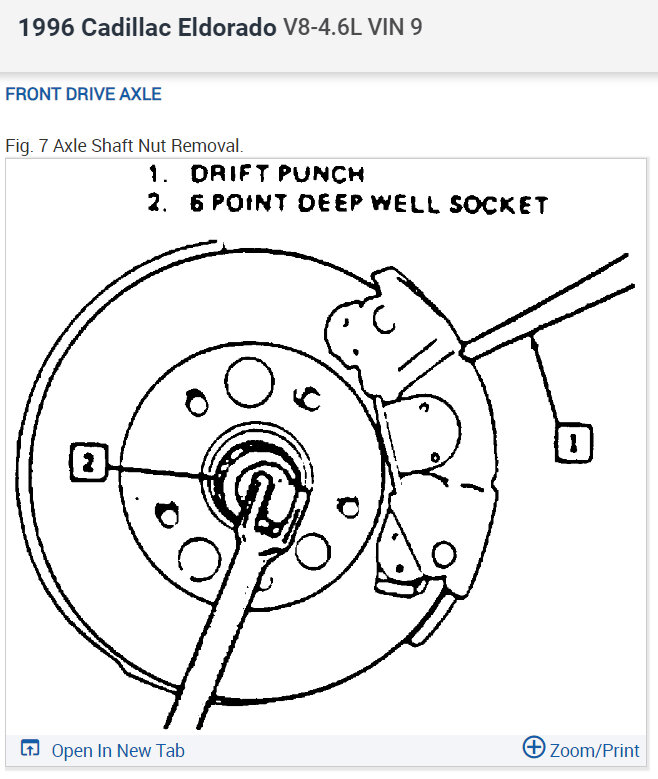
2. Install a brass drift or a screwdriver to prevent the rotor from turning, Fig. 7.
3. Remove axle nut and washer.
4. Remove stabilizer shaft or link from control arm.
5. Remove nut from ball joint, then separate ball joint from steering knuckle using separator tool No. J-36226, or equivalent.
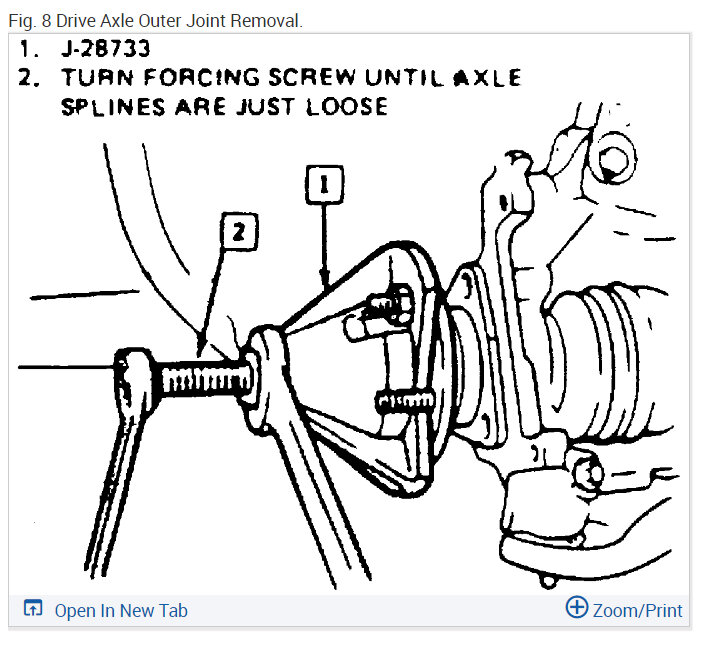
6. Remove drive axle from hub and bearing assembly using front hub spindle remover tool No. J-28733-A, or equivalent, Fig. 8.
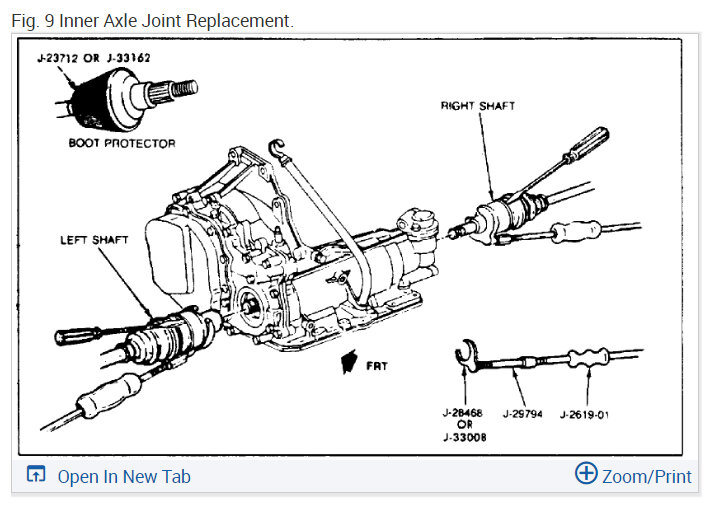
7. Remove drive axle from transaxle using axle shaft remover puller tool Nos. J-33008, J-29794 and slide hammer tool No. J-2619-01, or equivalents, if necessary, Fig. 9.
INSTALLATION
1. Install drive axle into the transaxle using seal protector J-37292-B, or equivalent
2. Seat snap ring by placing a screwdriver into the groove on the joint housing and tapping until seated, Fig. 9.
3. Grasp the inner housing and pull outward. If the snap ring is properly seated, the axle will remain in place.
4. Install drive axle into hub and bearing assembly.
5. Install lower ball joint to steering knuckle and tighten to specifications.
6. Install stabilizer shaft or link to control arm, tighten to specifications.
7. Insert a screwdriver or drift into caliper and rotor to prevent rotor from turning, Fig. 7.
8. Install new hub nut and washer, tighten to specification.
9. Install tire and wheel assembly, then lower vehicle.
Check out the images (below). Please upload pictures or videos in your response of any problems so we can see what to help you with.
Images (Click to make bigger)
Saturday, July 20th, 2024 AT 1:09 PM
