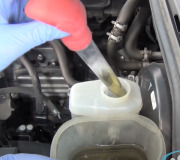
Brake issues

Tiny
NANCY VAUGHAN
  • MEMBER
  • 1989 PORSCHE 944
  • 2.7L
  • 4 CYL
  • AWD
  • AUTOMATIC
  • 120,440 MILES
Well, it started just all of a sudden really, my brakes went to floor. Well I had to drive it but at first they would pump up some after a day or so they would not hold any pressure. So I was told to get a new brake master cylinder. I did. I have it on now but I have got to bleed brakes. So I got a friend to help, but we are both female's and I am pretty good at fixing my own but this is new to me. The brakes do not seem to be pumping up and there is like a catch when letting back out. Am I doing something wrong? But it is only on the first wheel I stopped. Aggravated! Please help.
Saturday, July 22nd, 2017 AT 2:41 PM

10 Replies

Tiny
HARRY P
  • MECHANIC
  • 2,292 POSTS
Did you bleed the new master cylinder before you put it on the car? Because if not, that is where you went wrong. Here is a method of bleeding that I have never personally tried, but I have heard that it works. https://www.youtube.com/watch?v=oi4BnNA3Ep4.

If it does not work, then take the master cylinder off and bench bleed it, install it, and then bleed each wheel.

Let us know.
Was this
answer
helpful?
Yes
No
Saturday, July 22nd, 2017 AT 6:34 PM
Tiny
CARADIODOC
  • MECHANIC
  • 33,871 POSTS
You may be making this more complicated than necessary. I have never worked on your model, but the brake system should be similar to those on other models. First of all, did you bench-bleed the new master cylinder before installing it? They usually come with kits that include a pair of short hoses and a pair of plastic fittings for the job. If you did that, the bleeding is ninety percent done. If you did not, you have to push all that pile of air through the system to get it out.

There is a trick I use when removing the old master cylinder that makes bleeding even easier, but we are past that point. Now, when you have the bench-bled master cylinder bolted to the booster, loosen one of the steel line nuts about half a turn, then have a helper push the brake pedal very slowly. It should take about fifteenseconds to push it half-way to the floor. Stop there. In fact, get in the habit of never pushing the brake pedal to the floor as that can damage an older one that has crud and corrosion accumulated at the bottom of its bores. Your helper must holler when they stop moving the pedal, and they must hold it there until you have that line nut tight.

You will see air bubbles spitting out at the line nut while the brake pedal is moving. If the pedal is released before you have that nut tightened, air will be sucked right back in. Do that a second time, and perhaps a third time until you do not see any air bubbles coming out. Do the same thing for the other steel line.

When doing this, the pedal should be pushed very slowly so only brake fluid goes down the lines and any air bubbles have time to float back up. When the pedal is released, it should be done very quickly. The fluid rushing back into the reservoir will wash any sticking air bubbles back up with it.

I have done this for every master cylinder I have replaced, and have not had to bleed at the wheels in years.

If you did not bench-bleed the new master cylinder, there is no point to doing it now as excessive air has already entered the system. If you can look into the reservoir and see one or both ports, you should be able to see air bubbles coming out of them when your helper just starts to push the brake pedal. Air in this case, but normally brake fluid gets pushed out of those ports and flows into the reservoir for about the first inch of pedal travel. After that, as you continue to push the pedal, the rubber lips seals pass those ports, then the brake fluid is trapped and has no choice but to get pushed down to the wheels. What we are interested in is that first inch of travel. Some air got expelled, then when the pedal is released, brake fluid gets sucked in there in its place. If you stroke the pedal that one inch repeatedly, you are bleeding the air out of the master cylinder.

Chances are your car does not have anti-lock brakes, but if it does, there may be two chambers in the hydraulic controller that cannot be bled without a scanner to command the computer to open two valves. We will worry about that later if necessary.

When other parts are replaced and bleeding at a wheel is necessary, the only method I use is gravity-bleeding. This is also the safest way when the car has an old master cylinder that could be damaged by an exuberant, uninformed helper working the brake pedal. Loosen the cap on the reservoir so no vacuum builds up in there that would impede the free flow of fluid. Open any bleeder screws involved in the repair, then take a break and wait for fluid to start running out. If the fluid is dark, that is normal from being hot, but it means it is old fluid. Depending on what was replaced, the air may have not made it down to that wheel yet. Be sure to not let the reservoir run empty. When you see clear fluid coming out of the bleeder screw, it has made it all the way from the master cylinder, and air in that line should be gone. When you are bleeding at multiple wheels, and one has clear fluid coming out, close that bleeder screw, then wait for the next one to flow. If no fluid flows from any wheel within about five minutes or so, "irritate" the brake pedal by hand a little to get the fluid started. Once there is some fluid in the lines, its weight will let gravity pull it down.

Once you have all the bleeder screws tightened and the air is out, work the brake pedal a couple of times. The fluid flowing to the wheels will wash a few sticking air bubbles into the calipers and wheel cylinders. Open each bleeder screw once more for a couple of seconds to let those bubbles pop out, and you are done.
Was this
answer
helpful?
Yes
No
Saturday, July 22nd, 2017 AT 6:40 PM
Tiny
HARRY P
  • MECHANIC
  • 2,292 POSTS
Okau then. I like Carradiodocs answer more than mine. Either way you go about doing it, let us know how it goes for you.
Was this
answer
helpful?
Yes
No
Saturday, July 22nd, 2017 AT 6:55 PM
Tiny
CARADIODOC
  • MECHANIC
  • 33,871 POSTS
Hi Mr. Man. I am running that video right now, but it is too painful to watch. This reminds me of when working at the dealership, we had a new fellow who did time-wasting things like this, and we all warned him he would be fired if he continued wasting customers' time and money. In the final case, replacing the thermostat solved the customer's (used car department's) complaints of no heat and temperature gauge stays on "cold", but instead of moving on to the next car, he spent two hours rigging up a method to test the old thermostat. That was the last day we saw him.

Similarly, it has taken this fellow a half hour to accomplish what normal bleeding would do in a few minutes, and that's in addition to he said he had already bleed the system before starting this procedure.

I thought he was going to hook that hose to a vacuum port on the engine. Now that would get the air out, but it reminds me that any time vacuum-bleeding is done, air gets sucked in through the threads of the bleeder screw. The resulting steady stream of very tiny bubbles doesn't get recognized for what it is. Air in the break line comes out as a few larger bubbles.

I can see why you never tried this. Our jobs would have been done and our customers would have happily buzzed off into the sunset a long time ago, while this fellow is still putting his invention together. To add to the misery, after running through all of this video, he still has a low and mushy pedal!

One point of value I did learn from the comments is some Porsche calipers have two bleeder screws. Nancy, be sure to check if you have that on your car. There may be two pistons on each caliper, and one bleeder screw may have not been sufficient to get all the air out.
Was this
answer
helpful?
Yes
No
Saturday, July 22nd, 2017 AT 7:59 PM
Tiny
NANCY VAUGHAN
  • MEMBER
  • 3 POSTS
I appreciate the both of your help. That explains it all. Because, as a matter of fact, I did not know to bleed the new master cylinder and it did not come with anything but the master cylinder and as I said I am new at this type of DIY process. Lol. But, I am catching on every day and learn new things. I am getting ready to try the way CARADIODOC has explained and will let you know what happens with that. Again thank you two so much!
Was this
answer
helpful?
Yes
No
Sunday, July 23rd, 2017 AT 9:16 AM
Tiny
KEN L
  • MASTER CERTIFIED MECHANIC
  • 47,574 POSTS
We are the team that want to get you back on the road. :)

Please let us know what happens.

Cheers, Ken
Was this
answer
helpful?
Yes
No
Monday, July 24th, 2017 AT 2:33 PM
Tiny
CARADIODOC
  • MECHANIC
  • 33,871 POSTS
As a point of interest, three of my top students were girls, and the guys had a lot of respect for them. Once this problem is solved, be sure to come back for more of our wondrous help.
Was this
answer
helpful?
Yes
No
Monday, July 24th, 2017 AT 8:56 PM
Tiny
NANCY VAUGHAN
  • MEMBER
  • 3 POSTS
Well, just wanting to let y'all know that helped so much.I now have breaks once again. So, from me thank you thank you. Now if only I could solve the other prob I have it would be back right. Sincerely nancy
Was this
answer
helpful?
Yes
No
Tuesday, August 1st, 2017 AT 8:14 PM
Tiny
HARRY P
  • MECHANIC
  • 2,292 POSTS
Glad we could get you going right. Please come back if you need anything else
Was this
answer
helpful?
Yes
No
Tuesday, August 1st, 2017 AT 8:47 PM
Tiny
KEN L
  • MASTER CERTIFIED MECHANIC
  • 47,574 POSTS
Nice work men
Was this
answer
helpful?
Yes
No
-1
Wednesday, August 2nd, 2017 AT 10:58 AM

Please login or register to post a reply.

Sponsored links