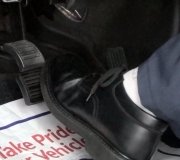
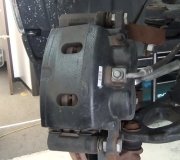
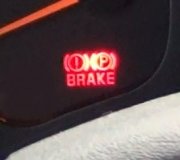
Given the recent history, it's a pretty good bet the master cylinder has been damaged and will need to be replaced first. After about a year or so, crud and corrosion build up in the lower parts of the bores where the pistons don't normally travel. When anything happens to allow the brake pedal to be pushed all the way to the floor, those pistons run over that crud, and that can tear the rubber lip seals. That results in a slowly sinking brake pedal, and that usually takes two or three days to show up. Eventually it becomes a total failure with no pedal pressure at all. This includes going to the floor due to a fluid leak, pumping the pedal to run the calipers' pistons out after installing new pads, and pedal-bleeding. Being surprised by a sudden leak is rather unavoidable, but when it comes to pedal-bleeding with a helper, always pretend there's a brick under the pedal so it can't go more than halfway to the floor.
The clue here is you have the rear brake hydraulics blocked off, so the brake pedal should be higher and harder than normal. If there's no leak in the front system, the only way for the brake pedal to be able to go down too far is the master cylinder isn't pushing any fluid. That's due to "internal leakage", meaning the fluid is bypassing the rubber lip seal.
You don't have to worry about pushing the brake pedal too far with the replacement master cylinder, for now. It won't have any internal corrosion developed yet. It's still a good habit to avoid going more than halfway though.
Bleeding the front brakes was not necessary. No air gets into that system when there's a leak in the rear circuit.
Be sure to bench-bleed the replacement master cylinder, but when it comes time to install it, I have a trick that can save you a lot of time. First get the rear line replaced. If you use a number of sections of pre-made lines from an auto parts store, you'll have a number of unions, or connectors. If one of those is close to the rear and at a high spot, it can make a dandy place to bleed the rear if the bleeder screws on the wheel cylinders are rusted tight. Those lines are available in a number of standard lengths, and for just a little extra, you can get some that have an anodized coating to resist rust. The line nuts are soft brass and will round off easily. Use "line wrenches" / "flare nut wrenches" to prevent that.
When you're ready to install the bench-bleed replacement, start by loosening the two line nuts at the master cylinder. Remove the nuts that hold the master cylinder to the power booster. Pull the master cylinder forward off those studs, then use it as a handle to bend the steel lines upward a little. That will prevent brake fluid from running out of them. Now finish removing the lines. Be careful with dripping brake fluid. It loves to eat paint. Wash any fluid off painted surfaces right away with water.
Thread the two line nuts finger tight into the new master cylinder, then bend them back down and slide the unit onto the booster and mount it. Lightly tighten one line nut; leave one loose. Have a helper slowly push the brake pedal halfway to the floor. It should take about 15 seconds to do that. You'll see air bubbles coming out around the line nut. Snug that nut with the wrench, THEN holler to your helper to let the pedal up quickly. Loosen the same nut, then do that again. When you see only clear fluid coming out, tighten that nut, allow the helper to release the pedal, then do the same thing for the other line.
By pushing the pedal slowly, only brake fluid will go down the lines. Air will float back up. By releasing the pedal quickly, any bubbles stuck to the lines will wash up into the reservoir with the returning brake fluid. No need to bleed at any wheels when the master cylinder is the only thing being replaced.
In your story, you will need to bleed the new rear line. By the way, please let me know if you have one line that feeds both rear brakes, or if there's two lines, one for each rear brake. For this procedure, all I've ever used since the 1980s is gravity-bleeding. Open a rear bleeder screw, or a connection that's higher than the rest of the line, and loosen the cap on the reservoir so a vacuum won't develop that impedes the free flow of the fluid. The disadvantage to this method is it is very time-consuming. I often "irritate" the brake pedal a little by hand to get the flow started. You can push the pedal halfway by foot too, but release it slowly to reduce how much fluid, (and air), gets pulled back. The advantage to this method is you can do it by yourself.
If you're able to get the rear bleeder screws open, those will not be a high point in that system. Air is going to pool in the high spots while brake fluid runs past it. To expel that trapped air, you will likely have to resort to pumping the brake pedal. No need to get aggressive, but this will need a little more pedal speed to force the air to go down, then out.
There are also hand and air-powered vacuum pumps you can use to speed up the bleeding process. They use clear tubes attached to the bleeder screws so you can see the air bubbles. You're looking for really large, long pockets of air. When those stop showing up, you're done with that wheel. You will likely also see a constant stream of very tiny bubbles that never stop. Ignore those. They're caused by air getting sucked in past the threads of the bleeder screw. Those bubbles aren't actually in the brake fluid.
If you have trouble getting any fluid to flow to the rear, consider that trucks, minivans, and other vehicles that can have a wide range of load distribution usually use a rear height-sensing proportioning valve with a linkage connected to the rear axle. That is used to stop rear braking power from increasing under hard stops, leading to rear-wheel lockup and skidding. If you have the vehicle jacked up with the rear suspension hanging down, that proportioning valve will react as though you're under a hard stop with weight shifting to the front wheels. It will block fluid flow to the rear. To prevent this, set the jack stands under the rear axle, not under the frame. That will push the axle up to its normal, at-rest position, and the valve will open and let fluid pass.
Here's some dandy articles you may find of interest:
https://www.2carpros.com/articles/how-to-bleed-or-flush-a-car-brake-system
https://www.2carpros.com/articles/brake-pedal-goes-to-the-floor
https://www.2carpros.com/articles/how-to-replace-a-brake-master-cylinder
https://www.2carpros.com/articles/symptoms-of-a-bad-brake-master-cylinder
Here's some videos you might also find interesting on brake bleeding and on bench-bleeding your new master cylinder:
https://youtu.be/WdxvEQrMkBg
https://youtu.be/w7gUsj2us0U
One huge warning I always include is to be extremely careful to not get any type of petroleum product in the brake fluid or on any parts. Things like engine oil, power steering fluid, transmission fluid, penetrating oil, and axle grease are not compatible with rubber brake parts. They will cause those rubber parts to swell and become slimy and mushy. That takes about a week to show up. The first sign is from the rubber lip seals in the master cylinder growing past the fluid return ports and blocking them. That keeps the fluid trapped and the brakes applied. As the brakes get hot, usually with smoking from the wheels, that heat migrates into the fluid causing it to expand. Since it is blocked from returning to the reservoir, the brakes become applied even harder, hence the smoking brakes and very hot wheels.
The only proper fix for this contamination is to replace every part that has a rubber part inside that contacts brake fluid. The steel lines must be flushed and dried, then all new rubber parts installed. This will include the new master cylinder, front calipers, rear calipers or wheel cylinders, rubber flex hoses, combination valve, near or under the master cylinder), rear height-sensing proportioning valve, rubber bladder seal under the reservoir cap, and the hydraulic controller if your vehicle has anti-lock brakes. This gets to be a very expensive repair. If any rubber part is not replaced, the contamination will leach out of it and recontaminate the new fluid and rubber parts. To prevent problems like this, professionals even wash their hands before handling rubber brake parts to avoid contaminating them with fingerprint grease.
See how far you get with this, then let me know what you find.
Saturday, October 19th, 2024 AT 8:49 PM


