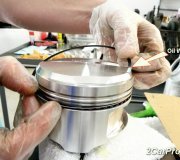
If the parking brake is released, it shouldn't cause this. Here are the directions for compressing the piston. Note, I don't know what type of tool you are using, however, the one called for applies pressure to depress the piston as it turns it in to place.
______________________________________
Note! Do not depress the brake pedal while the brake pads are removed.
Cleaning the brake caliper
Clean and check the brake caliper and dust cover.
Clean and check the brake pad mating surfaces in the brake caliper and caliper holder.
Note! If the dust boot is damaged dirt may have penetrated the cylinder. If this is the case the caliper must be replaced.
Brake disc check
Check brake disc friction surfaces.
If the brake disc displays signs of out-of-true, check its lateral run out. See: Brake disc rear, checking See: Brake Rotor/Disc > Component Tests and General Diagnostics > Brake Disc Rear, Checking.
Replace the brake disc if it displays signs of heavy wear, variable thickness or similar. To replace, see: Rear brake disc See: Brake Rotor/Disc > Removal and Replacement > Rear Brake Disc, Replacing.
Note! Minimum disc thickness/replacement limit = 9.0 mm. Minimum recommended disc thickness when installing new brake pads = 9.8 mm.
Tightening torque
Note! For tightening torques, see Specifications. See: Brakes and Traction Control > Mechanical > Tightening Torque
Installing brake pads
pic 1
Press back the piston in the cylinder on the brake caliper. Use the press tool together with 999 7091 Spanner See: Vehicle > Electrical / Mechanical Repair > 999 7091 Spanner.
Check that the dust cover is correctly positioned.
_________________________
Are you able to turn the piston?
Joe
Image (Click to make bigger)
Tuesday, January 21st, 2020 AT 5:39 PM


