First, you have to use the milliamp ranges on the meter. Depending on the type of meter, it may blow its internal fuse and leave you with a reading of 0.00 milliamps.
The bigger problem is you can't just stick the meter in there and expect to read the result. It can take up to 20 minutes for all of the computers to time out and go to "sleep" mode. Until then, the system can draw as much as three amps. If you do anything to break the circuit, even for an instant, some of the computers will wake up and take up to another 20 minutes to go back to sleep mode. Breaking the circuit is done if you need to move the meter's positive probe from a dedicated 10 or 20-amp jack to the common jack used for volts, ohms, and the lower current ranges. Even turning the range knob to a lower scale for more accuracy breaks the circuit as the switch contacts move from one contact to the next.
The extra step required to avoid waking up the computers only takes a few seconds; much less time than it takes to explain it. When you want to change the meter's range, use a small jumper wire to bypass it first. Pick the range you want, then remove the jumper wire.
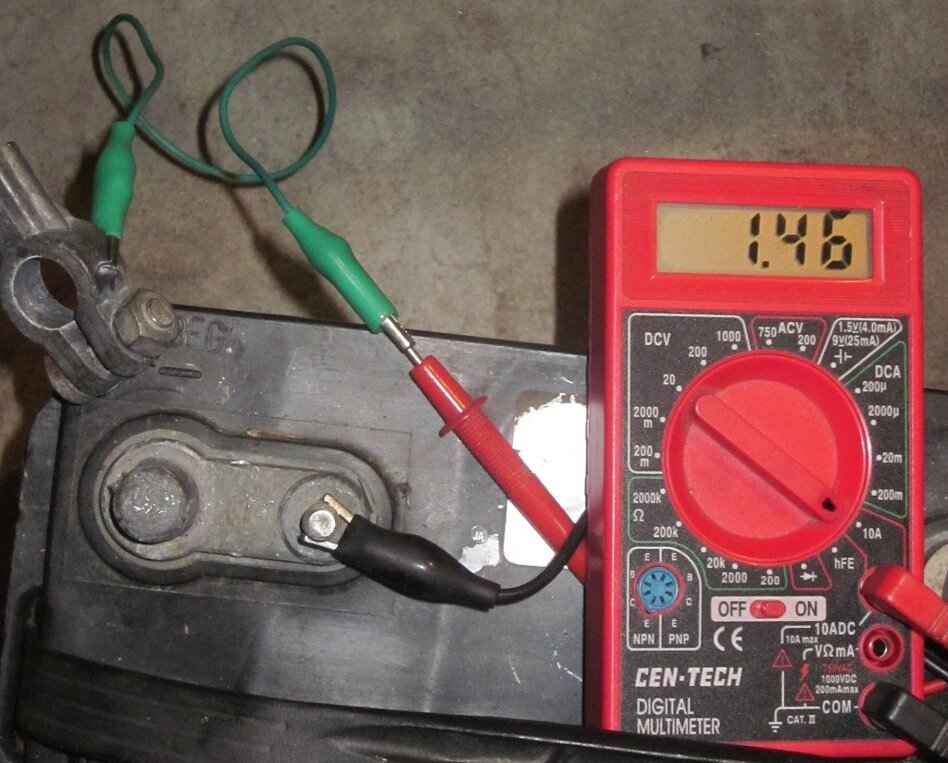
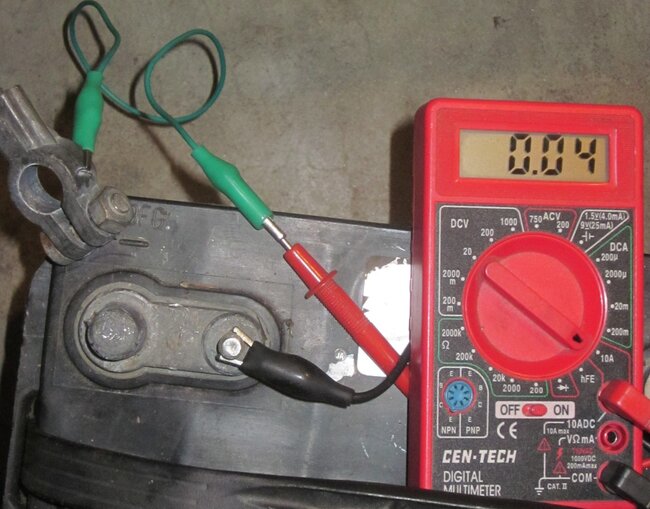
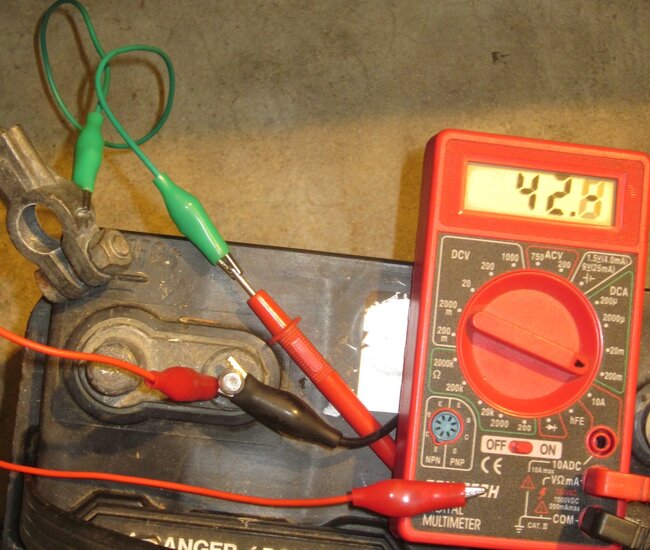
Starting with the first photo, the meter and red probe are on the 10-amp range. Current is 1.46 amps. That's too high to measure on the next lower range. After the computers have timed out in the second photo, current has dropped to 0.04 amps. That can be measured on a lower range, but that requires removing the red probe to move it to the center jack, and rotating the switch. Both actions will break the circuit and wake up the computers.
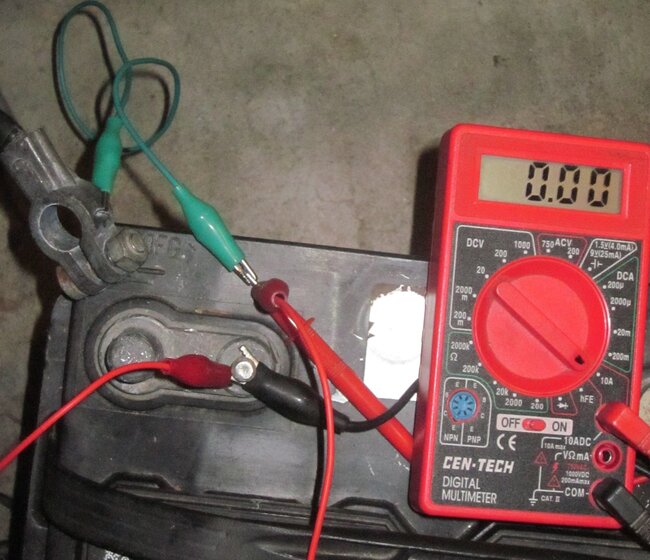
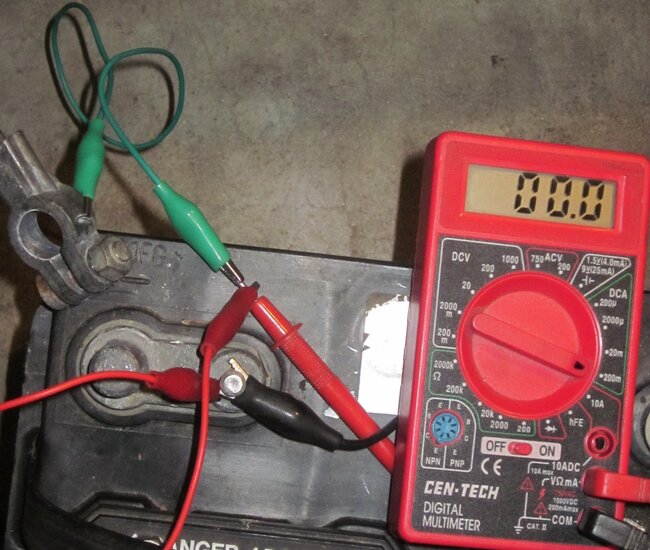
The solution is shown in the third photo. The red jumper wire has been added between the two meter probes. Current flow takes the path of least resistance, so it goes through that jumper wire instead of the meter. That's why the meter is showing 0.00 amps. As long as that jumper remains in place, it's okay to move the probe and turn the range switch. In the fourth photo, those changes have been made, but current is still flowing through the red jumper wire, so the meter still shows 0.00 amps.
Finally, in the fifth photo, one end of the red jumper wire has been disconnected. Current has to flow through the meter now, and it's showing 42.8 milliamps. This range can measure up to 200 milliamps, (0.200 amps), but it has more accuracy than the ten-amp range. If this current would drop even more, as in below 20 milliamps, the next lower range could be used. That would provide another decimal place to the reading for even more accuracy. To do that, reconnect the jumper wire again, rotate the range switch, then disconnect the jumper.
The meter I used here is an inexpensive $7.00 model from Harbor Freight Tools. You can find similar meters at Walmart and any hardware store. On most of these, the 10 or 20-amp dedicated jack is not fused. Typically there's a 2-amp fuse inline with the common positive jack. Since the "ignition off-draw", (IOD) current can exceed two amps, if you start out on the next lower range, even if it's a 2-amp range, that will blow that 2-amp fuse, then the meter will not measure anything, volts, amps, or ohms, except on the 20-amp range. On this meter, the next lower range is only a 200 milliamp range that I switched to in the fourth photo. We had an initial 1.46 amps. That will not blow the fuse, but it's too high to read on that range, so you have to start out on the 10-amp range. This meter can be turned off during the wait to save the battery.
Many meters are turned off by rotating the range switch to the "off" position. That means breaking the circuit so you'll need the jumper wire.
Images (Click to make bigger)
Thursday, December 7th, 2023 AT 4:10 PM
