Sunday, February 21st, 2021 AT 7:32 PM
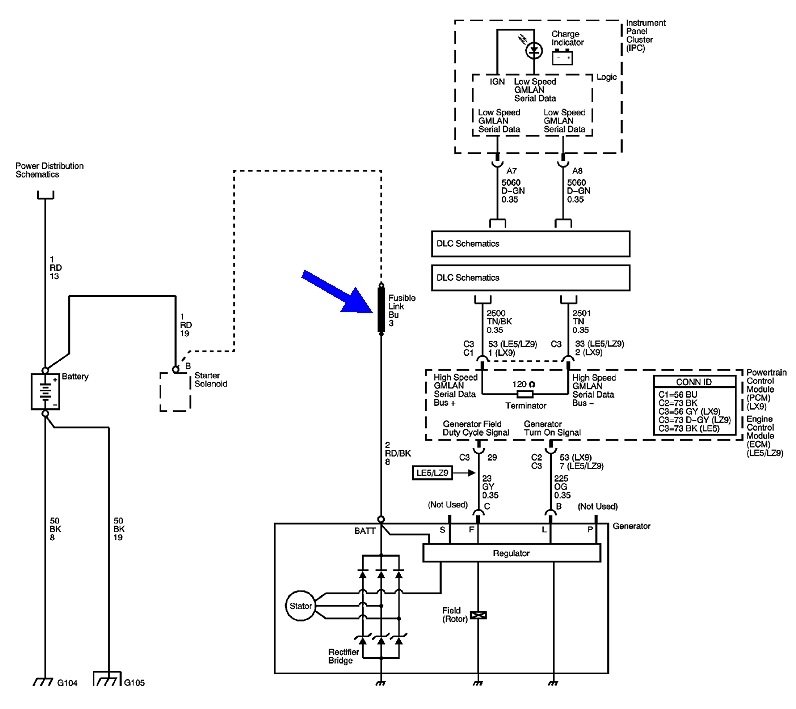
So, after retiring this car for about two months as winter cold and freezing weather wreaked havoc through the land- I restarted the engine to check things out. I had placed a new battery back in May of 2020. I drove it for about 10 miles, shut it off, did some work and returned to drive back home. 5 miles later, the engine loses acceleration, IPC light lit up one after another and the power door locks locked and unlocked in a state of frenzy. I managed to escape multiple traffic lights but ultimately the engine stalled at an uphill one-way traffic light. I managed to back up the car into a parking garage where I did obdii scanning (a total of 18 codes! Mostly purge solenoid and emission related codes and TPS, Catalytic converter and other codes related to a past problem IMT stuck open and ISS low voltage. Unfortunately, I erased the DTC and could not replicate the codes many of which were repeats of the same thing). Then, I did some electrical testing. There was distinct rubber melting smell and smoke (which disappeared before I could determine the source- belt maybe? I thought to myself). Lighting and battery power seemed fine at the time of the breakdown. The next morning, I returned to do more testing. I found that the battery was literally dead. Jump starting did nothing more than move the car to the next garage a block away. I suspected the alternator. I got me a new one and in the freezing rain and snow, I replaced both the alternator and belt (belt had some rubbed or burned areas but still good; alternator tested at 15.2 volts output and still good). Tried to start the car; no go. Battery not being charged. I recharged the battery at a parts store, and went back to the site, installed and drove the car home (10 miles). Finally, at home the alternator isn't charging the battery. I tested the wiring, all grounds are in good condition. Alternator output is 14.8 v, but battery is 12.8 and going down. Finally, the car still running in the driveway, the engine begins to lose power again. Battery: 10.2 V and going down. I retested the battery and had it recharged at a part store. The same: Battery: good (the same pattern again). I decided to check out the BCM and interior fuses because I heard zapping sounds coming from that area after I shut off the engine. Heater blower motor fuse was blown (so was the auxiliary power outlet fuse back in the trunk fuse box). I replaced the fuses. What do I do next? One thing I am thinking: to attach a separate cable between the alternator post and the battery positive, run the engine and see if the alternator charges the battery? Is this possible (almost doubling the connection between the positive battery post and the alternator?) Just to see the difference or is this totally wrong way do things? When I test voltage using the alternator post, I get 14.8 V at the alternator but only 12.8 V at the battery when the engine is running (meaning the alternator isn't charging the battery), and I get 12.1 V at the alternator post when the engine isn't running. The bottom line is if the battery is damaged, why is it able to recharge from low 3 volts at the stores but not be maintained at 12.8 inside the engine bay being connected to the alternator? I say this because someone mentioned that this battery maybe good, but it is really failing? I don't get it. It is under warranty but why replace it when things aren't clear?


