Disconnect the negative battery cable.
Partially drain the cooling system into a suitable container, to a level below the thermostat.
It is usually possible to leave the radiator hose attached and simply remove the thermostat housing (also called a water outlet) and flex the radiator hose enough to service the thermostat. It is good practice, however, to remove the radiator hose so the thermostat housing can be given a thorough cleaning. Debris on the thermostat housing sealing surface can cause leaks.
Some applications may have electrical connections to sensors which mount in the thermostat housing. Use care when detaching these connectors.
Unfasten the thermostat housing bolts and remove the housing.
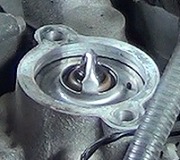
Remove the thermostat by simply pulling out. Discard the gasket.
To install:
Clean all parts well. Make sure the sealing surfaces on both the thermostat housing gasket flange and the intake manifold are clean and free of corrosion damage. It is good practice to run a thread cutting tap or a clean bolt into the threaded holes in the manifold to clean out old sealer and dirt. The threads should be clean so the thermostat cover clamps the gasket evenly at assembly.
Position the thermostat in the intake manifold. Make sure it is seated.
Position a new gasket over the thermostat. If no gasket is used, apply a 0.125 in. (3mm) bead of RTV sealer to the thermostat housing and install the housing. Lightly lubricate the bolts with clean engine oil. Torque to 18-20 ft. Lbs. (23-27 Nm).
If removed, attach the radiator hose to the thermostat housing.
Refill the engine with the proper mix of DEX-COOL¬ and water. Connect the negative battery cable, start the engine and check for leaks.
SPONSORED LINKS
Friday, February 11th, 2011 AT 6:05 AM


