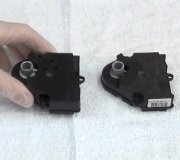
If you have the lower panel out and the glove box you have gone through the steps for removal already. The next is to disconnect the wiring and remove the screws that hold the actuator. Here are the OEM directions -
Left Side -
Disconnect and isolate the negative battery cable.
Remove the silencer from underneath the passenger side of the instrument panel.
Remove the glove box bin See: Body and FrameInterior Moulding / TrimGlove CompartmentService and RepairInstrument Panel Glove Box - Removal.
Disconnect the wire harness connector (1) from the blend door actuator (2) located on the left side of the HVAC air distribution housing (3).
Remove the two screws (4) that secure the blend door actuator to the air distribution housing and remove the actuator.
Right Side -
Disconnect and isolate the negative battery cable.
On LHD models, remove the silencer from underneath the passenger side of the instrument panel.
On LHD models, remove the glove box bin See: Body and FrameInterior Moulding / TrimGlove CompartmentService and RepairInstrument Panel Glove Box - Removal.
Remove the front floor distribution duct from the right side of the air distribution housing See: Air DuctService and RepairFloor Distribution Duct - Installation.
Remove the screws (2) that secure the blend door actuator (1) to the right side of the air distribution housing (4) and remove the actuator from the housing.
Disconnect the wire harness connector (3) from the blend door actuator and remove the actuator from the vehicle.
Images (Click to make bigger)
Tuesday, December 5th, 2017 AT 7:00 AM


