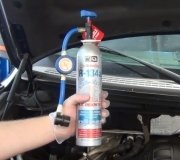
Your charging hose will have a valve to close, then switch it to the next can and reopen the valve. No need to stop the engine.
Here's some pointers that might help. First, keep the can upright at all times when it's flowing refrigerant. You only want the vapor going into the system. If you tip it over, you'll get liquid going into the low side where it could get into the compressor. At best that will just lock it up for a few hours. At worst it can damage the pistons and valves.
If it takes a painful amount of time to empty a can, set it in a pot of hot water. After waiting over 20 minutes, that has worked for me to empty the can in less than half a minute.
The amount of refrigerant is critical for proper operation. Too much is just as bad as too little. Chrysler is the only manufacturer that provides a means to know when the system is fully-charged. If this is a dealer's OEM kit, there will be a small sight glass on top of the receiver / drier. It's only about 1/4" in diameter. Keep adding refrigerant just until the vapor bubbles stop flowing through that window. At that point the evaporator in the dash will be very close to half-filled with liquid and half with vapor. That's the point at which it changes state from liquid to vapor, and that's the point at which it gets very cold. With too little refrigerant, that point will be in the high-side hose under the hood. You're likely to see frost developing on the hose in the area where it's changing state. You don't want the cooling to occur there. Likewise, with too much refrigerant, it will change state in the low-pressure hose under the hood; another place the cooling won't do any good. If liquid gets into that hose, it can slosh into the compressor and damage it.
For our Ford friends, it's important to point out they also used a sight glass starting in the '80s, but they must never be used. When the system is fully-charged and even badly over-charged, there will still be vapor bubbles in that window. It's a great idea that doesn't work on those vehicles.
It's also important to watch what you get for air temperature at the ducts. 60 degrees F. is very respectable. That's sweater-wearing temperature. Some people will brag that theirs gets down to 40 degrees, but that indicates something is wrong. To take 70 degree outside air and get it to 40 degrees at the ducts means the evaporator needs to be much too cold. The biggest comfort comes from removing the humidity from the air. That moisture condenses on the evaporator and drips onto the ground. All AC systems are regulated to limit the temperature drop to no lower than 40 degrees. That's already getting dangerously close to 32 degrees, the point at which that condensation will freeze into a block of solid ice. That will block air flow and stop the cooling. If your system uses a gas-charged sensing bulb on the evaporator, be sure that is located in the spot specified so it regulates properly. Many systems today use pressure instead of temperature to control the flow of refrigerant. The older R-12 had a neat characteristic where, when the system is at rest, its temperature will very closely equal its pressure, as long as there's some liquid and some vapor in the system. The newer R-134 is similar, so a pressure switch can be used to cycle the compressor on and off.
For my last comment of value, don't get excited if you see a little bubbling at the charging port when you disconnect the hose. That is common. The valve in that port is only intended to hold the refrigerant in while you screw on the plastic cap. The sealing is done with the rubber O-ring in that cap.
Here's links to some articles that might cover something I missed:
https://www.2carpros.com/articles/re-charge-an-air-conditioner-system
https://www.2carpros.com/articles/air-conditioner-how-to-add-freon
Let me know how this turns out.
Sunday, May 28th, 2023 AT 5:32 PM


