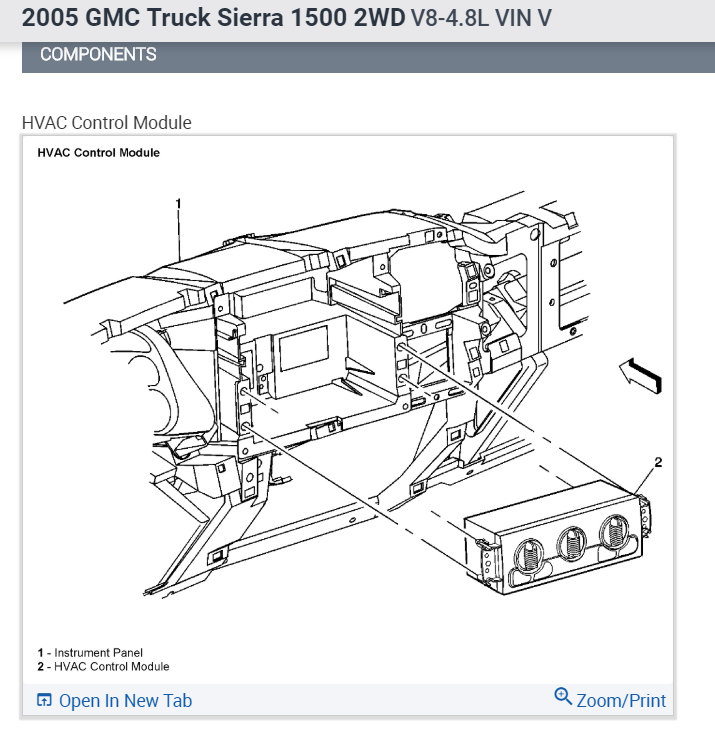
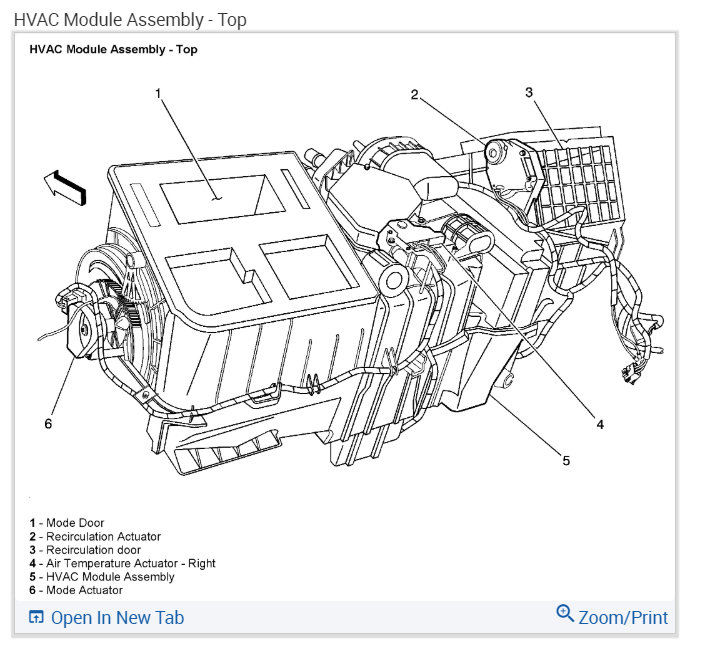
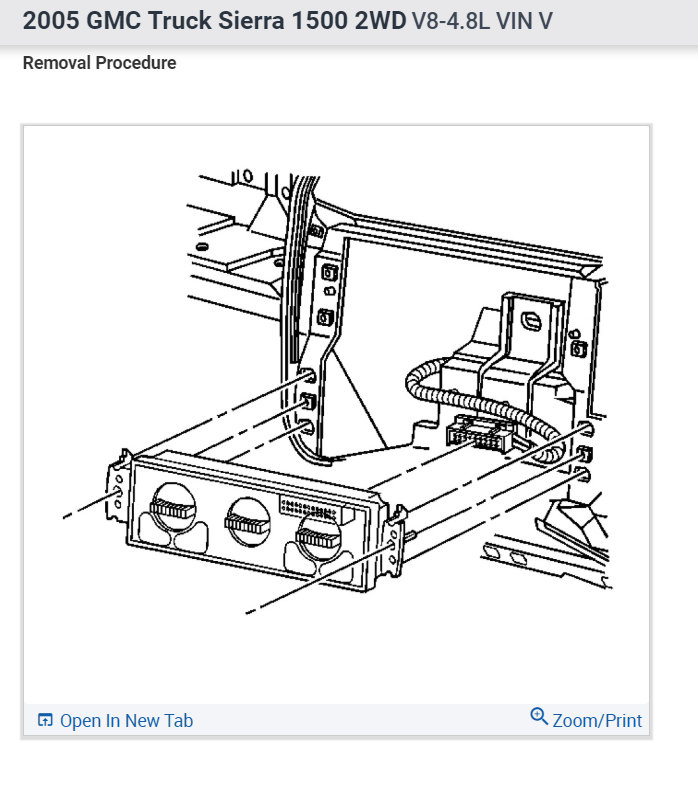
Yep it does sounds like the controller is loosing its calibration but lets reset the system to see if it holds one last time before replacing the control module. If it doesn't hold here are the replacement instructions and diagrams to help.
Remove the HVAC fuse and turn the key on for 1 minute then turn the key off and replace the fuse, then turn the key back one and let site for 1 minute. It should reset.
HVAC CONTROL MODULE PROGRAMMING AND SETUP
Each of the following service procedures may require programming or setup procedures to be performed on the HVAC control module or HVAC actuators.
HVAC Control Module Replacement
If the HVAC control module is replaced, an automatic re-calibration of all the actuators will occur. No additional procedures are necessary.
HVAC Control Module Reprogramming
Do not reprogram the HVAC control module, unless directed by a service procedure, or a service bulletin.
Reprogram HVAC Control Module-Refer to Service Programming System (SPS).
Actuator Replacement
If an actuator is replaced, the following procedure must be performed:
- Re-Calibrating Actuators-Refer to Re-Calibrating Actuators in HVAC Systems - Manual.
- Re-Calibrating Actuators-Refer to Re-Calibrating Actuators in HVAC Systems - Automatic.
1. Connect the electrical connectors to the HVAC control module.
2. Install the HVAC control module into the instrument panel, ensuring that the HVAC control module retaining tabs lock into place.
Notice: Use the correct fastener in the correct location. Replacement fasteners must be the correct part number for that application. Fasteners requiring replacement or fasteners requiring the use of thread locking compound or sealant are identified in the service procedure. Do not use paints, lubricants, or corrosion inhibitors on fasteners or fastener joint surfaces unless specified. These coatings affect fastener torque and joint clamping force and may damage the fastener. Use the correct tightening sequence and specifications when installing fasteners in order to avoid damage to parts and systems.
3. Install the screws from the HVAC control module.
Tighten
Tighten the screws to 1.9 Nm (17 lb in).
4. Install the instrument panel accessory trim plate. Refer to Instrument Panel Cluster Trim Plate Bezel Replacement See: Dashboard / Instrument Panel > Removal and Replacement.
Important: Do not adjust any controls on the HVAC control module while the HVAC control module is calibrating. If interrupted improper HVAC performance will result.
5. Start the vehicle and let run for one minute.
6. Refer to Control Module References for programming and setup information See: Vehicle > Programming and Relearning.
Check out the diagrams (Below). Please let us know what you find. We are interested to see what it is.
Images (Click to make bigger)
SPONSORED LINKS
Thursday, June 27th, 2019 AT 11:21 AM
