If everything is working, it sound like the blend air door is not opening. The blend air door is what is responsible for allowing heat or AC to enter the cab of the vehicle.
Here is a link that shows in general how one is replaced. Take a look through it.
https://www.2carpros.com/articles/replace-blend-door-motor
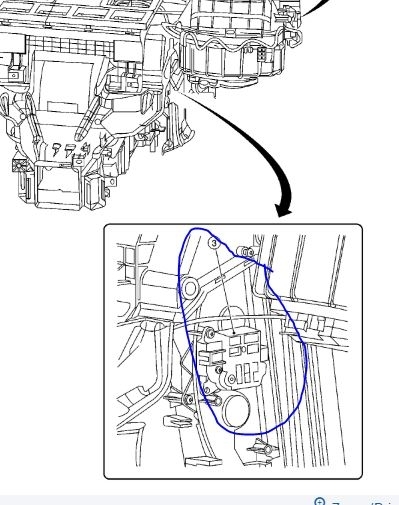
I attached a picture of the one for your vehicle. I circled the component I am referring to. It is number 3 in the picture.
Here are the directions for replacement of the component:
DOOR MOTOR
AIR MIX DOOR MOTOR : Removal and Installation
REMOVAL
1.Remove the glove box assembly. Refer to "Removal and Installation" See: Glove Compartment > Removal and Replacement > Removal and Installation.
2.Remove the upper floor connecting duct (RH). Refer to "Exploded View" See: Housing Assembly HVAC > Removal and Replacement > Exploded View.
3.Disconnect the harness connector from the air mix door motor.
4.Remove the air mix door motor screws and the air mix door motor.
INSTALLATION
Installation is in the reverse order of removal.
_______________________________________
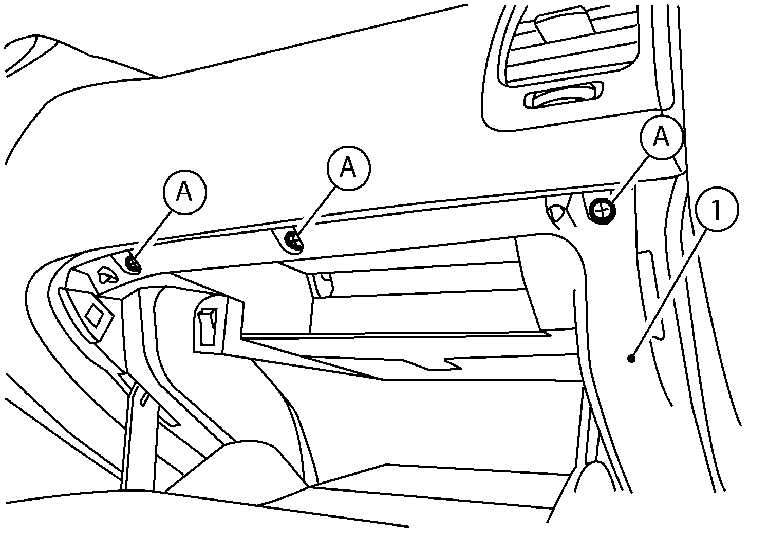
You will need to remove the glove box to access it. Here are the directions for removing the glove box. Pics 2 and 3 correlate with these directions.
GLOVE BOX ASSEMBLY
Removal and Installation
REMOVAL
1.Remove the instrument side finisher RH using a suitable tool.
2.Remove the glove box assembly (1) upper screws (A).
3.Remove the glove box assembly lower screws (A).
4.Disconnect the harness connectors from the trunk switch and glove box lamp, then remove the glove box assembly.
INSTALLATION
Installation is in the reverse order of removal.
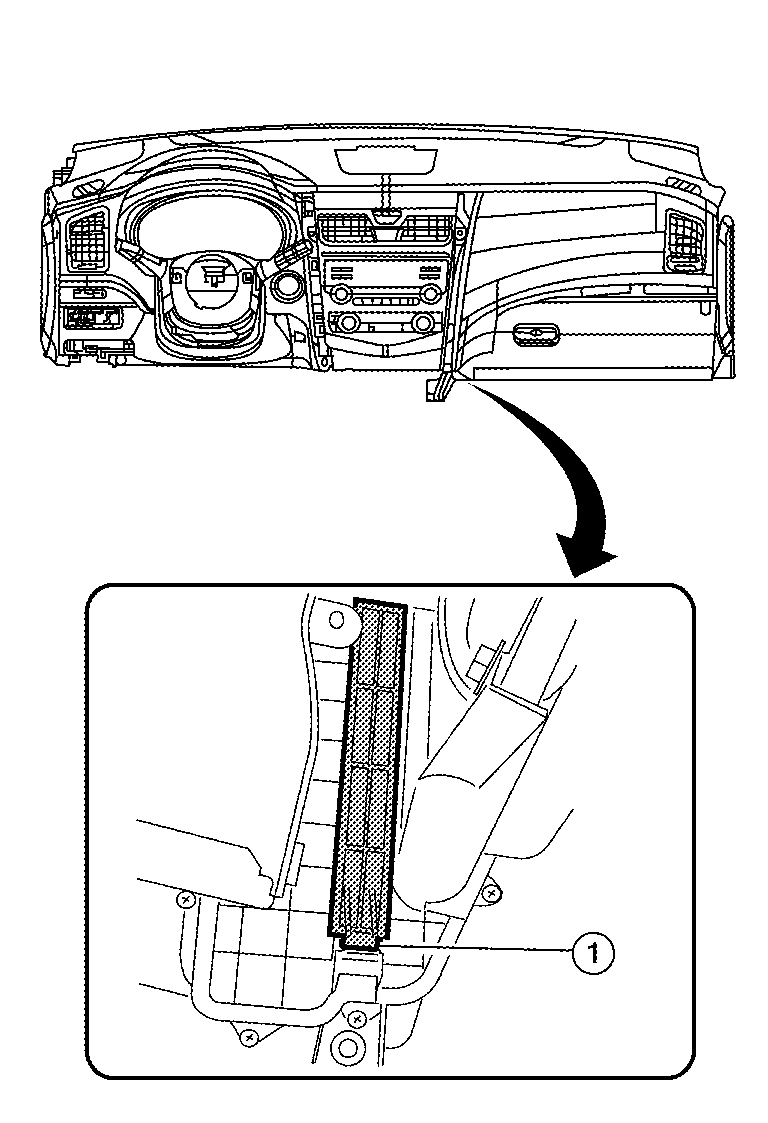
One last thought, since you will have the glove box out, it would be a good time to replace the cabin air filter. Most people don't even know they exist or never replace them.
Here are the directions,
REMOVAL
1.Disengage the filter cover tab (1) to remove the filter cover.
CAUTION:
Use care when lifting up on the tab to avoid damaging it.
2.Remove the in-cabin microfilter from the blower unit.
INSTALLATION
Installation is in the reverse order of removal.
CAUTION:
- When installing, handle the filter with extreme care to avoid deforming or damaging the filter.
- If the filter is deformed/damaged when removing, replace it with a new one. A deformed or damaged filter may affect the dust collecting performance.
Check out the diagrams (Below). Please let us know what happens.
Images (Click to enlarge)
May 17, 2019 at 8:32 PM