That sounds like fun, but you will need the clutch pedal sub frame under the dash, and you will need to modify the wiring and you will probably have a check engine light on to let you know. Here is the information you need to get the correct transmission:
Chevrolet Cavalier (1990-1994):
Some models came with the 2.8L and 3.1L V6 engines paired with a Getrag 282 5-speed manual transmission, which should be compatible with your 3100 engine.
Chevrolet Beretta/Corsica (1987-1996):
Certain models, particularly those with the 3.1L V6, were available with a 5-speed manual transmission (Getrag 282).
Pontiac Grand Prix (1988-1991):
Models equipped with the 3.1L V6 could be found with a Getrag 282 5-speed manual transmission.
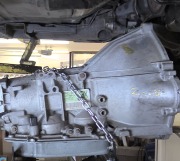
Here are the instructions on how to remove the transmission:
REPLACE
1. Disconnect battery ground cable, then remove air cleaner and duct assembly.
2. Disconnect the following electrical connectors: TCC switch, A/C low pressure switch and Park/Neutral Position switch.
3. Disconnect TV cable from throttle body and transaxle, then shift control cable from transaxle mounting bracket and lever.
4. Disconnect vacuum modulator line from modulator, then remove three upper transaxle bolts from engine and ground wires.
5. Remove steering shaft pinch bolt, then install engine support fixture.
6. Raise and support vehicle, then remove front wheel assemblies and splash shields.
7. Remove pinch bolts from control arms, then stabilizer shaft bolts and reinforcement plates from frame.
8. Remove stabilizer shaft nuts and bracket from control arm, then separate shaft from arm. Using a 7/16 inch drill bit, drill two spot welds located between front and rear holes of left front stabilizer shaft mounting.
9. Remove front and rear transaxle nuts, then power steering cooler line bolts.
10. Remove right frame to left frame retaining bolt, then position jack stand under frame for support.
11. Loosen two right frame mounts and discard bolts, then two left frame bolts and left frame assembly.
12. Remove transaxle mount retaining bolts from transaxle case, then mount.
13. Remove transaxle converter covers and torque converter bolts.
14. Remove drive axles from transaxle as outlined under Front Wheel Drive Axles. See: Axle Shaft Assembly > Procedures
15. Remove transaxle support bracket bolts from transaxle, then disconnect vehicle speed sensor electrical connector from transaxle.
16. Disconnect transaxle cooler lines, then install transaxle jack.
17. Remove rear transaxle bolts from engine, remaining transaxle bolts, then transaxle.
18. Reverse procedure to install.
. Let us know if you need anything else.
Wednesday, August 7th, 2024 AT 1:42 PM


