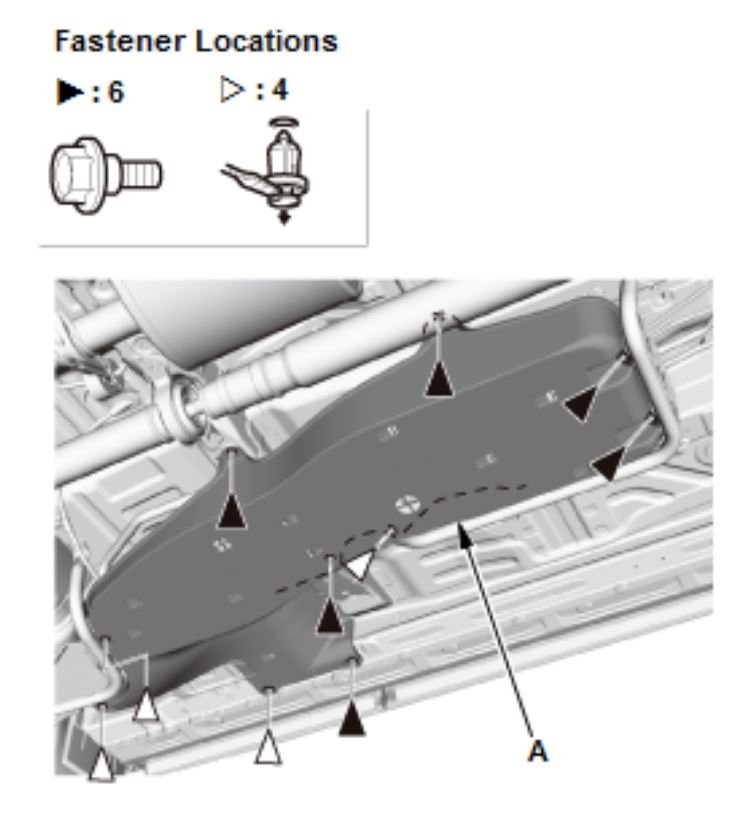
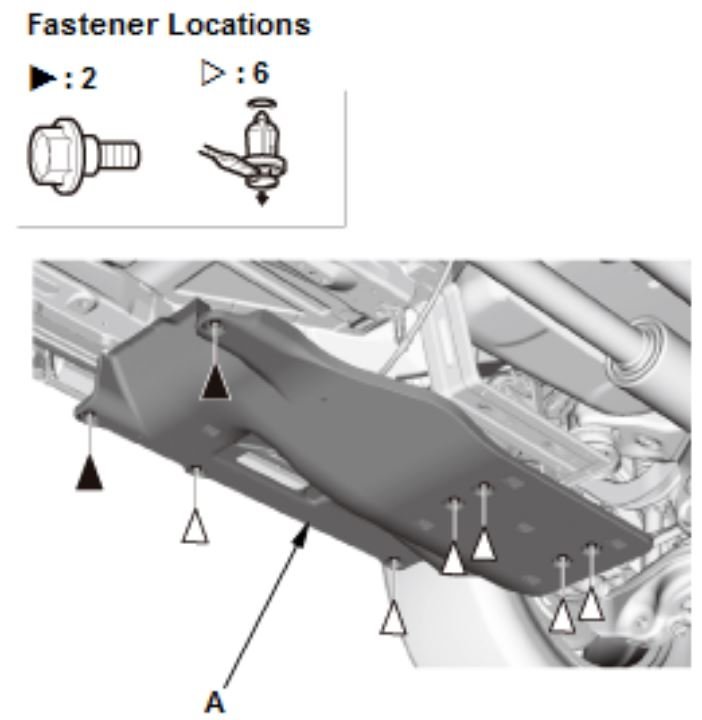
The vent valve is located in the end of the canister under the vehicle. To access it you will need to remove the covers under the body of the truck. They use bolts and push pins to hold them in place. Remove both and clean all the dirt and crud that collects on and under them. With the cover off you will see the vapor canister and the valve mounted to the frame.
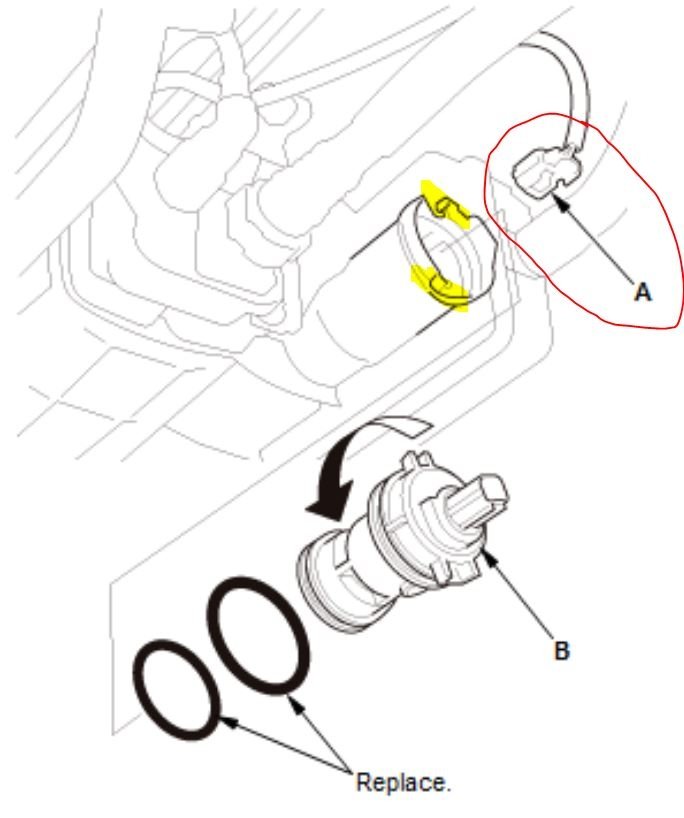
The valve twist locks into the end of the canister. Clean around it and then remove the electrical connector, Now test the circuit before you try to remove the valve. If the connector were corroded or the circuit faulty this is the time to find out instead of replacing the valve only to find it isn't the problem. Testing is simple if you have a scan tool as it can turn the valve on and off and you can use a simple test light to see if it works. As you likely don't have a scan tool that can control it we will test the valve instead. To do that you will need either a couple jumper leads connected to the battery or a 12 volt power source. With the electrical connector off just apply 12 volts the the two terminals on the valve. If it is working you should hear it click, as the code indicates it is stuck closed it shouldn't do anything if the code is correct. However it can be that the valve is working but the vent line is actually plugged, that would give the same result. To check it you will need to remove the valve by twisting it clockwise to remove it. Now you can see the port that goes to the vent line, if you use some compressed air you can blow through the vent to be sure it is open.
To replace the valve you simply apply a bit of silicone to the o-rings on it and push it into place and twist it back into the lock tabs, reconnect the plug and reinstall the covers.
Images (Click to make bigger)
SPONSORED LINKS
Sunday, June 27th, 2021 AT 5:37 AM


