Raise¬ and¬ support¬ vehicle.¬ Allow¬ suspension¬ to¬ hang¬ free.¬ Remove¬ wheel.¬ Disconnect¬ stabilizer¬ bar¬ from¬ lower¬ control¬ arm.¬ Separate¬ ball¬ joint¬ from¬ lower¬ control¬ arm.¬ See BALL¬ JOINT¬.¬ Remove¬ lower¬ control¬ arm
bolts.¬ Remove¬ lower¬ control¬ arm.
Installation
NOTE: Tighten¬ lower¬ control¬ arm¬ bolts¬ with¬ vehicle¬ weight¬ on¬ lower¬ control¬ arms.
To¬ install, ¬ reverse¬ removal¬ procedure.¬ Tighten¬ nuts¬ and¬ bolts¬ to¬ specification.¬ See TORQUE¬ SPECIFICATIONS¬ table.¬ Check¬ wheel¬ alignment.¬ See SPECIFICATIONS¬ &¬ PROCEDURES ¬ CARS ¬ EXCEPT
SATURN¬ article¬ in¬ WHEEL¬ ALIGNMENT.
LOWER¬ CONTROL¬ ARM¬ BUSHINGS
Removal¬ &¬ Installation
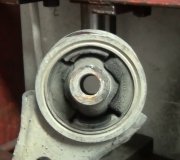
1. Remove¬ lower¬ control¬ arm.¬ See LOWER¬ CONTROL¬ ARM¬.¬ On¬ vehicles¬ with¬ bushing¬ mounted¬ on¬ frame, ¬ remove¬ and¬ install¬ bushing¬ as¬ illustrated, ¬ ensuring¬ bushing¬ is¬ fully¬ seated.¬ See Fig.¬ 3¬.
2. On¬ vehicles¬ with¬ bushing¬ mounted¬ on¬ lower¬ control¬ arm, ¬ use¬ a¬ hammer¬ and¬ punch¬ to¬ tap¬ down¬ flare¬ on¬ lip¬ of¬ bushing.¬ Remove¬ bushing.¬ Install¬ new¬ bushing.¬ To¬ retain¬ new¬ bushing, ¬ tighten¬ nut¬ on¬ flare¬ tool¬ to¬ obtain
a¬ 45 degree¬ flare¬ on¬ bushing¬ See Fig.¬ 4¬.¬ Ensure¬ bushing¬ is¬ secure¬ in¬ lower¬ control¬ arm.
Fig.¬ 3:¬ Replacing¬ Lower¬ Control¬ Arm¬ Bushings¬ (Frame Mounted¬ Bushings)
Courtesy¬ of¬ GENERAL¬ MOTORS¬ CORP.
Fig.¬ 4:¬ Flaring¬ Lower¬ Control¬ Arm¬ Bushing
Courtesy¬ of¬ GENERAL¬ MOTORS¬ CORP.
If you have an air chisel you can push the bushing out with that instead of a tool. However you do need the tool to flare teh bushing so it doesn't come out.
Friday, March 23rd, 2012 AT 12:14 AM


